By default, the login link to any WordPress site is public and known to everyone, and it is in the form: (www.DomainName.com/wpadmin). But why might the login page link be a concern for you? Why should you think about changing the WordPress login link and adding the Captcha tool to it?
In fact, keeping the login link as it is could pose a potential risk to the security of your site. It is not a good idea to easily predict the login page and also increase attempts to hack that page, which is considered a gateway to all of your site’s settings. Therefore, we will explain to you about securing this page by changing that. Default links and adding the automatic verification feature ( reCAPTCHA ).
Why change the login page link?
If you want to increase the degree of security and protection of your WordPress site, one of the most important ways to achieve this is to modify the login page link and make it available only to members or administrators of the site. Customizing the page link to be available only to specific people will protect your site from any hacking attempt or unauthorized access, which may affect the speed and performance of your site, or even the security of the site and expose user data to risk.
One of the most famous attacks that WordPress sites are exposed to is the brute force attack, which includes a series of attempts to predict login accounts through that home page with the aim of hacking the site and stealing its data or even blocking the site and users’ data. Therefore, changing this default link foils all of these attempts. .
We can clarify that the mechanism that most hackers follow when trying to hack your site is through the general login link, through the following steps:
- Access the primary website link: www.Example.com
- Determine whether the site was designed and developed using WordPress or another platform, through one of the tools or by checking some known files that are inside WordPress, such as /wp-content, /wp-includes, and others.
- Ensuring that the site is built on the WordPress platform, it is easy to expect the default Dashboard login page if it has not been changed, which is /wp-admin.
- After reaching the login page, hackers begin to guess the username and password. This is very easy if the login data is the default data and the username is Admin. Of course, if you are at the slightest knowledge of how to design a website on WordPress, you will not keep that password as she.
- After guessing the username and password and successfully entering the site’s control panel, they can damage a lot of the site’s files and user data.
After this quick review of the most prominent dangers that your site may be exposed to through the general login link, and the importance of changing that link in securing your site, as well as the same thing in adding the reCAPTCHA human verification system to the login page, and this is what we will explain in the following lines.
Change the login link to WordPress control panel /wp-admin
Let us now review one of the ways to change the link of the login page to the WordPress control panel using one of the easy-to-use plugins, which is the WPS Hide Login plugin , which helps you change the link from within the control panel.
First, we will install the add-on through the WordPress control panel, then go to: Plugins << Add New , write the name of the add-on in the search box, then install and activate the add-on using the known steps for installing a new add-on .

Then, after installing the plugin on your site, you can enter the settings page for the plugin integrated into the WordPress control panel, under the (Settings) tab , to find the (WPS Hide Login) tab to see the plugin’s control panel as follows:
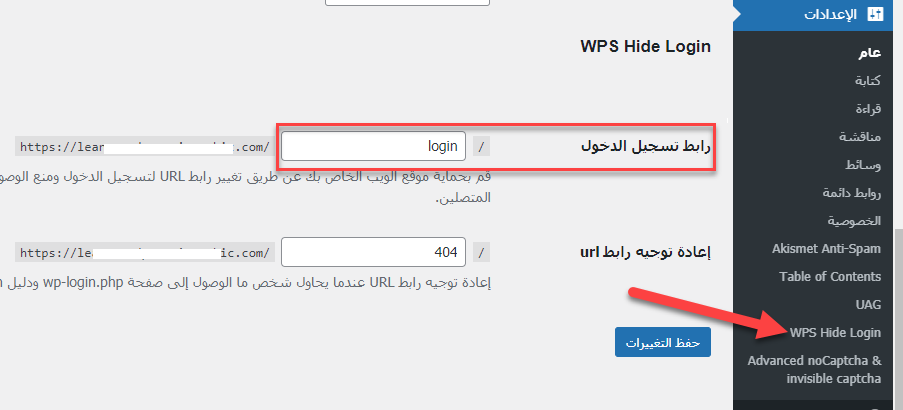
As shown in the image, you will find an option (login link) , which you can modify to be the login link designated for your site. If you type LOGIN the login link will be: www.DomainName.com/login.
After modifying this option and confirming the modification, you will not be able to log in to the WordPress website via the usual link: site.com/wp-admin. Rather, a 404 error page will appear and you will be able to log in via the new link that you specified in this step.
Change the login link through wp-login.php
In the previous method, we changed the login link to the WordPress control panel using one of the plugins so that you will not have to modify your site’s code in order to do this task, but in the next step you can perform the same task manually without using any plugins.
It is worth noting that the steps for manually modifying the login link are performed automatically by the add-ons, so in practice what we will do now is to perform the same previous steps but manually, because some people prefer to avoid installing more add-ons on their sites so as not to affect the site’s performance.
Note : We advise you to take a backup copy of your site before performing the next step, in order to avoid any damage caused by making the modification incorrectly.
Now we will move to the control panel for hosting your site ( Cpanel ), then enter the “File Manager” tab , with the aim of reviewing all the files for the site, including the software file responsible for the process of logging into WordPress.

After entering the file manager, you will find the wp-login.php file , which is located under the public_html path inside the file manager:
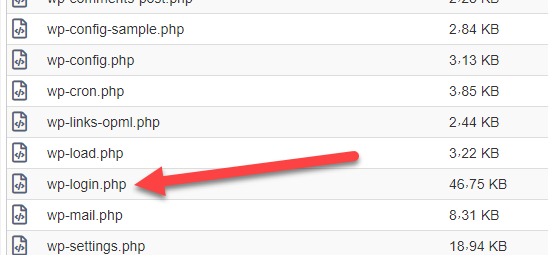
After you reach the wp-login.php file, you can right-click on the file, then click on the ( Edit ) option to open the file editing page, in which all the code for the WordPress login process will appear, including the specific link with which you can register. Enter through it.
The page content will appear in front of you, as in the following image:
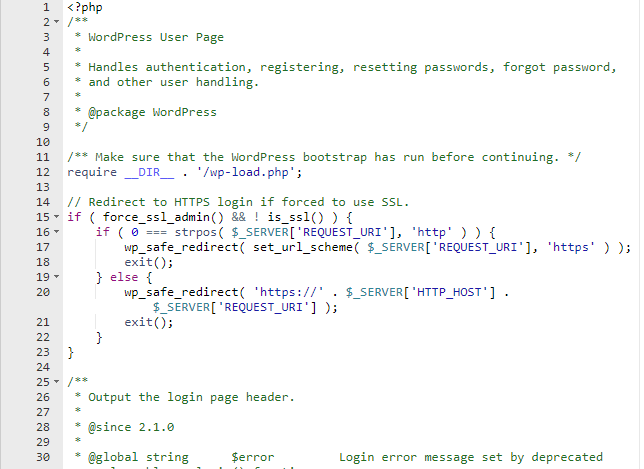
Copy the entire code of the wp-login.php file, making sure to highlight and select all the file content and copy it, then paste it into a new file.
We will create this new file from within the file manager control panel. You will create a new file and name it whatever name you want (noting that this name will be the new login address to the WordPress control panel on your site). For example, you would give this file the name private.php:
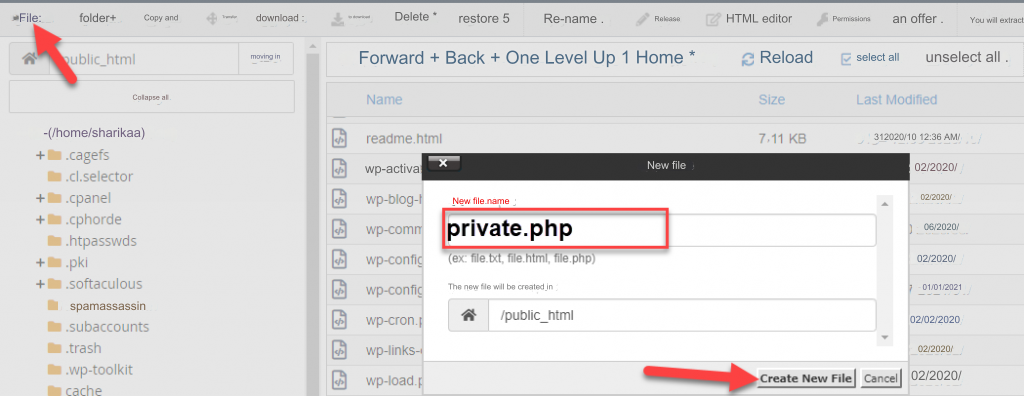
After creating the file, open it, then put the code that you previously copied from the wp-login.php file as it is.
Then, inside the new private.php file, search for the phrase (wp-login.php), and replace it in all its places with the phrase private.php. So that it is replaced in all places, and you can search for the word in the file by pressing the CTRL+F button and then typing the phrase.
Then, after you replaced the phrase wp-login.php with the phrase private.php within the private.php file itself, the program file responsible for the process of logging into your WordPress control panel became private.php.
In the final step, now delete the wp-login.php file from within your site’s file manager. Thus, the login link to your WordPress site’s control panel will become the new page name private.php. For example, you will find that the new login link has become: www.example.com/private.php
Note that old login links will be automatically deleted, such as the /wp-admin link; Therefore, the only way to log in will be via the new link /private.php.
Thus, you have changed the WordPress login link yourself, in steps that are not very complicated, and without the need to install any external plugins to do so.
Activate human verification system for reCAPTCHA logins
After we learned how to change the login link to WordPress, now we will learn how to increase the security level of the logins that occur on your site, by adding the famous verification system known as “Captcha” to the login page.
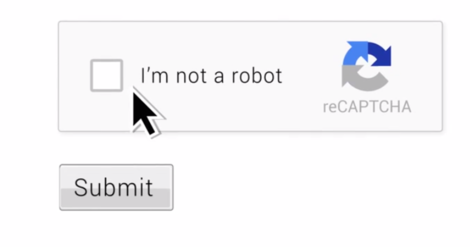
First, we will install and activate the Advanced captcha add-on , as this add-on helps WordPress website owners activate the system for verifying login processes through the famous “reCaptcha” verification system, which is a system that verifies that the login process is indeed a reliable human login process and not from programs. Attacks that are used to send a large number of login attempts to the site with the aim of hacking it.
Then, after installing and activating the add-on, you can access its settings from within the WordPress control panel. Under the (Settings) tab , you will find the settings for the Advanced Captcha add-on , as in the picture:
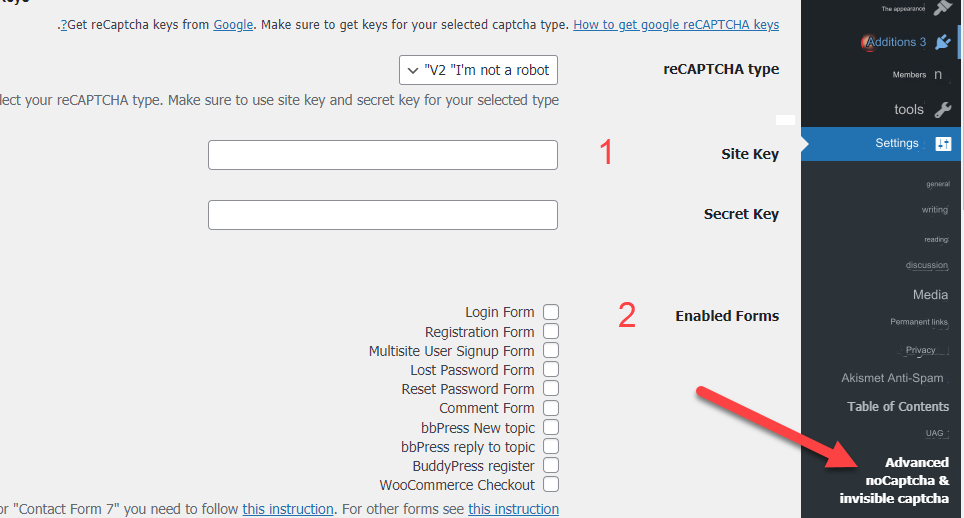
As you can see on the settings page there are two basic options:
- Captcha activation code: Site key and Secret Key. We will explain below how to obtain these codes.
- The second option allows you to choose the pages on which you want to activate the Captcha verification system. You can choose to activate the system on the Login page, as well as register new memberships, for example.
We will now obtain the activation codes required by the add-on, which you can obtain easily and for free through the service provided by Google by going to the Google Captcha platform , so that the service page appears for you and you choose v3 Admin Console.
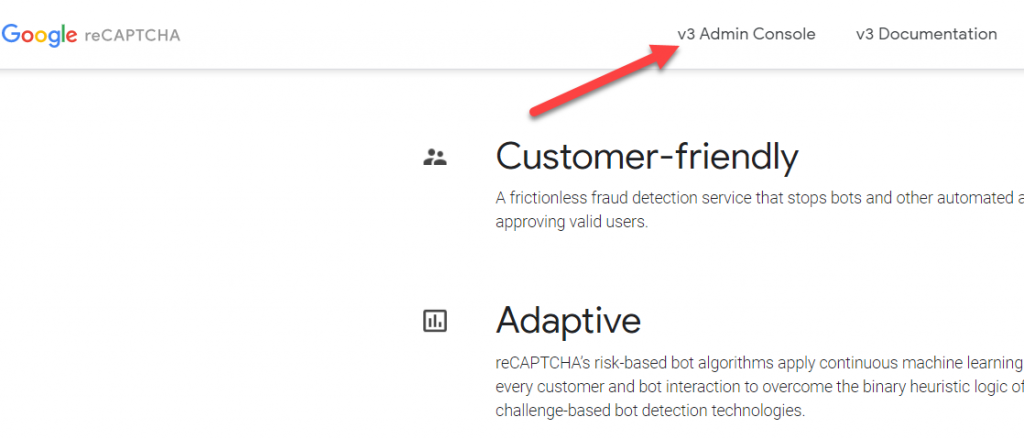
To obtain the code, you must click on the link to enter the page for setting the captcha code for your site, which appears to you as in the following image:
You will see some fields that you must fill out in order to get the code to activate the Captcha verification system on your site. Here is an explanation of those required fields:

- Lable , in which you can write the name of your site
- Recaptcha type, in which you can specify the version of Captcha that you want to activate, but we advise you to choose reCAPTCHA v3
- Domain , in which you write the domain for your website directly without www or http, for example the domain: example.com
- Owner , in which you can add other people to manage your site’s Captcha account and allow them to view its activation codes and modify them as well, if you work with a team.
After completing all the required information, you will accept the terms and conditions of the service, and then a page will appear containing the Keys codes to activate the captcha on your site:

All you have to do now is copy these codes and paste them in the designated place within the add-on’s settings page, as in the following image:

After successfully pasting the activation code, you can now try the login page or any of the pages on which you have enabled the Captcha verification system. The following image shows the Captcha verification box appearing on the login page below the fields designated for login data.
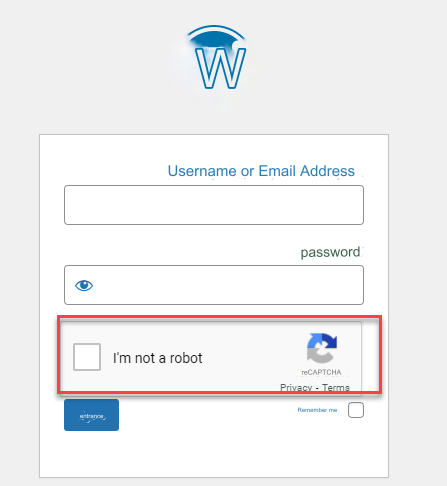
Thus, we have learned how to secure the site login arm by changing the default extension /wp-admin, as well as adding the human verification feature in a way that helps improve the security and integrity of your site and users’ data and thwart many random hacking attempts


Leave a Reply