Adjusting email settings is one of the important things in WooCommerce, because it has an effective role in improving the user experience. Through it, you will be able to modify the characteristics of the messages that WooCommerce sends from your store, such as messages informing the customer of the order status and others.
For this reason, we have prepared this article in which we will introduce you to the email settings in WooCommerce and the function of each setting so that you can adjust them to suit the needs of your store.
Explaining email settings in WooCommerce
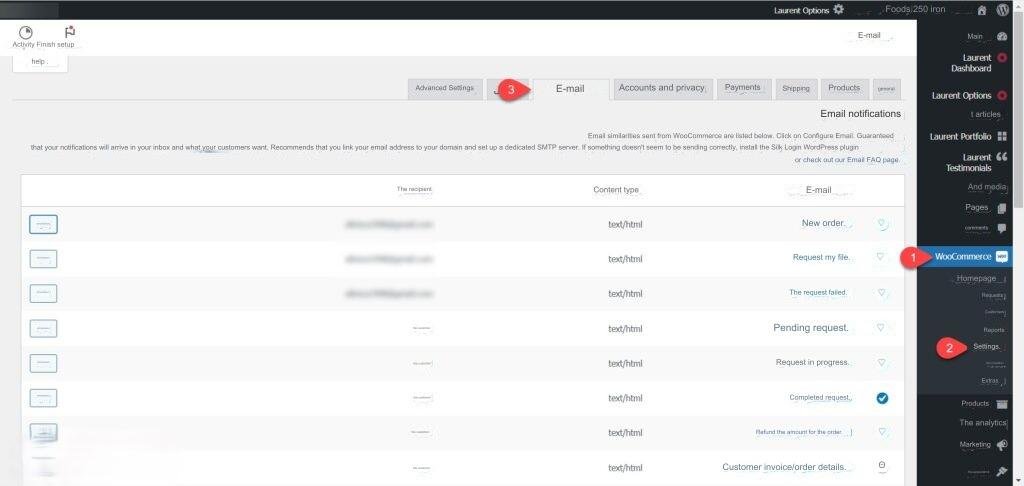
You can access your email settings in WooCommerce by going to ( WooCommerce ) >> ( Settings ) and then clicking on the ( Email ) tab.

Through these settings, you will be able to modify the e-mail messages that WooCommerce automatically sends to users or to the store owner. It will also enable you to customize the form of the messages to suit your store. Below we will explain these settings to you in detail:
Email notifications

Within this section there is a group of e-mail messages that WooCommerce sends to the store owner or customers when a transaction is performed in the store. Among these messages are messages that inform the store owner of the existence of a new order, a canceled order, or a failed order, and messages that inform the customer that his order is waiting or pending. Implementation and others.
You can modify the properties of any of these messages by clicking on the ( Manage ) button located on the left within the message tab, to show you a set of settings that enable you to modify some of the message properties, which are:

- Enable/Disable: This option enables you to activate or disable notifications for the specific message.
- Recipient: This field specifies who receives the email message, and you can add more than one recipient by separating the emails with a comma.
- Message title: Through this field, you can specify the general subject of the message (message title), and you can also use the expressive tags provided by WooCommerce.
- Message Header: Through this field, you can specify the phrase that appears at the top of the email message.
- Additional content: Through this field, you can write an additional phrase to be added to the specified email message.
- Email type: Select through the drop-down menu in this setting the format or type of email sent, there are three options (HTML, plain text, multi-part).
- HTML template: Through this setting, you can display the template (code) for the specific message, and you can modify it by clicking on the ( Copy file to template ) button. The template varies depending on the type of email selected, and we do not advise you to modify it unless you have programming experience. Good, to avoid problems.
Email sender options
This part of the settings contains two fields that enable you to specify the sender’s name and the email address from which messages are sent. The two fields are:

1. Sender Name: In this field, specify the name of the sender that appears in emails sent by WooCommerce (you can write the name of the store, for example).
2. From address: Put in this field the email address that users see and from which WooCommerce messages are sent.
Email template
Through this part of the settings, you will be able to modify and customize the form of emails, and the settings in it are:

- Header Image: This field enables you to add a link to an image in your store’s media library to be added to emails, and it is added directly above the header.
- Footer text: This field allows you to add text to appear in the footer of e-mail messages. You can use the emoticons provided by WooCommerce (such as the name of the site or the site link) to be written automatically. You can identify the emoticons by placing the mouse cursor on the existing question mark. Next to the field ( ? )
- Primary Color: This setting allows you to specify the color that appears in the header background of your email messages.
- Background Color: You can specify the main background color for messages that WooCommerce sends from your store.
- Main box background color: Using this setting, you can specify the background color of the text of your store messages.
- Text Color: This option determines the text color of messages WooCommerce sends from your store.
- Enable Email Insights: You can enable this option in order to get educational messages from WooCommerce.
Modifying these settings and customizing them to suit the store’s color and logo is sufficient, but if you want advanced customization of your store’s messages, you can use one of the WordPress plugins dedicated to that, such as the Email Template Customizer for WooCommerce add-on .
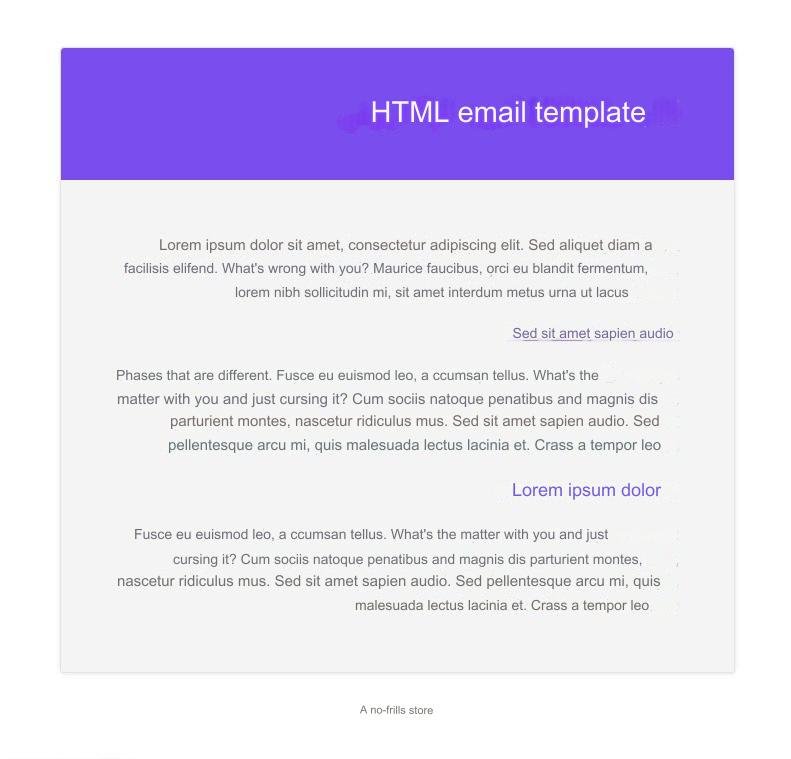
You can also preview the current form of the store’s messages by clicking on the phrase ( Click here to preview your email template ) located at the top of this section, and the default form of WooCommerce messages will be as shown in this image.

Thus, dear reader, we have introduced you to the email settings in WooCommerce and the function of each setting. In conclusion, we would like to point out that adjusting these settings correctly and to suit your store will help improve the user experience and the efficiency of managing orders in it, which will reflect positively on the store’s revenues and profits.


Leave a Reply