Adjusting the advanced settings in WooCommerce is one of the important things that contribute to improving the user experience in your online store and adding some new features to it. Through it, you will be able to identify the main pages in your store and control the structure of its page links. You will also be able to link your store to external applications and websites by relying on a programming interface. REST applications and Webhooks, as well as activating features that are under development or testing by WooCommerce.
For this reason, we have prepared this article in which we will explain the advanced settings in WooCommerce and the function of each setting so that you can adjust them to suit the needs of your store.
You can access the advanced settings page in WooCommerce by going to ( WooCommerce ) >> ( Settings ) and then clicking on the ( Advanced Settings ) tab.
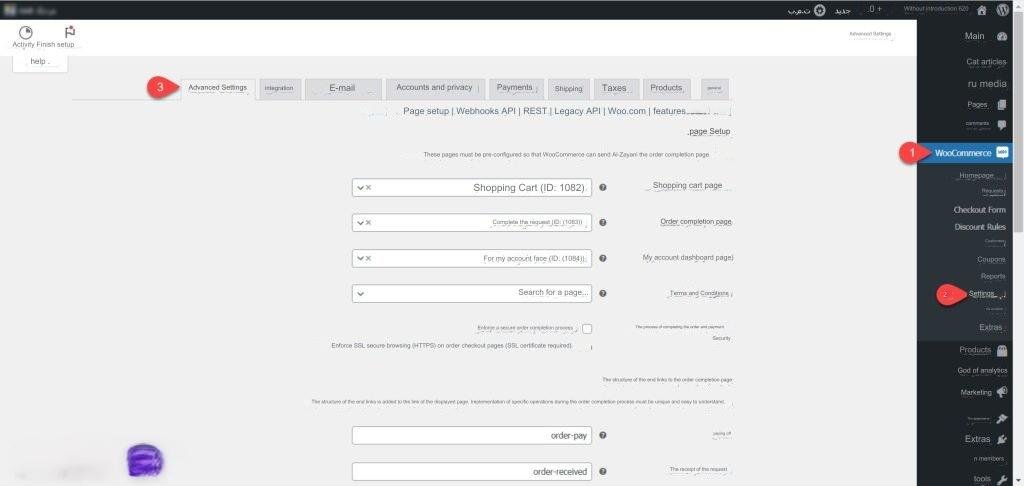
Through advanced settings, you will be able to define main pages, manage the final structures of its pages in your store, link it with other applications and websites, and activate experimental features, through a number of settings pages:
Page setup page
This page is divided into three sections of settings that enable you to define and set up some store pages and determine the structures of the end of links for the order completion pages and account pages. These sections are:
page Setup
Through this section, you can specify the main pages in your store, using a number of fields:
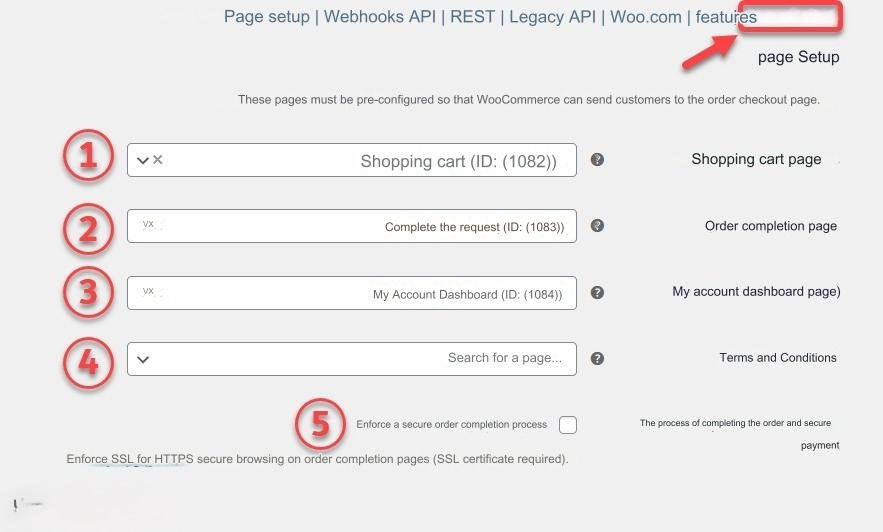
- Shopping cart page: This field enables you to specify the shopping cart page within your store, by adding the page ID within it, and the specific page must be specifically prepared for the mentioned function.
- Order fulfillment page: In this field, specify the page you want to be the order fulfillment page in your store.
- Page (My Account Dashboard): Put in this field the ID of the page you want to be the My Account Dashboard page in the store, which is the page where users go to view their orders or modify their account data.
- Terms and Conditions: Through this field, you can specify the terms and conditions page for your store, by adding the page ID within it.
- Secure order completion and payment process: When this option is activated, the user is forced to access the order completion and payment process pages using an SSL certificate to protect his data and enhance the store’s security.
End link structure section of the order completion page
The fields within this section provide you with the ability to adjust and specify the combination that appears at the end of the link to the order completion page ( nice name ). The existing fields are:

- Payment: This field enables you to specify the structure of the end of the link of the payment page branching from the order completion page.
- Order received: Using this field, you can specify the combination that appears at the end of the My Account page link within the part of the order receipt process.
- Add a payment method: In this field, put the combination that you want to appear at the end of the order checkout page link when the user adds a payment method.
- Delete Payment Method: This field determines the structure of the end link of the order checkout page that appears when the user deletes the payment method (Delete Payment Method page).
- Set Default Payment Method: This field is used to specify the order checkout page end link combination in the process of setting the default payment method.
The final link combination for the account
As in the previous section, through the fields in this section, you will be able to determine the structure of the end of the URL link for the account pages branching off from the My Account panel page, such as the orders page, the downloads page, the account modification page, and the rest of the eight pages within this section shown in the image above.

Note: WooCommerce automatically adjusts the link-end structure of pages, and you can modify it by typing in the fields as we explained previously, but you must be careful that the link-end structure of each page is unique and not repeated on other pages.
REST API page
Through the REST API page, you can generate API keys that enable you to link your WooCommerce store with external applications and websites in order to facilitate sharing data with them. For example, you can use this feature in your store to receive orders from external applications and websites and send data and order status to the customer. To be able to see it in these applications and websites.

Read also: Explanation of the WordPress REST API .
To create an API key, click on ( Create API Key ) and then fill in the following fields:
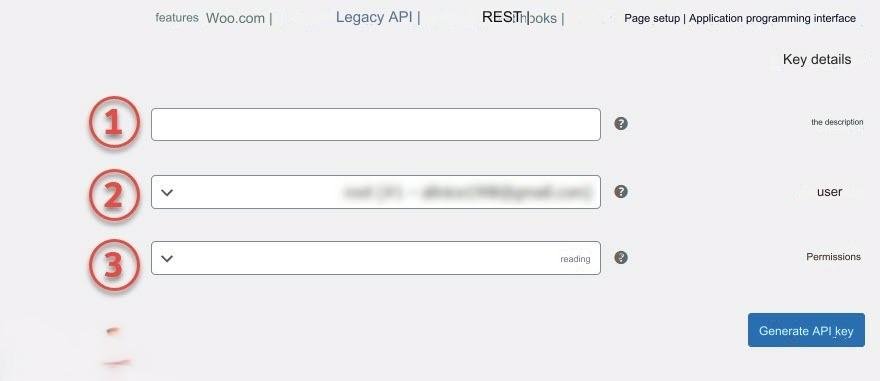
- Description: In this field, put a description or name for the key.
- User: In this field, specify the owner of the API key you are creating.
- Permissions: In this setting, specify the permissions allowed for the key, and there are three options:
- Write : This option gives the key permission to add and modify data in the database.
- Read : This option gives the key permission to extract data from the database only.
- Write/Read: This option gives the key both read and write permissions.
After you finish setting these options, click ( Generate API Key ) to create the key, and then you can copy it and use it on the sites and applications you want.
Webhooks page
WooCommerce webhooks send a notification to a URL when an event occurs in the store. For example, you can create a webhook that sends a notification to a specific application that a new product has been added in the store.
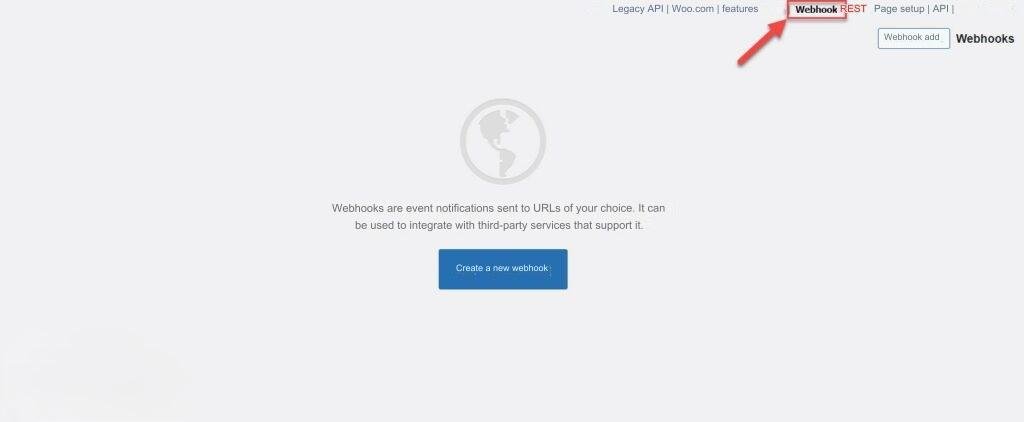
To create a webhook in WooCommerce, click ( Create a new Webhook ) on the previous page. A page will appear that includes a set of fields. Fill in the existing fields with the required data, and then click ( Save the Webhook ) to create the hook.
Old API page

On this page there is an option ( Legacy API ) that is used to enable the old REST API on the site, but in the WooCommerce 9 version it will be canceled and this option will be removed, and if you want to continue working on it, you will have to install a separate WooCommerce add-on to activate it in the settings. Your store.
WooCommerce.com page
This page contains two options:
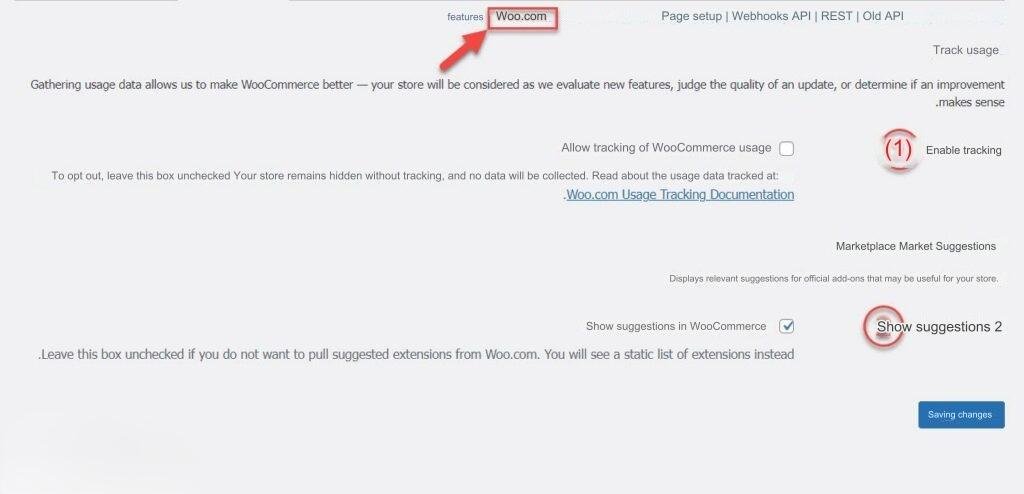
- Enable Tracking: This option is used to allow WooCommerce to collect information about your store for use in new releases and development of WooCommerce.
- Show Suggestions: Disabling this option will prevent WooCommerce from displaying extension suggestions and recommendations while you adjust other settings.
Features page
On this page there is a group of features that WooCommerce is working on creating and developing that you can activate within your store at the present time. The existing features vary depending on the version of WooCommerce that you are using, and the features in the latest version currently (8.8.2) are:
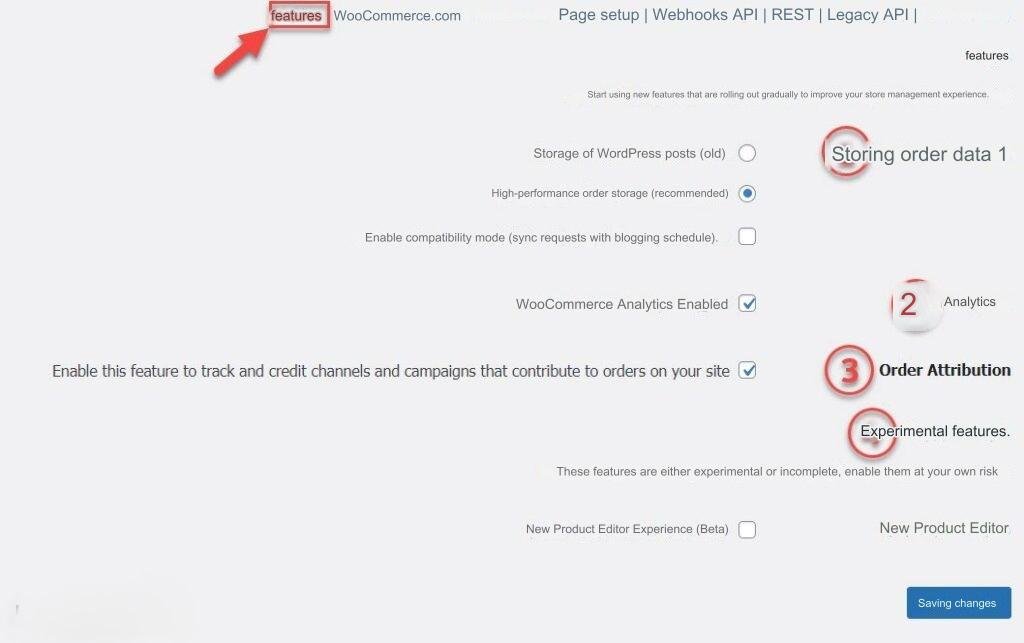
- Storing order data: Through this setting, you can specify the way in which the store’s orders are stored within the database.
- Analytics: When you activate this option, you allow the WooCommerce Analytics tool to prepare reports and analyzes about the store, such as reports of total sales, net sales, orders and inventory reports, and many other reports that you can use to develop your store.
- Order Attribution: This feature is used to track the sources of store orders. When activated, a column is added on the orders page showing the source of each order (Facebook post, TikTok video, email marketing campaigns), which provides a greater understanding of the effectiveness of each type of marketing campaign for your store. .
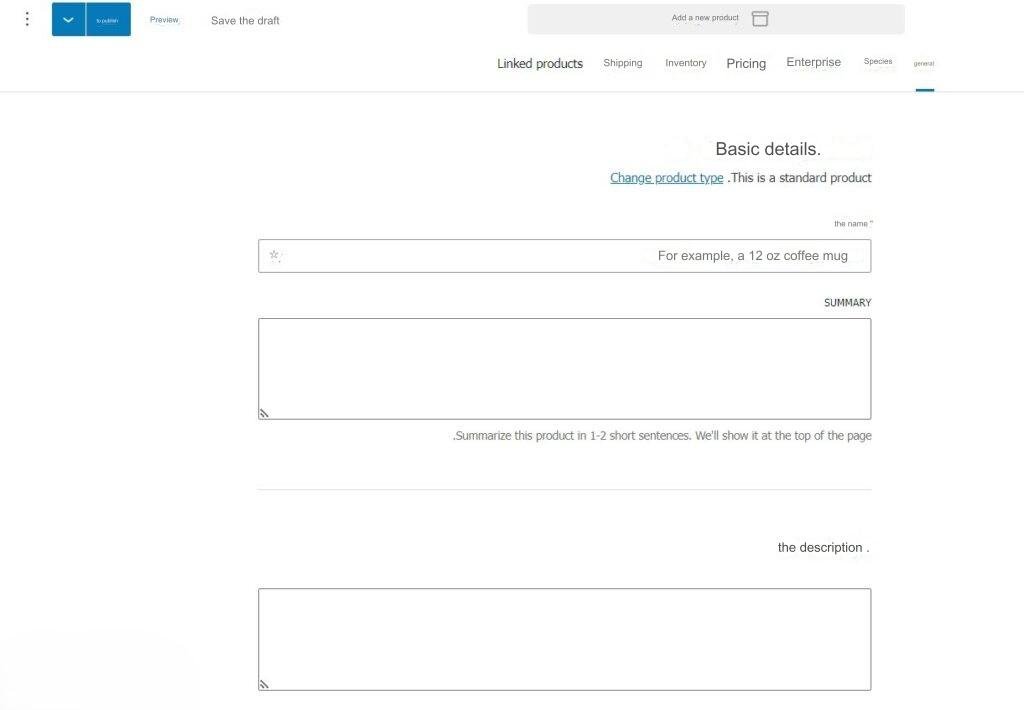
- Experimental Features: Within this section there is a group of experimental or incomplete features that you can activate at your own risk. The currently existing feature is the new product editor (Beta). When activated, the add or edit product editor is changed to another editor different from the classic editor and the newer ones. from him.
With this, dear reader, we have finished explaining the advanced settings in WooCommerce. In conclusion, we would like to point out that there are many features that you can activate in your store through these settings, so we advise you to understand them well and adjust them to suit your needs in order to improve the user experience and increase your store’s profits.


Leave a Reply