

Google announced that all free sites offered to customers during the Google Business Profile creation stages have been closed, effective March 5, 2024. Visitors to those free sites will be redirected to the business profile associated with the account until June 10, 2024. After that, Delete the entire domain, and visitors will see a “Page not found” error message.
This will definitely affect your project’s presence on the Internet and the quality of access to your potential customers who are interested in the product you offer them. This is one of the most prominent disadvantages of relying on free, proprietary systems that you do not actually own, and therefore you cannot fully control your site, which may lead to security problems or sudden closure, as happened in this case, unlike open source systems that allow you freedom of control. The databases and basic files of the site.
Therefore, if you have a site on Google business profile, you should quickly transfer your site to another reliable system to build your site, then update your site link on Google business profile, and we will explain this in detail in steps throughout the article.
What are free Google Business Profile sites?
When you create a new business profile through the Google Business Profile service to ensure that your business appears in local search results on Google, the platform gives you the ability to create a free one-page website. This site helps direct visitors from Google directly to your personalized business page, and features extensions like Business.site and negocio.site.
Small and medium enterprises relied on these free pages directly, without the need for the hassle and costs of purchasing hosting or a special domain, or installing a content management system and creating an integrated website. Some were postponing this step for the future as part of the expansion of their business activity.
With Google announcing the closure of free sites in March due to the additional costs that these sites require in terms of servers, periodic maintenance, etc., without any financial return on them. It is now necessary to prepare for this change. You must start preparing a new website that matches the size of your business, then update your profile on Google using the new website.
Steps to transfer your site from Google Business Profile
First, you need to create a backup of your previous Google Business Profile. If you have not already created a backup, it will now be difficult to recover data because Google has closed the sites, and Google does not provide a page recovery service.
We’ll need the backup to move site content, including text and media files like photos and videos, directly to the new site. If you don’t have a backup.
So, you can easily recreate a new website, redesign and layout the interface to suit your business, and include all the important details and data for the activity. In addition, the new website can be developed to become more professional and advanced.
1. Get web hosting
You need to purchase a paid web hosting service to host your new website. Choosing the appropriate type of hosting varies depending on the size and requirements of the desired site, and the available budget. One of the best reliable options is cloud hosting, as it provides speed and stability suitable for commercial use. Consumption-based payment options are also available, making it suitable for various project sizes.
Among the best cloud hosting options are Digital Ocean and Cloudways . Digital Ocean can be chosen if you have moderate technical experience and want to manage server resources yourself. As for Cloudways, it is the perfect choice if you have weak technical experience, as their technical support team manages the entire server.
The appropriate server resources will be required for your new site, and you can rely on the following server resources:
- Random access memory (RAM) of at least 1 GB.
- Storage capacity is not less than 20 GB.
- The central processing unit (CPU) is single-core.
- Bandwidth is at least 100 GB per month.
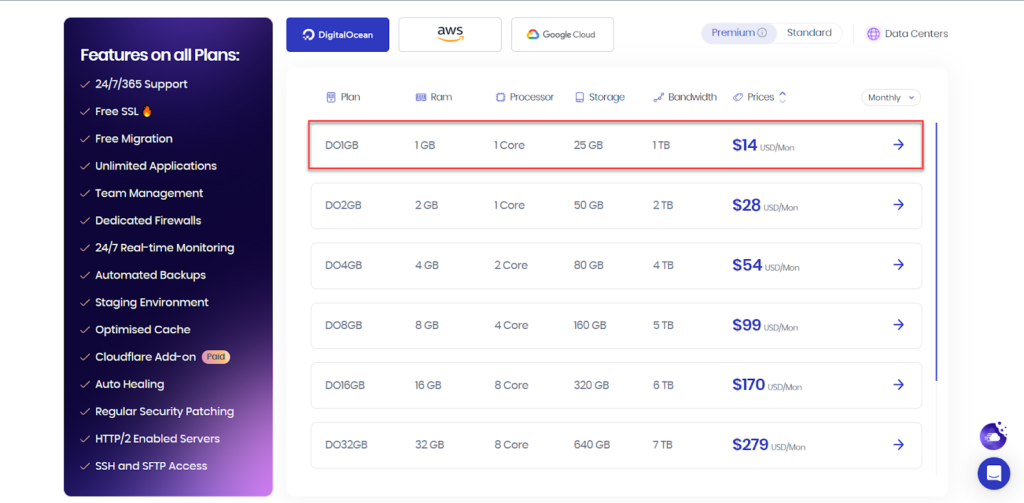
For hosting on Digital Ocean , the second plan shown in the following image will be suitable:

As for Cloudways hosting , the DO1GB plan shown in the following image will be suitable:
It is preferable if the budget allows to move to higher hosting plans to provide a better user experience for customers. You can see the article “ How to Select the Right Hosting Resources for Your Site’s Requirements ” to understand in more detail how to measure server resources based on the size of your required site.
2. Purchase a domain name

The domain name is the URL assigned to your site that a visitor uses to access the site. You should already have a domain name for your previous site with the Business.site or negocio.site extension. So, you can buy a new domain with the same name but with a more professional extension like .Com, .Net, or .Org, depending on your site’s niche.
You can rely on domain service providers such as GoDaddy or NameCheap, and the cost of purchasing a domain ranges around $10 per year on average and varies based on the domain extension.

You can review the article “ How to Reserve a Professional Domain for a Website ” to learn in detail about the steps to purchase a new domain for your website. Next, you will need to forward the domain name to the hosting server. You can rely on the technical support provided by your hosting company, or you can follow our detailed guide on “ How to connect the domain to hosting and set up the settings correctly .”
3. Install a content management system
Now, you should install a content management system on your website. WordPress is one of the best options you can rely on, as it is an open source content management system that is completely free. WordPress also provides a simple Arabic control panel suitable for beginners, which is why more than 43% of websites around the world rely on it.
Most hosting companies offer the ability to install WordPress with one click. You can use the following articles to learn how to install WordPress on your site.
4. Design and layout of the website interface
The WordPress system provides a wide range of free and paid templates that suit commercial websites in various disciplines, and this feature is considered one of the most important features of WordPress. You can rely directly on these templates to design the interface of your commercial website.
Among the suitable options for one-page business websites or Google Business Profile landing pages are the Neve template, the Hestia template , the One Page Pro template , and many others.
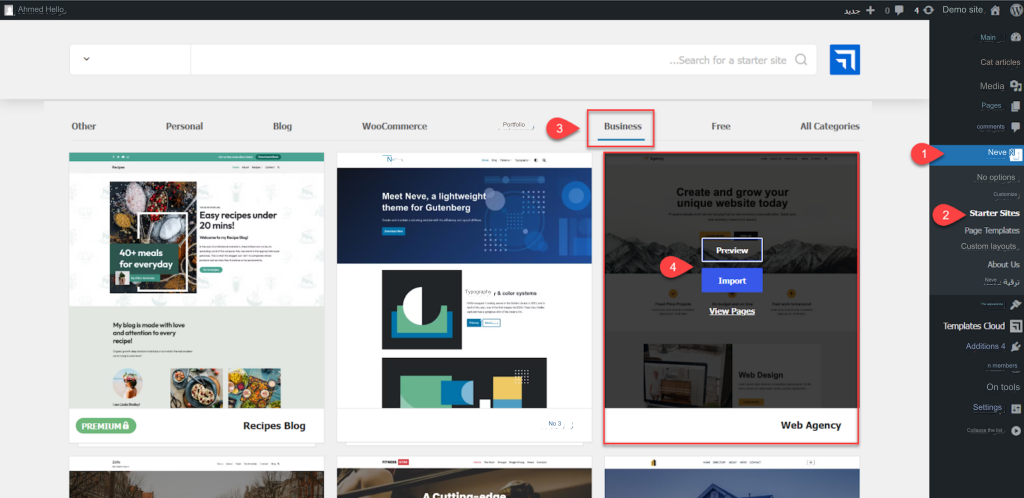
For example, you can install the Neve theme on your site by choosing Theme from the WordPress side menu, then going to the Themes section, searching for the Neve theme , installing it, and activating it on the site.

After that, you can rely on ready-made Neve template templates. You can simply choose “ Neve ” from the WordPress side menu, then go to the “ Starter Sites ” section, and then go to the “ Business ” tab to view templates suitable for business sites. After that, you can select and preview one of the appropriate templates, then install it on your site.
Once the template is installed on your site, you can access the template customization options from the Customize option from the WordPress side menu. Then you can modify the template in terms of layout, colors, fonts, widgets, etc., to suit your site’s brand identity.

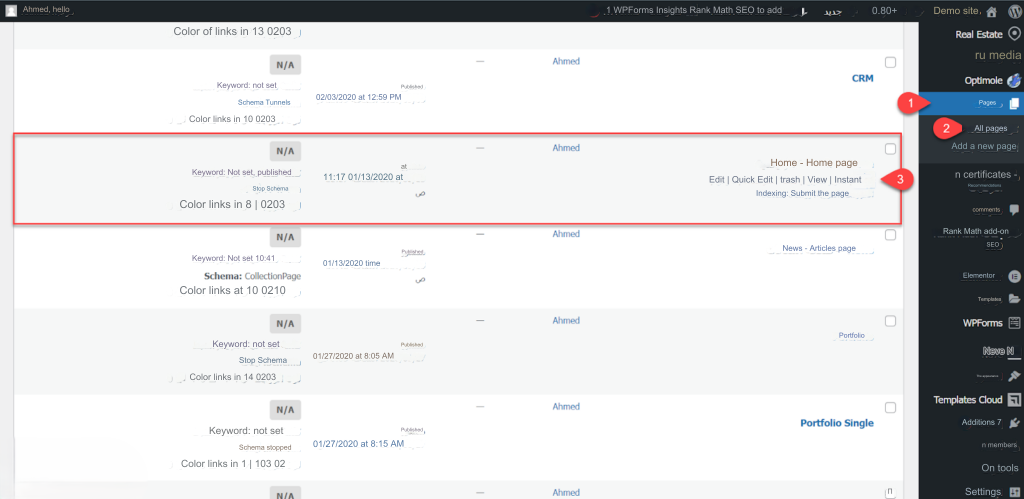
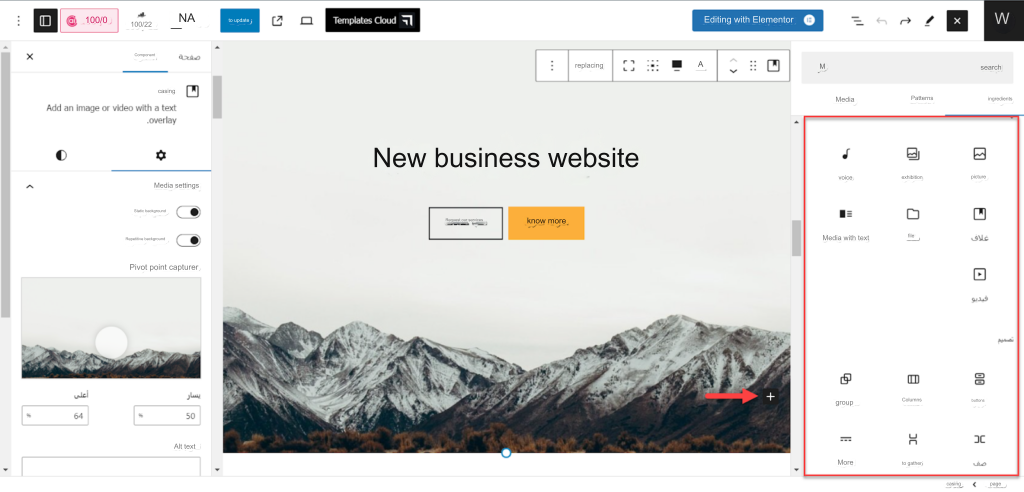
After that, you can modify the content of the home page by modifying texts, icons, buttons, etc. To do this, go to the main WordPress dashboard, choose “ Pages ” from the side menu, and then choose “ All Pages .” Next, look for the page called “ Home ,” which is labeled as a home page. Then click the “ Edit ” button as shown in the following image:
You can now modify the content of the home page and format its contents using the WordPress editor. For example, you can select, change, and format the title as you see fit.

Likewise, you can select buttons in the main interface and edit their content and associated links.
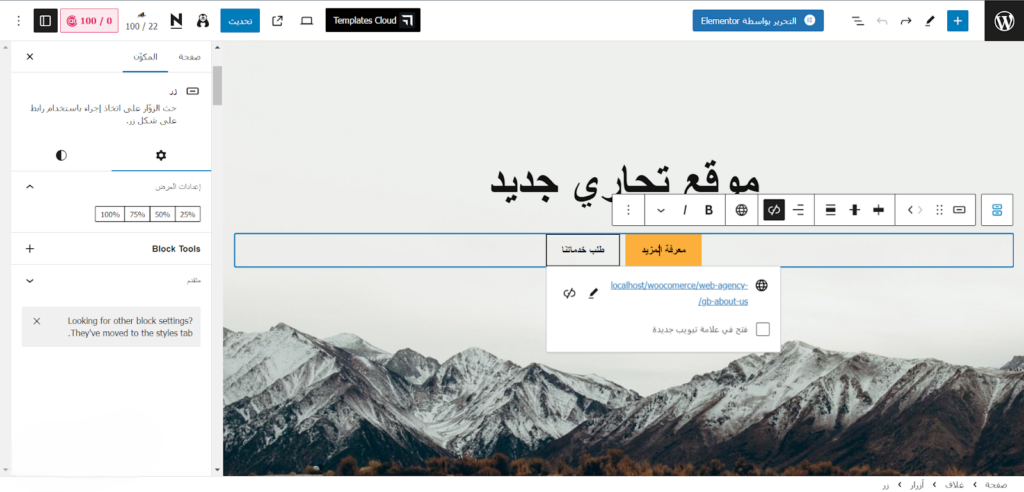
Also, you can edit the rest of the home page content. You can either completely remove inappropriate parts or enhance them with additional elements using the WordPress editor tools.
After completing all modifications to the main interface, click on the “Update” button to save the final changes and apply them to your site’s interface.

5. Optimize your site for local search engines
Local SEO is a set of algorithms that help search engines understand your site better, which leads to improving the appearance and ranking of your site in search results, which is the main factor for local SEO.
Local SEO algorithms add basic business information to your site, such as address, phone number, and business hours, using Schema.org codes. There are many plugins available on WordPress that help you improve local SEO, and among the best of these options is the Rank Math SEO plugin.
First, you need to install the Rank Math SEO plugin on your site through the plugins menu in WordPress, then choose Add a new plugin, then search for the Rank Math plugin, install it, and activate it on your site. You can review our detailed guide on “ How to Install and Activate a WordPress Plugin Properly ” to help with this process.

After that, go to the “Add Rank Math SEO” option from the side menu in the WordPress control panel, then activate the “Local SEO” option and go to its settings as shown in the following image:

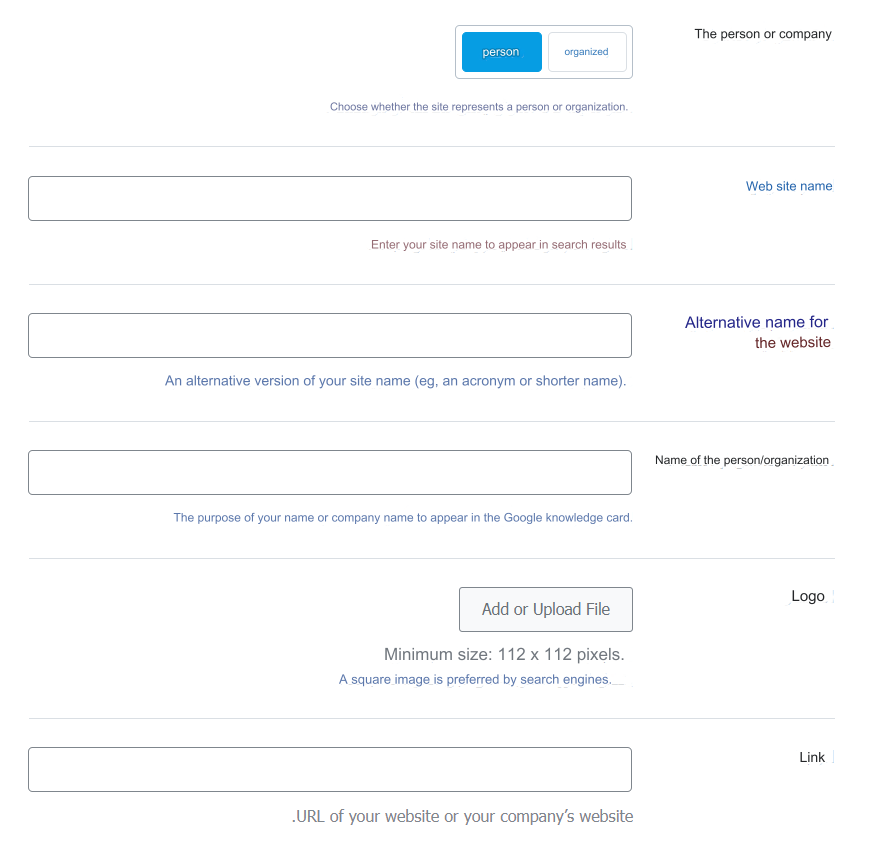
After that, you will be directed to your business page. First, select the type of business, whether it is a company or a person, then write the name of the site and the name of the owner. After that, upload the logo image and write the website link as shown in the following image:
Then, you can scroll down to the bottom of the page and select the business hours and phone number for the technical support or sales team that suits you. You can also specify the cost of services if you offer a paid service, so that you appear professional to customers on your Google Business Profile.

You can also enter your Google Maps API key for your Google account to activate embedded maps on your site, and then specify the geographic coordinates of your business on Google Maps. After completing all the settings, click on Save Changes as shown in the following image:

You will find that the local SEO options are similar if you rely on other engine optimization plugins, for example, the Yoast SEO plugin and the All in One SEO plugin .
6. Add the new website to your Google Business Profile
Now, you have a new, ready-made website that you can rely on instead of the previous free website that was provided by Google. The last step you need to replace the old location with the new location on your Google Business Profile.
To do this, go to your business profile page on Google or search for your business name directly on Google until the business profile page appears. After that, click on “ Edit Profile ” as shown in the following image:

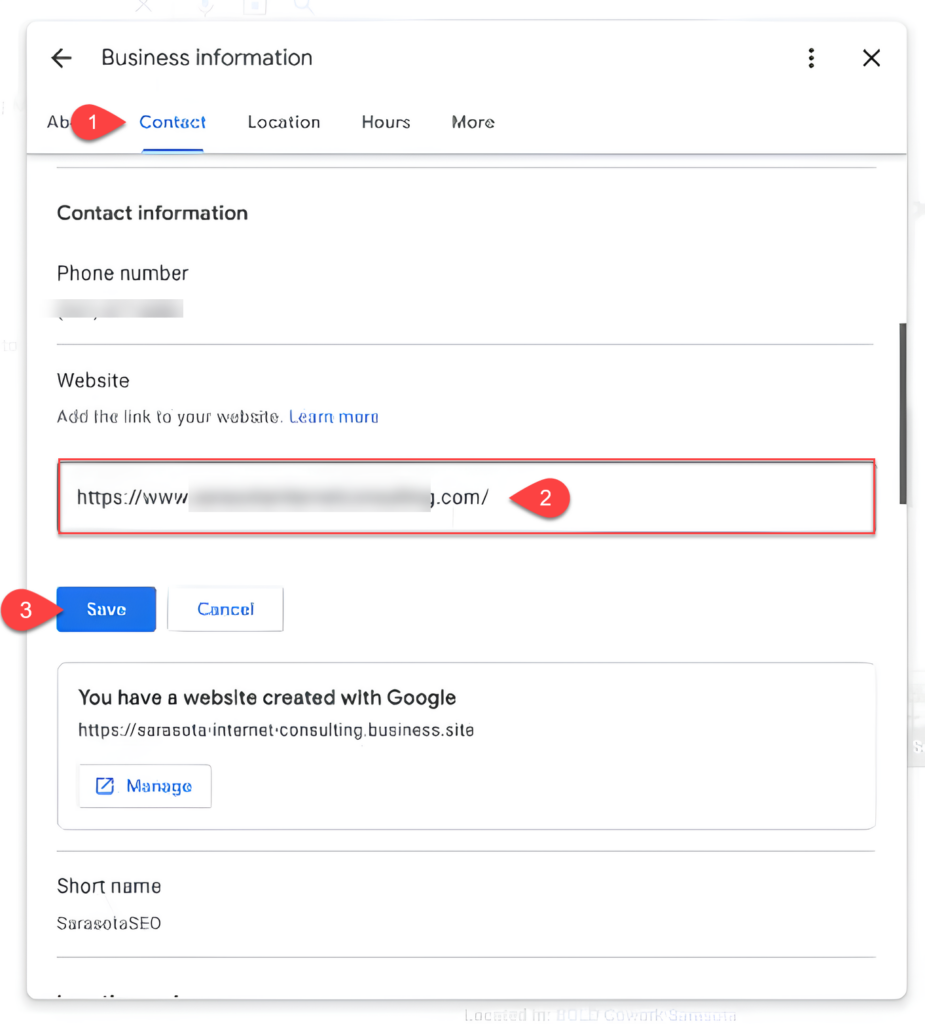
After that, go to the “ Contact ” tab from the top menu. After that, go to the “ Website ” option and remove the old website link, then write the address of the new website, then click “ Save ” as shown in the following image:
So you now have a new WordPress website that will appear on your Google business profile. This will allow visitors from Google to be directed to your site, thus avoiding the problem of free sites being blocked by Google or any free platform that offers this type of free website creation services.
It is always better not to rely on free or proprietary services, especially for commercial activities, until you are the primary owner and have full control over them.
In conclusion, the WordPress system helps you develop your company’s website instead of the free Google page with a significant difference. For example, you can add your products to the site by adding WooCommerce to create electronic stores. You can also optimize the site to keep up with search engine algorithms to boost your site’s visibility in search results, which contributes to increasing your website visits as well as local SEO. Which reflects and helps improve the user experience within your site and increase the success of your project.