

Website or blog and are looking for a way to attract the attention of your visitors and keep them informed of what you offer them periodically, you must try activating push notifications on your site, as they allow you to send notifications to users even if they do not visit your site. This helps keep users informed of everything new on your site, including articles, updates, or the publication of new products, which ensures their continued interaction on your site.
If you provide useful, good, and unique content on your site, and you want users to stay connected to your site and its content permanently, then you need a way to keep them connected with you. Therefore, in this article, we will explain the concept of push notifications, how important it is, as well as how to activate notifications on WordPress using the OneSignal plugin.
What is meant by sending notifications (push notification)?
The process of sending push notifications allows you to inform your audience or send a notification to your audience automatically when you publish new content or a new article. It is considered a great tool and method of marketing that you can use to increase user interaction with your site and work to increase the number of visitors and followers. .
What is unique about this method is that users are not required to be present on the site to receive notifications. The notifications will reach users when they open the browser.
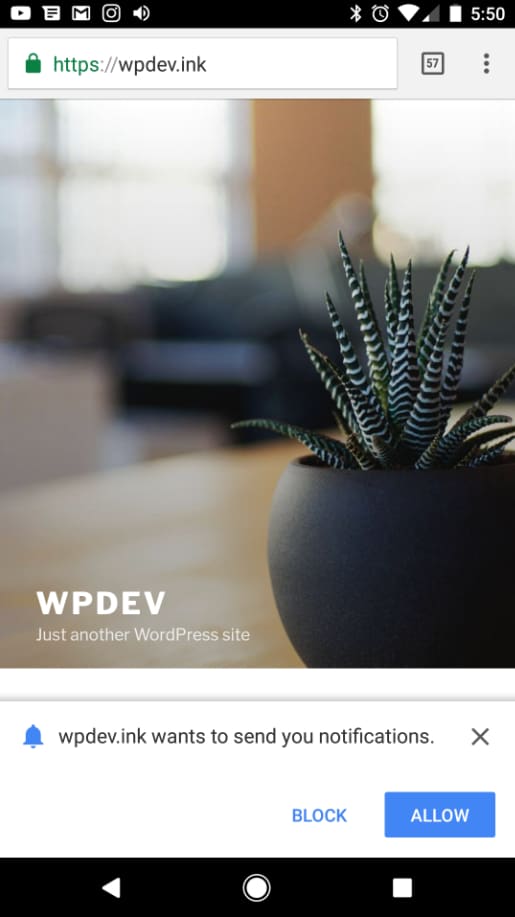
The notification system initially works by requesting permission from the user to receive notifications, as in this picture
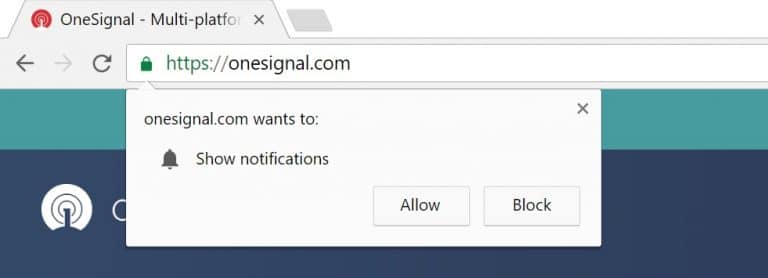
You can receive notifications on your browser, such as Chrome, Firefox, or Safari, or you can receive notifications on your Android phone (iOS phones are not yet enabled to receive notifications).
As the owner of your site, there are several reasons that push you to use the system of activating notifications for your site visitors, which ensures that you get more targeted visits, and also benefits visitors in constantly following the content of your site, and we mention some of its advantages as follows:
- Alert users to new content (as soon as new content is available, notifications will be sent to users)
- You can subscribe or unsubscribe at any time
- Push notifications are shorter and require less attention than emails
- Push notifications have high click-through rates, especially when compared to other marketing methods
- For store owners, users will be able to know about any new product uploaded to the site, without the users even being present on the site.
Notifications are considered a distinctive method of e-marketing and work to increase interaction and visitors to your site. However, they should not be used frequently, so that the reader will not be annoyed. However, it is recommended to use them when you have distinctive and unique content, and content capable of providing addition and benefit to your audience. Thus, you will be able to link users to your site in a way. Larger.
How to set up push notifications in WordPress?
There are many WordPress plugins that enable you to activate notifications on your site, and in this explanation we will talk about using the OneSignal plugin , as it allows you to send instant notifications to your visitors and audience, and thus you can increase user interaction on your site. Once you configure the plugin, your visitors will start receiving push notifications when you publish any new article or content.
You may be interested in: What are WordPress plugins, their functions and features, and how do they work?
You can configure and send notifications at specific intervals or create segments and lists for users, and users receive messages or notifications even without being on the site. The free plan allows you to send or target up to 10,000 subscribers.
The add-on offers many features that help website, blog, or store owners increase interaction and get more followers, visitors, and views, by sending notifications. These features include:
- The extension supports Chrome, Safari, Microsoft Edge, Opera, and Firefox, whether you’re running on your desktop or Android device, as well as HTTP and HTTPS sites.
- Set and specify whether notifications will be sent automatically
- Define lists or segments of users and send them special notifications
- Customize the mechanism and method for asking visitors to subscribe
- Schedule notifications for any time in the future, for example scheduling a notification to the user based on the same time of day they last visited your site
Steps to configure push notifications for your site
Now let’s configure notifications on the site by installing and activating the OneSignal add-on, then configuring the add-on settings, creating our first notifications, and then completing sending notifications. Let us follow the steps as follows:
1- Install and activate the OneSignal add-on?
The OneSignal plugin can be installed from within the WordPress control panel of your site. Go to: Plugins << Add New , then type the name of the plugin in the search box, then click Install Now.

After that, you must click Activate to activate the add-on

After successfully installing and activating the plugin, it will appear in your WordPress control panel

To learn more about how to install and activate plugins on WordPress, you can read the following article: Ways to install and activate plugins on WordPress in detail.
2- Set up a OneSignal account
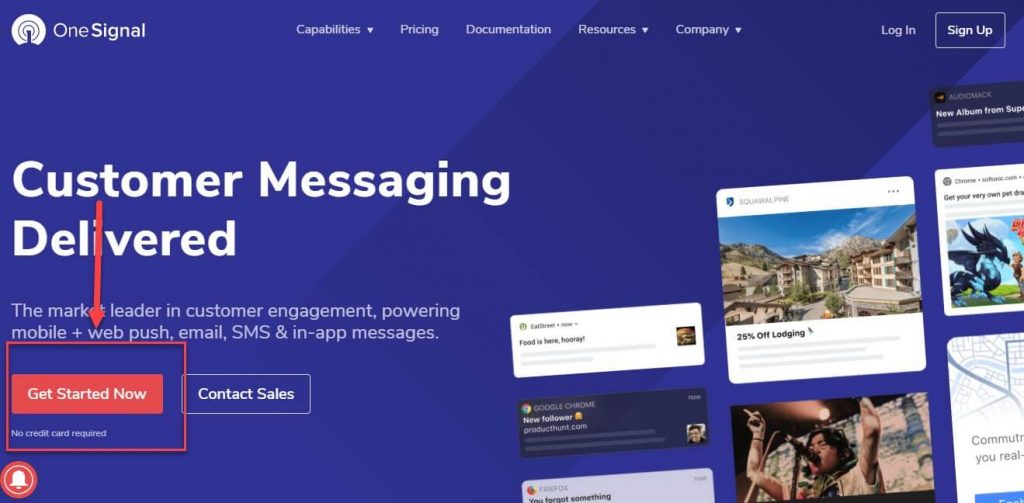
After installing the add-on, we will need to create a new account by going to the official OneSignal website , and then clicking on Get Started Now.
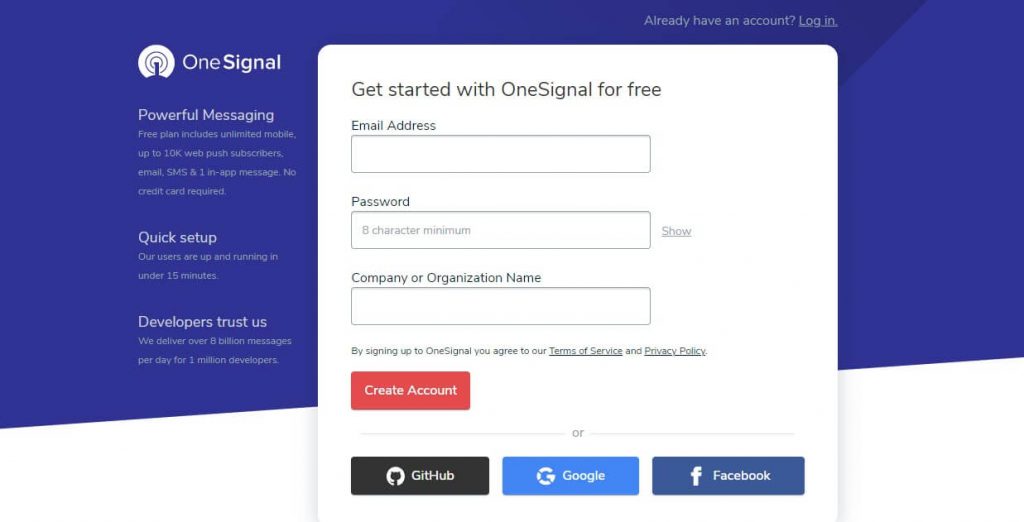
Then create a new account by entering your email and password, or you can register through Google, Facebook, or GitHub
The next window we will start creating push notifications
3- Create push notifications
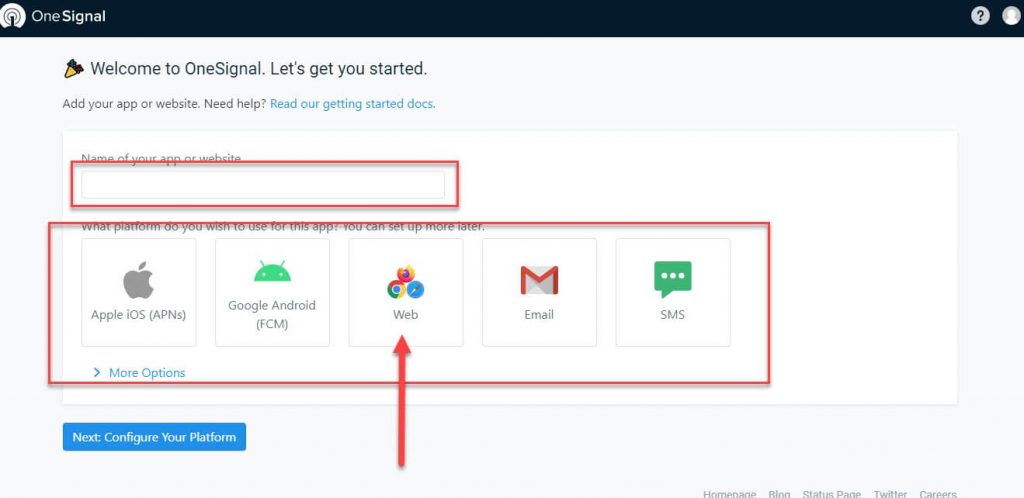
We will need to write a name for the application as well as specify the platform on which it will work. By choosing Web , the notifications will work on both browsers and Android devices, and we click Next: Configure Your Platform.
In the next window, we will choose integration with the WordPress website by choosing WordPress Plugin or Website Builder. You must also write the following information:
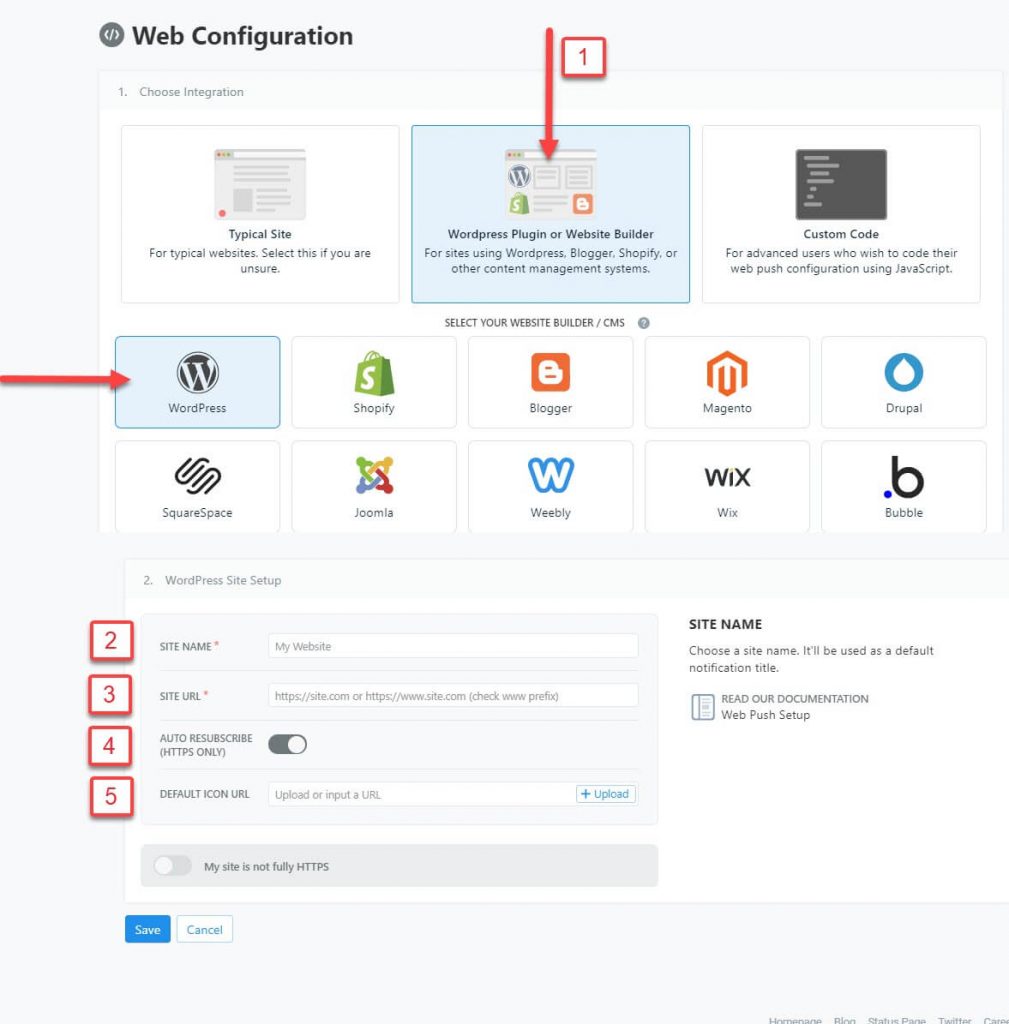
- اختيار WordPress Plugin or Website Builder
- (SITE NAME): Here you write the name of the site, which will be used as the default notification title.
- (SITE URL): This is where you write the site link. The URL of your site must not include anything after your domain extension and must include the protocol (for example, http:// or https://). Note : You cannot change this address after you have 100 subscribers
- (AUTO RESUBSCRIBE): This is the automatic subscription. This feature is intended only for HTTPS sites. It allows users to automatically re-subscribe when they return to the site without requiring them to subscribe again if they clear their browser cache or if you transfer to OneSignal from another payment provider.
- (DEFAULT NOTIFICATION ICON URL): The appropriate icon is chosen, and the dimensions must be 192 x 192 or larger.
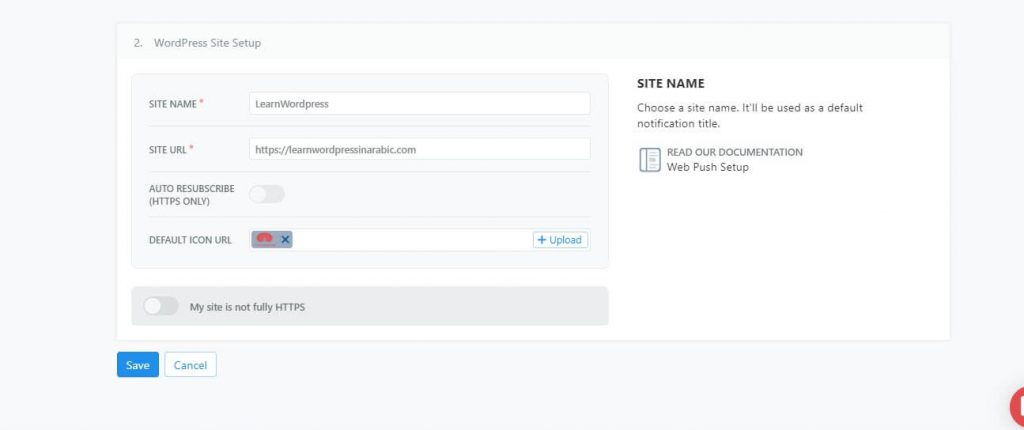
In our example, the information will be as follows:
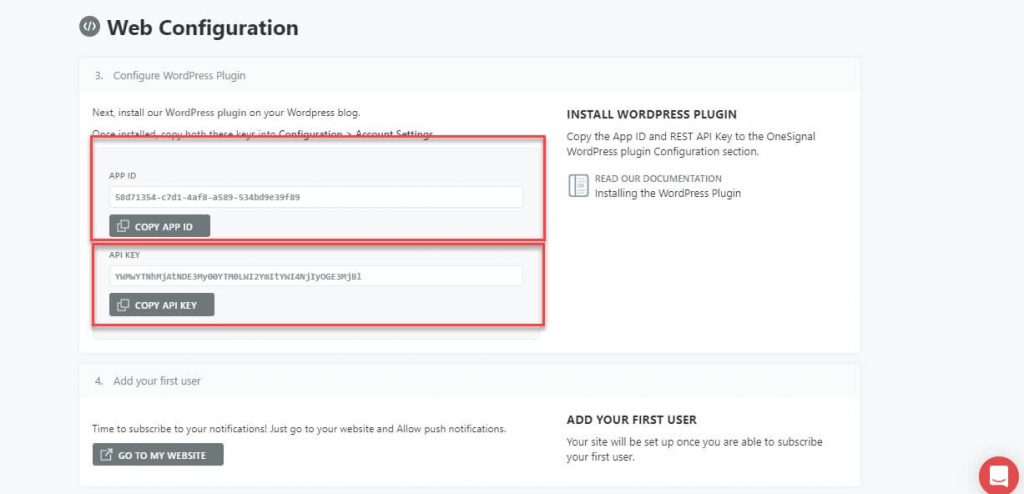
After clicking Save, a page will appear to us containing the application’s App ID number as well as the REST API Key . We must copy these numbers and place them inside the add-on in the add-on’s control panel on your site.
4- Configure OneSignal settings
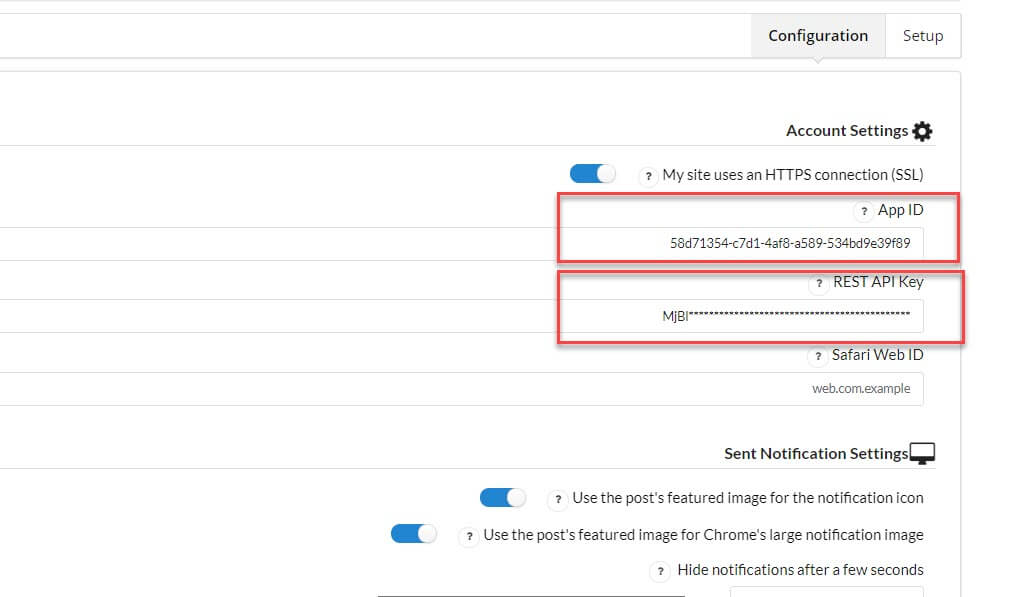
In the previous step, the App ID and REST API Key were obtained. Now we have to go to the WordPress control panel, then go to the OneSignal Push tab , then choose Configuration.

In the Configuration tab, we will see all the options and settings in order to configure and configure the extension, and we must put the App ID and REST API Key , which we obtained from the previous step.
When we scroll down we will find the Prompt Settings & Subscription Bell option. Here you can control the appearance of the alerts and messages that will appear to the user when subscribing and when unsubscribing, and specify where the subscription icon or icon will appear, etc.
From here, you can control the Subscription Bell in terms of the messages that appear, the location of the bell, etc. This bell will appear for new users, subscribed or non-subscribed users, and messages that will appear when a user subscribes or unsubscribes, etc.
You can activate this feature by activating the option : Automatically prompt new site visitors with OneSignal Slide Prompt before Native Browser Prompt (recommended)

When you scroll down, you will see where to write the messages you want the user to see. For example, what do you want to write to the user when he subscribes, or what will appear to him when he unsubscribes, etc

Before we continue reviewing the rest of the settings for the addition, we will try what will appear to us if we apply the settings above. If we visit the site, the subscription icon will appear to us as in the picture.
If we visit the site again, it will look like this:
We will also see the message we placed after canceling the subscription, as in the picture:
After this quick experience of how the results appear, you can return to the extension’s control panel and continue with the rest of the settings. You can do more control through the Prompt Customization option, in terms of the appearance and appearance of the icon and the subscription method.
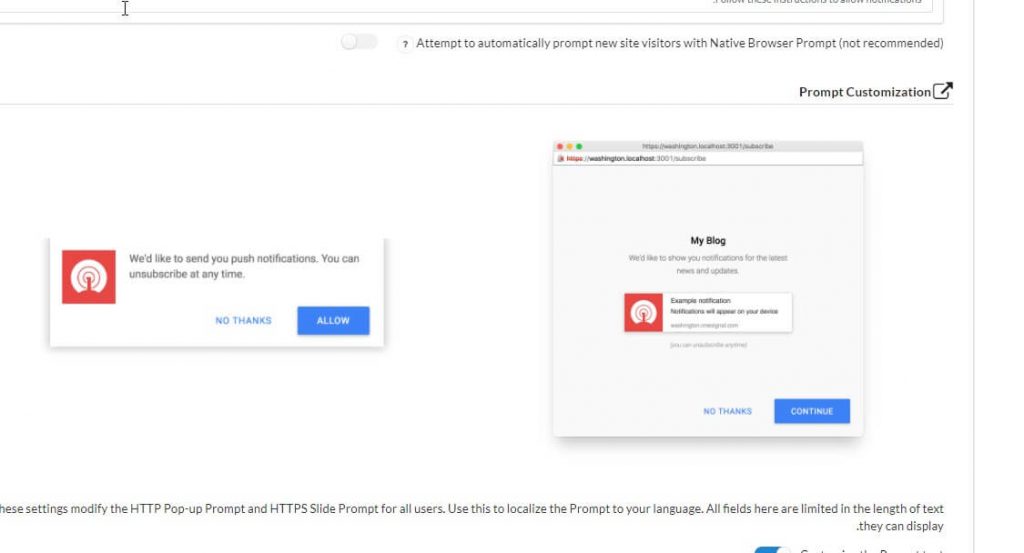
Where you can control the shape of the button that will appear for the user to subscribe and the messages that will appear to him as well.

If you try to enter the site, the user will see some of the following images, through which you can control written messages from the options at the top:

You can also control the welcome messages that will appear to the user for the first time through the Welcome Notification Settings

The images that will appear to the user will be like the following:

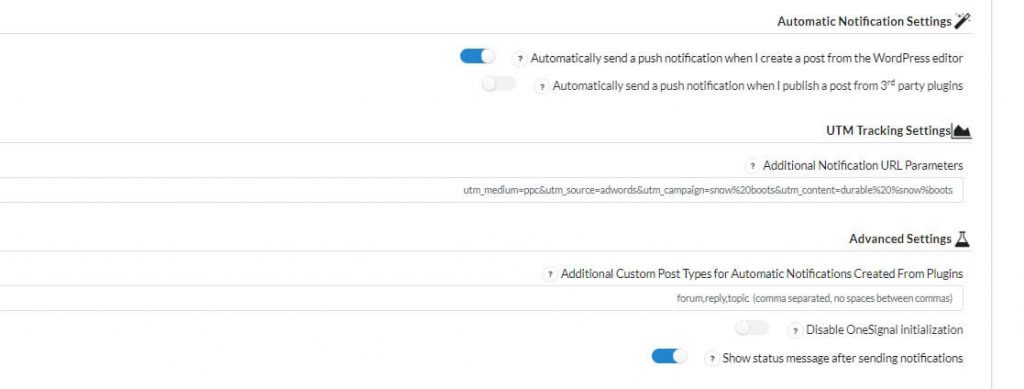
You can also control Automatic Notification Settings
After you finish configuring the add-on settings, you must click the Save button to save the changes you have made, and then try all the settings you want.
Therefore, we can say, if you are looking for a way to keep your visitors informed of everything new, and also to gain more visitors and viewers and thus achieve more views and profits, you should try activating push notifications in WordPress, as we explained previously, using the OneSignal plugin. Or any other add-on or tool that you can rely on to activate this option. It is not necessary to use the tool itself as much as you care about the benefits you get in promoting your site