

we explain to you the easiest ways to obtain a security certificate (SSL certificate) for free, and to install it and install it on your site correctly with the aim of securing users’ data and giving them confidence in your site, as the sign that your site has obtained an SSL certificate in the user’s browser shows that their private data is
Ways to obtain an SSL certificate for free
There are many ways that enable you to obtain an SSL certificate for your website for free, but let us talk about the two easiest ways, which do not require a lot of technical skills from you to complete the linking process, either through the hosting company or through SSL service providers who provide these. The service is free.
Note: We have previously talked in detail about explaining security certificates, their types, and their benefits to website owners in: The Comprehensive Guide to Security Certificates (SSL Certificates guide) . This is in case you want to know all the technical information about the mechanism of how security certificates work and the extent of their benefits to website owners, but let’s now talk. How to obtain the certificate and install it on your site for free.
1. Obtain a free SSL certificate from the hosting company
If you are about to purchase hosting for your website, you need to know before purchasing hosting whether the service provider provides you with an SSL certificate for free or not, as there are many hosting companies that provide SSL certificates integrated with the hosting plan that you subscribe to.
Obtaining a security certificate in this way will save you a lot of time and effort later in searching for a company to buy the certificate from, and then installing it yourself in a way that may be difficult for beginners. For example, the following image shows the shared hosting plans for one of the hosting companies, which you notice provides a certificate. Free SSL with all of the company’s hosting plans (instead of paying $11.95 to purchase the certificate):

After purchasing hosting from a company that provides you with a free SSL certificate, you may find that the certificate has been installed on the domain used to purchase the hosting, and your site’s domain appears to begin with the word https in the browser’s search bar, which means that the domain has activated the security certificate.
Verify that an SSL certificate is installed on your site domain
After purchasing hosting for your site and confirming that the company you purchased from is valid, the SSL certificate is supposed to be installed automatically without your intervention. It may take a few hours for the automatic linking process to complete properly, but you can be sure that the security certificate is installed and activated correctly.
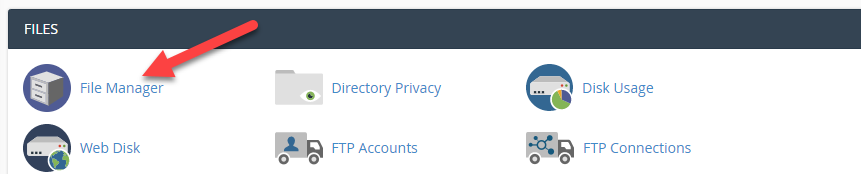
You can verify that the certificate is installed on your site by going to the hosting control panel ( cPanel ), and then you will find the icon to control and verify the SSL certificate:
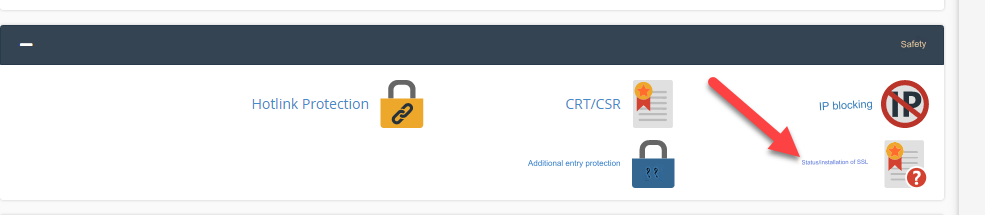
After entering the icon to check the status of the SSL certificate installation, the certificate data and status window will open for you:

You will also notice the status of the SSL certificate and an explanation of whether it has been installed or not. You can also access the certificate information and view the renewal website.
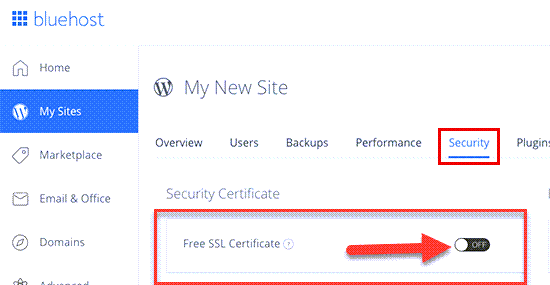
If you find that the certificate is not activated, you can do a simple procedure by entering the control panel of your website hosting account, and then entering the security and SSL settings, and you will find the SSL control bar that you can click on to activate the certificate:
Note that most of these companies provide you with a free SSL certificate for the first site on the hosting, but if you want to obtain more than one certificate for more than one site, you will pay the value of the certificate for the rest of the sites. Likewise, some companies provide the certificate with an annual subscription or with a financial value that you pay once for a Mada subscription. life. But anyway this free option will be good for you in the beginning
2. Obtain a free SSL certificate from intermediary companies
In the first method, we talked about how to obtain a free SSL certificate integrated with your site’s hosting, but as you read, it is usually free for one year and for one site only. Therefore, if you want to obtain a security certificate for more than one site and for free for life, you can rely on some Intermediary companies that provide you with the service for free.
In this explanation, we will rely on a famous company that provides free SSL certificates, which is SSL For Free , which provides you with obtaining the security certificate completely free of charge for a period of 3 months. Then, after the expiration of the period, you log into your account with the company and renew the certificate for another 3 months. Also for free. In this way, you can obtain the certificate completely free of charge, but you will have to renew it from your company account for free every 3 months.
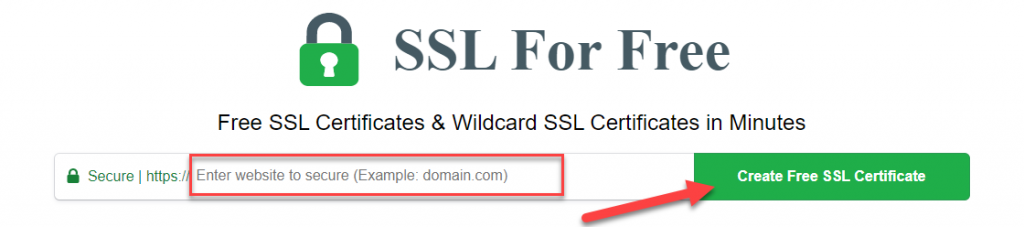
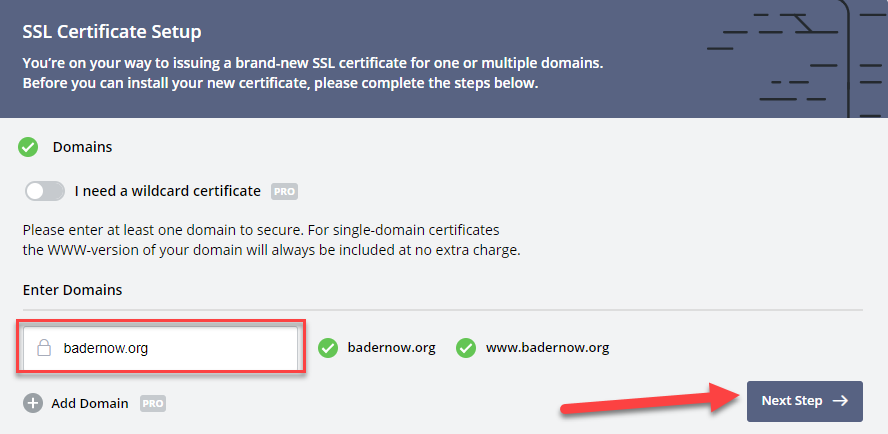
Therefore, you will go to the official SSL For Free website , write your domain name and then click on the green button ( Create free ssl certificate )
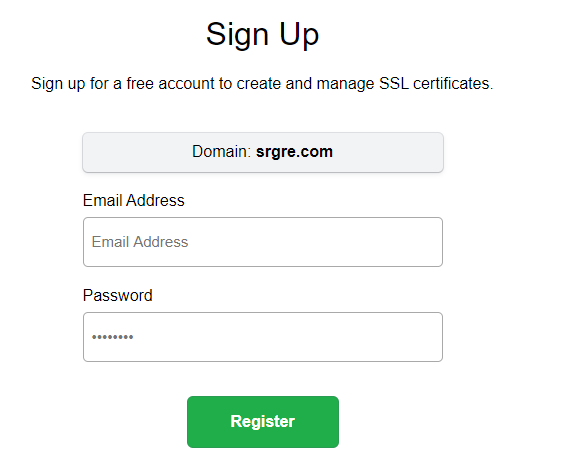
You will then be asked to register a new account on the site by writing your email and password, then click (Register).
Then immediately after that, you will be transferred to the installation window and install the SSL certificate for free through the installation window, in which you will find your domain name, and then click on Next step.
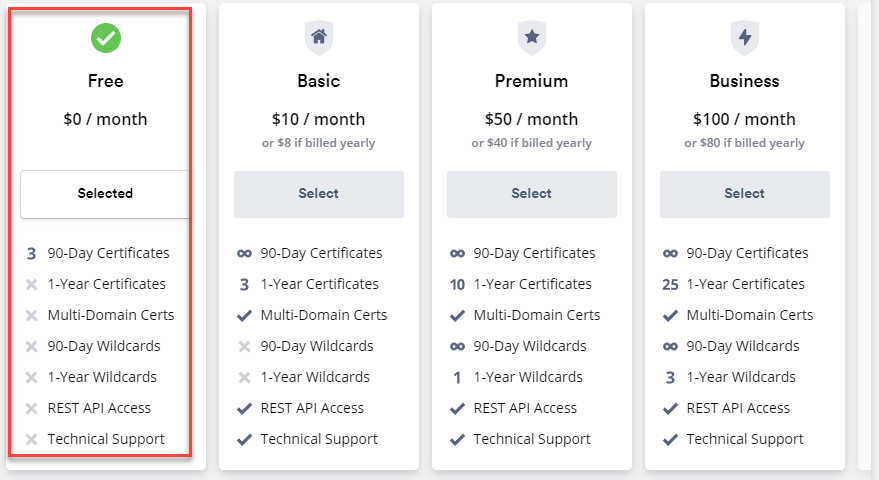
After that, you will be asked to select the purchase plan, which starts with the free plan, which enables you to obtain a security certificate for use on one domain only. You will be forced to log into your account with the company every 3 months and renew the certificate, and therefore we will select the free plan by clicking (Select).
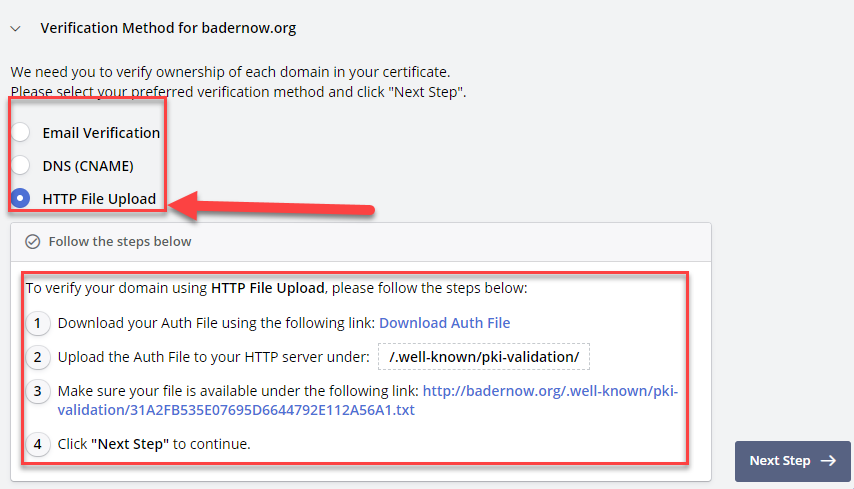
As you can see above, you are asked to take the step of verifying ownership of your domain. You will see 3 methods that you can choose from to confirm ownership of the domain. We advise you to choose the third method ( HTTP File Upload ), as it is easier. In this method, you download the activation file and then upload it to the hosting provider as shown.
First, you will download the proof of ownership file on your computer by clicking on (Download Auth File) ,
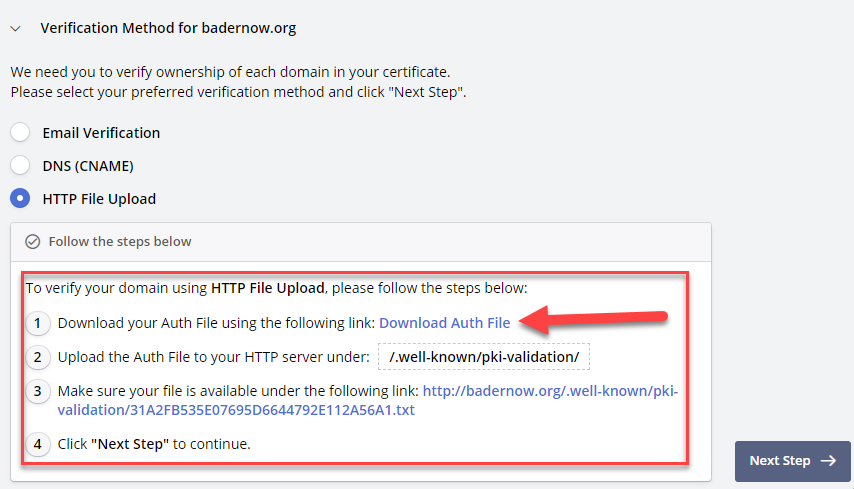
Make sure you keep it on your computer with the same name without changing it.
Then we will go to the hosting account and log into the hosting control panel (Cpanel), then go to the file manager .
After that, you will find the option to create a new folder , then click on it to create a new path within the file manager:
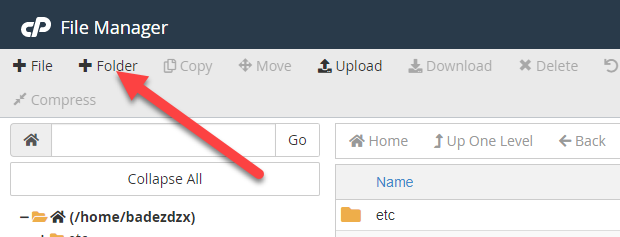
The Create a New Folder window will appear in which you write the name of the folder you want to create within the file manager. Here you will write the name of the file like this (well-known.), and then click on Create new folder to create a new folder with the name (well-known.)

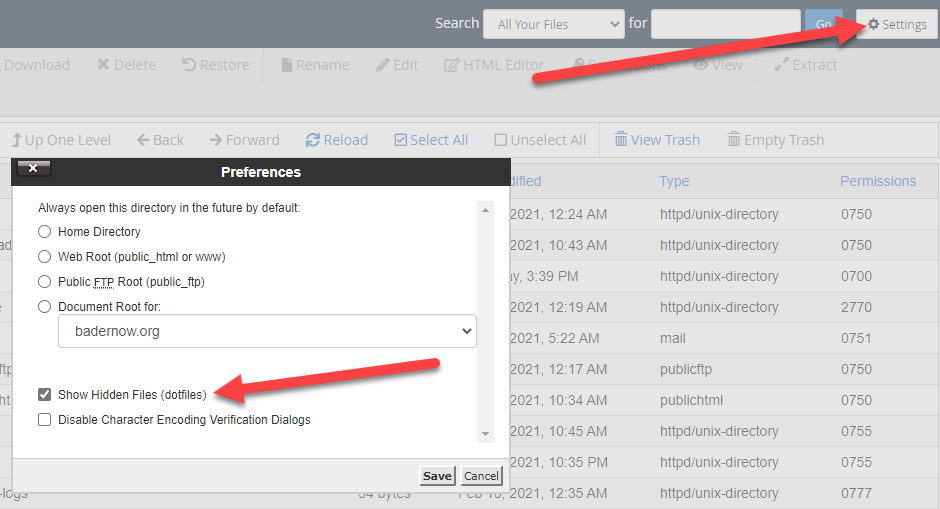
After that, the folder will be created, and you should find it inside the file manager with the name that we created. If you do not find the file in the file manager, you can go to Settings and a window will appear for you, choose “Show hidden files” or “Show hidden files”:
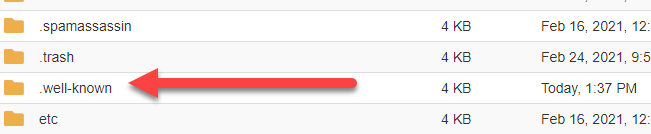
Now you will find the file we created located inside the file manager:
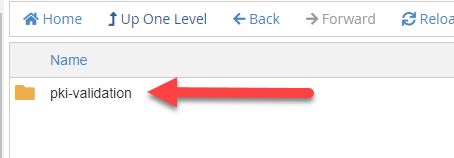
Next step, you will enter the new well-known glory. And you create another folder inside it called pki-validation in the same way we created the first folder:
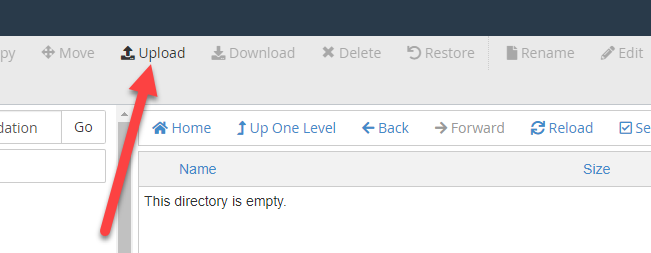
Go to the new folder pki-validation, to upload the proof of ownership file that you downloaded from the SLLFor Free website by clicking the Upload button .
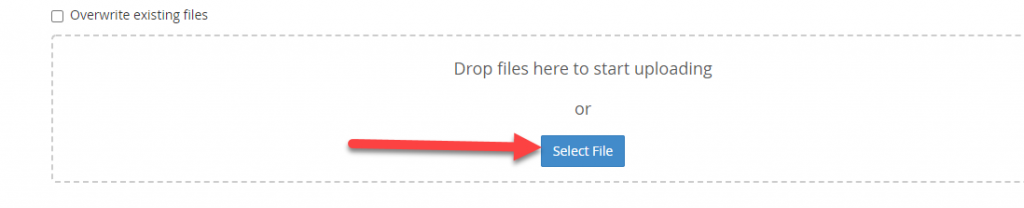
You will be directed to the file upload window, click on Select File , to upload the proof of ownership file from your computer
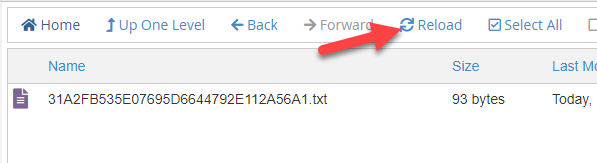
To be placed in its designated path in this way
After you download the proof of ownership file into your site’s file manager, you will return again to your account at SSL For Free, at the step where we stopped to prove ownership. We will return again to the same screen and click on Next step.
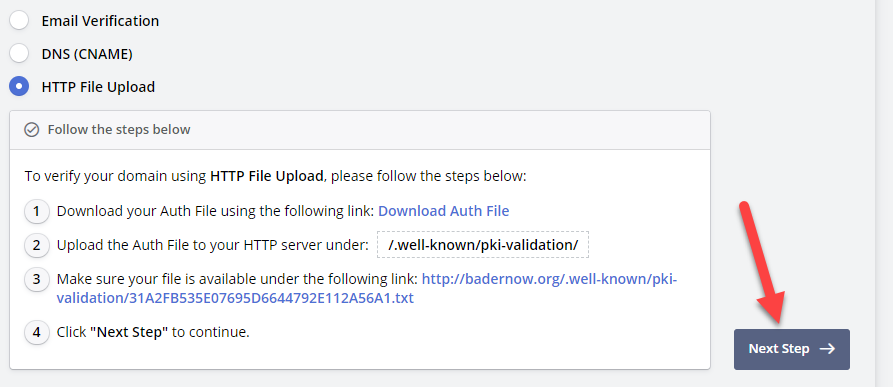
After verifying domain ownership and clicking next step, you will see the files and codes for the domain’s SSL certificate as follows:
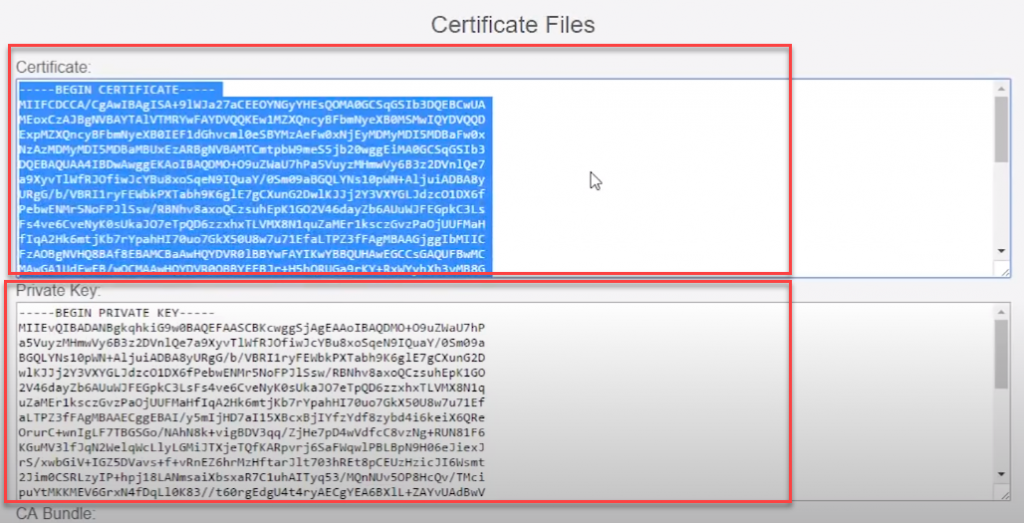
The final step is to copy these codes and add them to the Cpanel control panel for hosting your site, by going to your site’s Cpanel control panel and entering SSL\TLS:
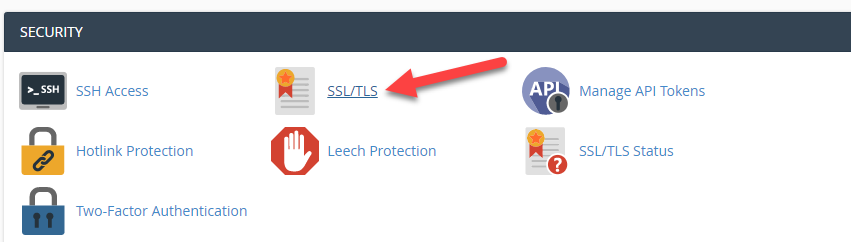
Which allows you to control and install the SSL certificate, in which you click on manage SSL sites:
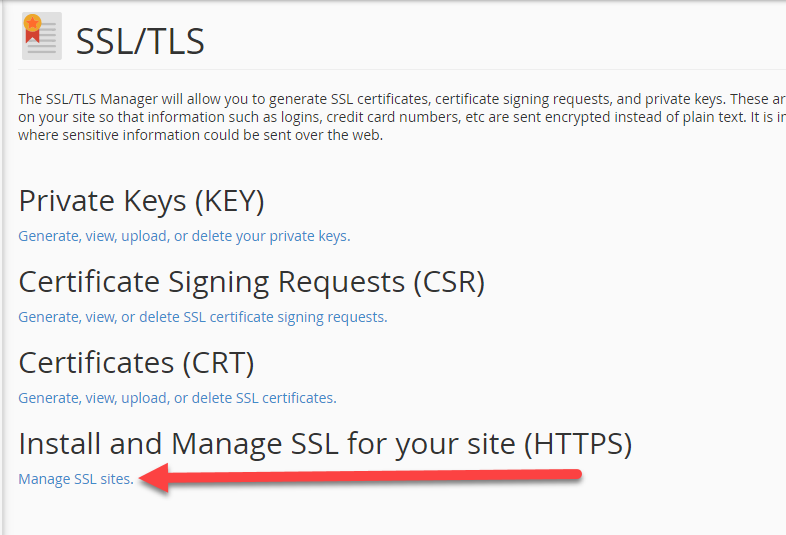
After that, the page for installing the SSL certificate will open for you, in which you will be asked to specify the domain and then fill in some data, which are:
- Certificate: (CRT)
- Private Key (KEY)
- Certificate Authority Bundle: (CABUNDLE)
You can fill it out in the designated fields and the certificate will be installed and activated directly on your site

Of course, you can obtain this data from your account in SSL for Free, where you copy it and place it on the certificate installation page within your account on the hosting company as shown above, then after filling in the data, you will click on Install certification ..
Then wait for about an hour and you will notice that the certificate has been installed successfully and the domain appears with the security encoding that begins with Https:

Do not forget to monitor your account on the SSL for Free website to renew the certificate every three months, as we explained at the beginning of the article.
What is the difference between a free SSL certificate and a paid one?
Many website owners wonder about the difference between free SSL certificates and paid versions, and are free certificates considered insufficiently secure for the site?
In short, we can say that all SSL certificates, whether free or paid, encrypt users’ contact data that is made through the site, but there are some paid certificates provided by many companies around the world that provide some features that are not available with free SSL certificate providers, and it can be clarified Most notable are the following:
- Free certificates provide a limited level of data encryption on the site’s domain, and can be used on small sites, personal blogs, and sites that do not send and receive sensitive data. Paid certificates provide many complex layers of encryption, and they also support (OV) technology, which is used as a higher layer in encryption. User data.
- In free certificates, some limited security precautions are available, as some data is encrypted without authenticating the site owner’s data, while in paid certificates, the site owner must prove his data and the site’s identity to provide high layers of security for visitors as well as site owners.
- In free certificates, you are limited to the limited options provided to you by the service provider, as well as many of the procedures that you perform manually. However, in paid certificates, the characteristics differ based on the purchase plan, and the activation procedures are automated, with technical support options provided by the service provider.
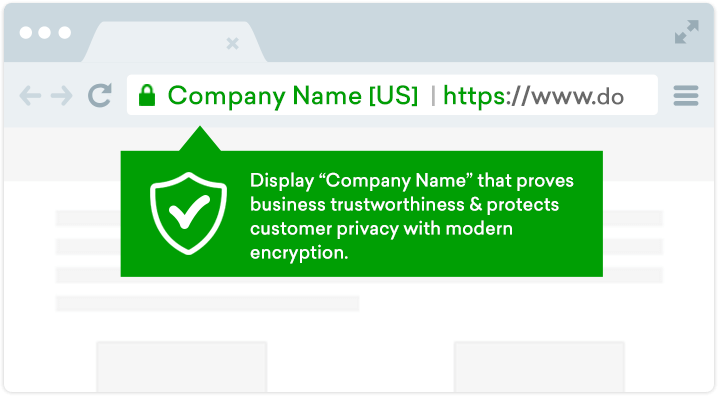
Also, one of the most famous features found in some reliable security certificates is that they display the name of the security company that secures user data
Therefore, as we explained, how important it is to install an SSL certificate on your site in securing user data, and therefore you need to obtain a security certificate, whether free or at a low cost, or the security certificates that are the highest in protection and the most expensive, which may reach $1000, but you certainly only need the certificate that provides you with a degree of protection that suits you. The data that visitors share, for example, the data obtained by personal blogs differs from the data obtained by online stores, and the free option is sufficient for you in some cases, but in any case, do not neglect this step to enhance the security of your site and gain the trust of users.