you are one of the people who build many WordPress sites, you must have thought about or needed a way through which you can speed up the process of creating pages on your site.
Did you know that you can create a large group of pages at once in WordPress easily and quickly in WordPress, which is known as the process (bulk page creation), that is, you can create a group of pages at the same moment without the need to create each page separately.
You can achieve this in simple steps by using some of the free plugins available in the WordPress repository. In this article, we explain how to use four of the free WordPress plugins that enable you to create multiple pages on a WordPress website at the same time. All of these plugins have been tested with the latest versions of WordPress and are still supported within the WordPress repository.
Note:
You will find many explanations that use plugins that have not yet been tested with the last three major versions of WordPress, that is, they have not been updated for a long time, but we do not recommend using them because they may pose a security risk to your site or cause compatibility problems with the rest of the plugins or the template used.
1. Use the Bulk Page Creator add-on
This plugin allows you to create the number of pages you want within any WordPress site, and anyone can use it, whether they are an expert or a beginner in dealing with WordPress sites. You can rest assured to use the Bulk Page Creator plugin as it has been installed on nearly 30,000 websites and tested with WordPress version 5.7.4 during the preparation of this article.

In order to start using this add-on, you must first install and activate it on your site by going to the Add-ons > Add New section , then writing the name of the Bulk Page Creator add-on in the search box and clicking the Install Now button to install it, then clicking the Activate button as shown in the following image.
Once you activate the add-on on the site, you will now be able to create the number of pages you want by going to the Settings section > and choosing the name of the add-on Bulk Page Creator .
The add-on settings window will appear, which contains several sections. The first section, Site Pages , includes the pages within your site, and the word draft appears next to them in red if the page is draft.
As for the Add pages section , it is for adding the pages you want. Here, you must pay attention to activate the Multiple pages mode option , then enter the page names in the page name field , separated by a comma, without using any spaces except within the page name.
You must now choose the parent page for these pages, or you can use the default no parent option . Then you can click on Add page to add pages immediately, as they will appear in the Site Pages section with the Remove option next to the pages that were added using this add-on.
So far, the previous pages have not actually been added to the site, as you must click on the Update Site option at the bottom of the page to save the changes. Here we notice that there are two additional options. The first is to add previous pages without content or with content, where a field appears in which you can write whatever content you want so that it appears on all pages. You can also choose the status of the pages, whether they will be published or draft.
This add-on is characterized by its simplicity of use and the speed of adding pages using it, but its problem is the inability to choose distinct content for each page or even a template to design these pages.
2. Use the Waka Bulk Page add-on
The Waka Bulk Page add-on is used on a smaller number of sites than the previous add-on. It has also been tested with WordPress version 5.6.6, and you can install it on your site by searching for its name Waka Bulk Page in the search box for installing a new add-on on the site.

After activating the add-on, you will find a new tab within the Pages section called ( Add multiple pages ). When you click on it, a new page will appear for you that includes the Existing Pages section. To the left is the Create New Pages section, where you must add the name of each page within a line and then choose the status of these pages. If it is (published, draft, private, or awaiting review) with the possibility of adding a parent page to these pages.
When you write the names of the pages, you will find that the Add pages option has become activated, and when you click on it, the pages in this section will be added to the Current Pages section, with a button next to these pages that enables you to delete them if you wish.
Now click Save so that these pages will appear on the site in the All Pages section of your site. You can also add them to one of your existing lists by clicking on the drop-down menu above the Save button.
This add-on is also characterized by its simplicity and ease of use, but its problem is that it does not allow adding any content or choosing a design template for the added pages, but it saves you some time if you have a large number of pages that you need to add without content.
3. Use the Mass Pages/Posts Creator add-on
The Mass Pages/Posts Creator plugin has been tested for the latest version of WordPress, which is WordPress 5.8.2 (when the article was published) and is used on more than 2,000 sites. It also provides you with two versions, a free version and a paid version.
The free version of this add-on allows you to create hundreds of pages or articles with the click of a button. It has a distinct feature from previous add-ons, which is adding a suffix or prefix to the names of pages or articles (in addition to the ability to add articles).
You can install and activate the add-on on your site as we explained previously, but you must use Mass Pages/Posts Creator in the search field for the name of the add-on.
Now, after activating the add-on, you will notice that a new section appears within the DotStore Plugins control panel. Click on it to take you to the Add Pages or Articles section. Here you will find different fields to add a prefix or suffix to the name and page names. You will find a red * sign indicating that this field is required, and you must use Space between the names of the pages or articles you want to add so that the extension can distinguish them.
Within the Content of Pages/ Posts field, you can add unified content for all pages or articles that you will create using this addition. The Excerpt Content field is also used to add a unified excerpt. The Type
field is also a mandatory field that you must choose for the addition to work, as you must choose the type of post, whether it is a page or an article. Note that when you choose an article, the next field, which is the Page Template, will disappear , and the last field, Parent Page , will disappear .
Note:
You cannot use the Template field, Author field, Comment status field, or Parent page field when using the free version of the extension. But the page or article status field allows you to choose any available status except the Published status, which requires a paid version of the extension.
Finally, click Create after you finish filling out the previous fields to add the pages or articles you want.
This add-on is very simple to use and the features in the free version are sufficient for most users.
4. Use the Multiple Page Generator Plugin
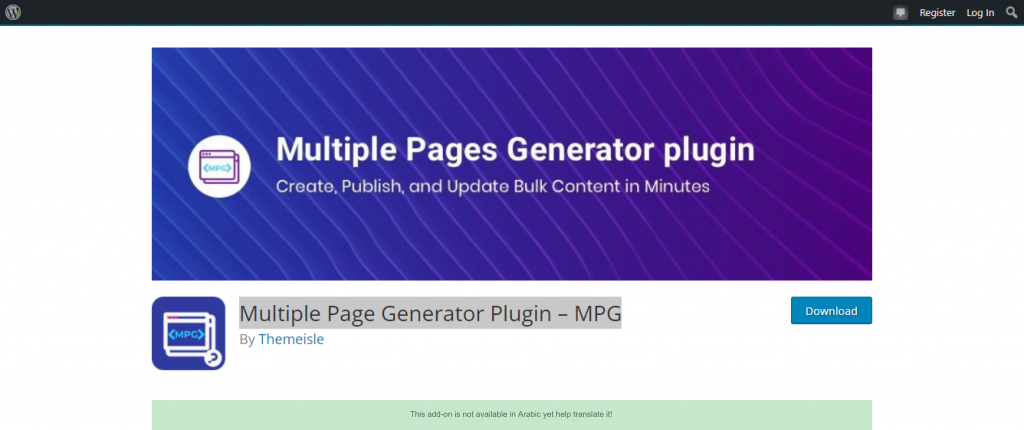
You can use the Multiple Page Generator Plugin – MPG with the latest version of WordPress (5.8.2 when the article was published) without worrying about its incompatibility or the appearance of problems or errors. More important than the above is the ability to create pages or articles by choosing the appropriate template for them and importing information from csv file or sheet file from Google.
Which means that using this add-on allows you to use distinct information for each page or article you create, and this is a feature that is not found in previous add-ons.

You can install the add-on using the method described previously in the article and search for the name of the add-on Multiple Page Generator Plugin . After activation, you will find in the WordPress control menu that a new section appears, called MPG. When you move the cursor over it, you will find several options. Click on ( Create New ).
You’ll now find a set of pre-made options and ready-to-add data to help you add the pages you want. There is an option to add pages with the names of US cities, blacksmithing services, and other options.
The first option allows you to add pages or articles according to your design, but to do this you must have a template for the pages or articles prepared in advance. As for the example here, I will click on US cities to add the cities of the United States and add its own template.
Within the page that appears you will have to adjust the template settings and since we used a preset this information will already be there.
The entity type determines whether you want to add articles or pages, while the template determines how to arrange the data that you will import from the source, which I will talk about later.
You can also use the last field before saving the settings to choose the links to which you want to apply this form, and from it you can choose the language in which the pages you have added will work.
Now move to the next section, which is the source of information that will build the content of the pages or articles that will be added to your site. Here you can import this information either from a direct link from Google Sheet or from a CSV file on your computer.
For our example, the data that you see in the image is data that was previously imported from the add-on itself, and it consists of columns. Each column has its own name that you will use within the page template so that the add-on can put this information in its correct place.

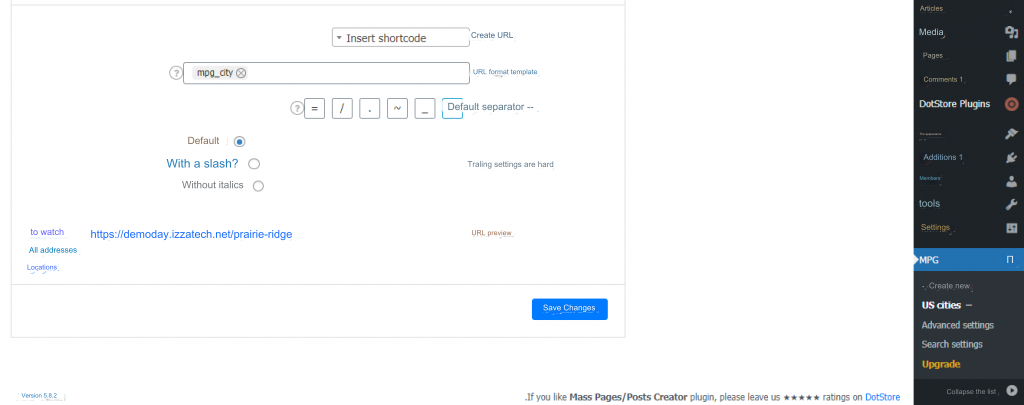
You must now choose the names of the previous columns that you will use to create a link to the pages or articles that you will add to the site. Here I will choose the city name mpg_city, and be careful that any change in this column name must be accompanied by a corresponding change in the link formatting template. For example, if you change the column name to city, you must The short code used should be city.
Click Save Changes and the link next to the Preview URL option will become blue and you can click on it.

Click on the previous link to get an idea of the page’s design and the arrangement of information within it, then click on Edit Page to see how the short codes are distributed within it.
Now go to the short code tab at the top of the page to generate a list that includes the city pages you created. You can display this list anywhere within the site using the short code.
If you go back to the Pages tab, you will only find the template page that the add-on uses to distribute the CSV file information within the pages it generates, but where are the pages?
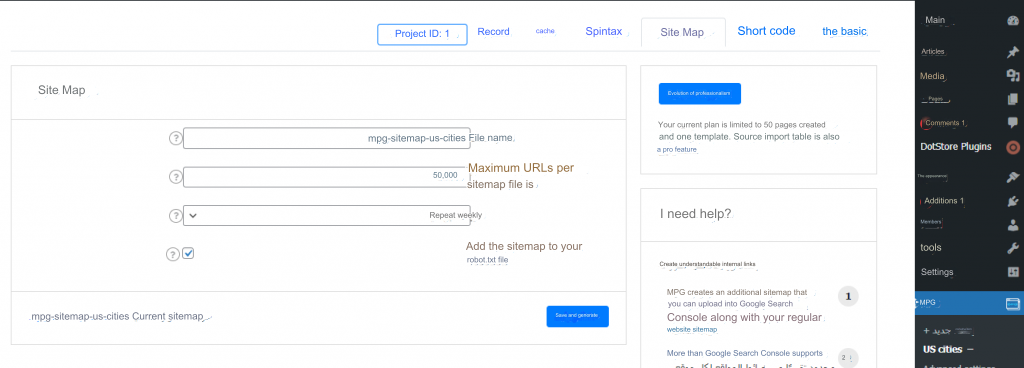
In fact, you can only access the general template page from the Pages tab in your site’s control panel . But all the city pages you added are there and can be visited either using the previous menu or by going to the site map tab and generating a site map for these pages.
Note that this map is different from your site map, but you can upload it to the Google search platform alongside the basic site map, and thus Google can visit these pages and archive them for it.

This add-on is distinguished from previous add-ons by the ease of adding distinct content to each page, but at the same time, if you want to use it and then modify the content of each page slightly, this is only possible using short codes, which makes using it a bit complicated. However, it remains the most powerful add-on in the field of adding pages. Multiple WordPress sites at the same time.
Conclusion
In today’s article, we learned about several methods and plugins that provide the advantage of creating a group of pages at the same time on a WordPress site, and we saw how these plugins save a lot of time when it is required to create a large number of pages or even articles quickly.
In order to choose the most appropriate add-on for you, you must be aware of what your requirements are. If you want different content for each page, you must rely on MPG, for example. However, if you want to add pages without content initially, but you will need to enter content in the future, you can use any of the first three add-ons.


Leave a Reply