Whatever the type of your website, you will often feel confused between using different colors, shapes, and phrases in different parts of the site. If you run an online store , for example, you want the color of the purchase button on your site to be the color that brings you the greatest number. of clicks on it, and if there is a membership system on your site, you would prefer to use the most appropriate phrase for the registration button to increase the probability of the user responding to your urging him to register on your site.
To make it easier for you to be confused between using one or more elements, you can use A/B testing.
In this article, we will explain this test to you, and teach you how to perform it on your WordPress site using an easy-to-use tool provided by Google.
What is A/B testing?
A/B testing, or sometimes called split testing, is a way for you to make data-backed decisions about anything that appears on the front end of your website, from the colors of buttons and titles, to calls to action. And ending with designing the site as a whole, by displaying two different versions (or more) of the web page to visitors and seeing how they will interact with each one of them, and then determining which of the two versions is better.
That is, instead of having to guess which of the two phrases will bring you the largest number of profits, or which of the two templates visitors will like the most, or which color you will use for the titles on the site, you can conduct an A/B test, and make the right decision based on the real data that you will obtain from Test results after completion.
Benefits of conducting A/B testing
There are many benefits that A/B testing can provide to website owners depending on how it is set up, and among the benefits of the task are:
- Increase the conversion rate : You can get the most out of your site visitors by conducting A/B tests to find out which variables are best at urging the user to take the action you want them to take, and then adopting them to increase the number of conversions, whether they are purchases or otherwise.
- Improving the user experience : You can address the points on your site that make the user experience poor and make it difficult for him to reach what he wants and achieve his goal, whatever it may be, by conducting split testing to determine the best method that facilitates the visitor’s access to what he wants.
- Reducing the bounce rate : There are many reasons that lead to a high rate of visitors bouncing from the site, such as bad design, difficult navigation , and using a lot of difficult terms. Conducting A/B tests can help solve these problems and thus reduce the bounce rate.
- Modifying the site design : By using split testing, you can determine whether the modifications you make to the site design are useful, regardless of their size, whether they include the color of a button on one of the site’s pages, or an entire page, or even all of the site’s pages.
It is worth noting that you must continue to conduct A/B testing on your site, because the benefits and goals that it helps to achieve must continue to improve in order for the site to remain successful and at the forefront of sites in its category.
Types of A/B testing
There are many types of split testing that you can use to determine which option is best for any aspect of your website, and some offer options that others do not. Common types of this test include:
1. Classic A/B testing
In this type of test, two pages that differ from each other in one or more ways are displayed to visitors within the same URL. For example, one page displays a red button to some visitors, while the other displays a green button to other visitors. You can also display more than two pages to visitors. In the previous example, you can display the button for a section of visitors in blue as well.
2. Multivariate testing (MVT testing)
This type differs from the standard type in that you can change the properties of a group of elements on a web page, and create pages that differ from each other so that you have a group of pages that include changes in all possible ways. To illustrate the idea of multivariate testing, we give the following example.
If you want to measure the impact of changing two things on a page on a rate, such as the color of the title text and the phrase “subscribe”, you would have two variables, and for each variable you would have two or more versions. The variables will be the color of the title text and the words of the phrase that the subscribe button carries. As for the copy variables, the first will have two or more colors, and the second will have two or more phrases.
Let’s say you want to test two versions of each variable for simplicity. For the first variable, the text color will be either (red) or (purple), and for the other variable, the button will carry the words (Start a demo account) or (Subscribe now), and thus you will have here 4 pages that differ from each other and are characterized by the following characteristics:
- The first page : the color of the title text is red, and the phrase for the subscription button is (start the trial account).
- The second page : The color of the title text is red, and the phrase for the subscription button is (Subscribe now).
- The third page : The color of the title text is purple, and the phrase for the subscription button is (start the trial account).
- The fourth page : The color of the title text is purple, and the phrase for the subscription button is (Subscribe now).
Multivariate A/B tests enable you to determine which versions of variables are best, and by reading the results you can see how each variable affects the number of conversions or whatever goal you are testing to reach.
3. Redirect test
In this test, visitors are divided and redirected to two different URLs instead of changing some elements on the page and showing them to visitors in two or more different ways. You can create two pages that are significantly different from each other and aim to achieve the same goal, each with a special URL. It then directs some visitors to one of these two pages, and the rest to the other page.
4. Multi-page testing
A multi-page test is an A/B test that is run across multiple pages that are linked together, such as the pages that a visitor visits when he makes a purchase or registers on the site, where multiple elements are changed along the path that the visitor takes when he makes the process, starting from the first page in question. The process, ending with the last page confirming his success.
In the beginning, it is preferable to conduct standard A/B tests, and after you have the necessary experience, you can move on to conducting more complex tests, such as multivariate tests and multi-page tests. We will explain next how to conduct a standard A/B test in the WordPress content management system based on On the Google Optimize tool.
Conduct A/B testing in WordPress
In fact, there are many tools through which you can do A/B testing on a WordPress site professionally, but we believe that the best free tool you can start with is Google Optimize, although it does not have a plugin that directly integrates it with the WordPress system. However, it is still easy to use.
To use the Google Optimize tool to conduct A/B tests on your WordPress site, you must first connect your site to Google Analytics, and you can do this by applying one of the methods in our comprehensive article ( Explanation of installing Google Analytics for your WordPress site ), in which we explained different easy-to-apply methods. To link the site to Google Analytics.
1. Create and set up a Google Optimize account
After linking your site to Google Analytics, you will have to go to Google Optimize and create a free account using the same email address that you already use for the Google Analytics account to which you added your website.
To create a free account in order to use the Google Optimize tool, go directly to the tool’s website by clicking here , then log in to Google using your email address for the Google Analytics account added to the site.
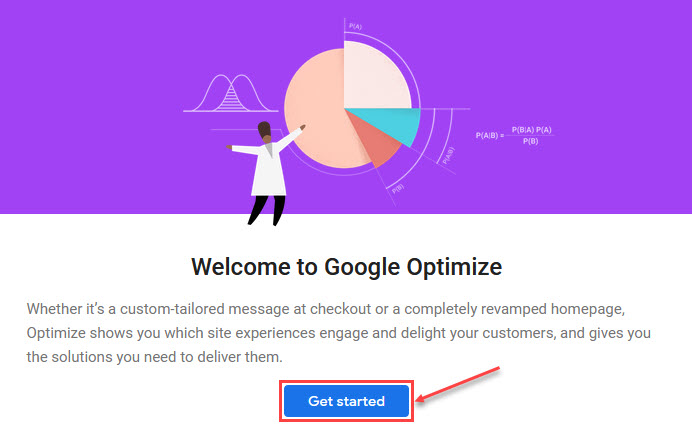
After logging into your Google account, you should see the Google Optimize home page. To start preparing the tool for use, click on the (Get started) button.
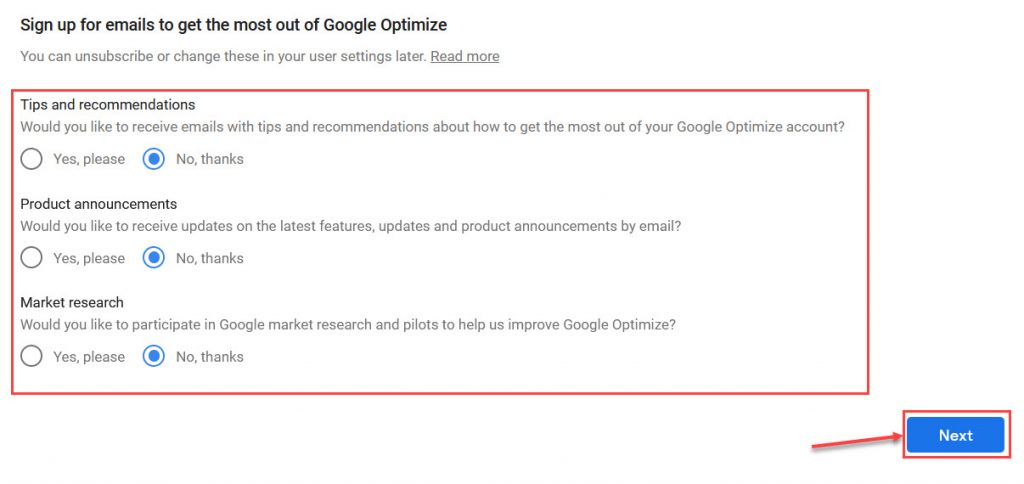
You’ll be shown a set of optional questions related to getting tips, notifications, etc. You must answer these questions by choosing the option that corresponds to what you want, then click on the (Next) button at the bottom of the page.
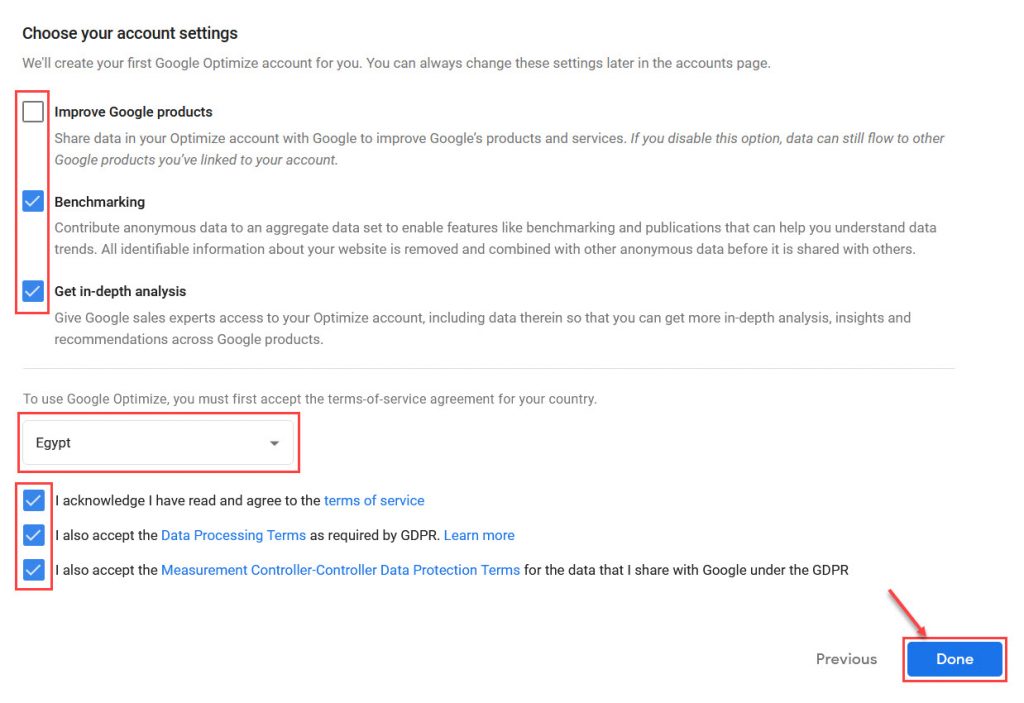
After that, you must specify the account settings, agree to the terms of use of the service, select your country from the next page that appears, and then click the (Done) button.
Thus, you have finished setting up your Google Optimize account, and you must link it to Google Analytics in preparation for starting to use the tool to create A/B tests on your WordPress site.
To do this, click on the word ( Settings ) at the top of the page to show the tool options, then click on the (Link to Analytics) button located within the Measurement section .
You will now see a section titled (Link a Property) asking you to choose the site you want from your sites added to your Google Analytics account. Choose the site you want from the (Select Property) drop-down list, then click the (Link) button at the top.

Within a few seconds, the site will be added to the account, and its data will be listed in the Measurement section where the (Link to Analytics) button was located.

But you still need to insert custom code that the tool provides to you on the pages of your website that you want to test. You will find the code that you must add to your website pages in a text box under the (Setup instructions) section, which is located under the (Measurement) section.
Copy the code and add it within the head tag within the HTML code of your WordPress website through the template editor, which provides you with the ability to do this manually, or by using the Insert Headers and Footers add-on , which provides you with the ability to do this easily by placing the code you want to add. In the designated field within the tool options, then click on the (Save) button.
With this, you have completed the process of creating and setting up a Google Optimize account, and you can use it to create A/B tests and benefit from the results you get from them.
2. Use Google Optimize to create an A/B test
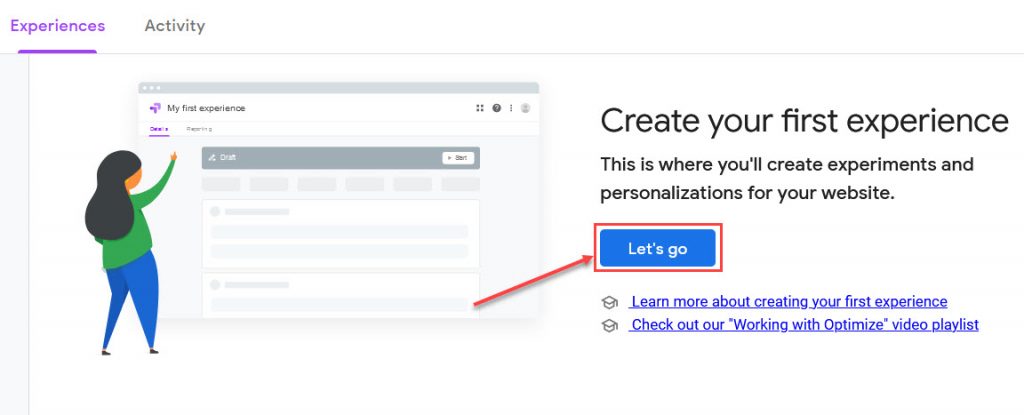
After creating and setting up a Google Optimize account, you will be able to start creating your first A/B test by clicking the (Let’s go) button located under the (Experiences) tab on your account page.
When you click on the (Let’s go) button, a window will appear asking you to enter and specify some information about the test. Enter an appropriate name for the test in the (Name) field, then place the link to the page where you want to apply the test in the (URL of the page) field below it, then choose the type of test you want to create, then click the (Create) button at the top.
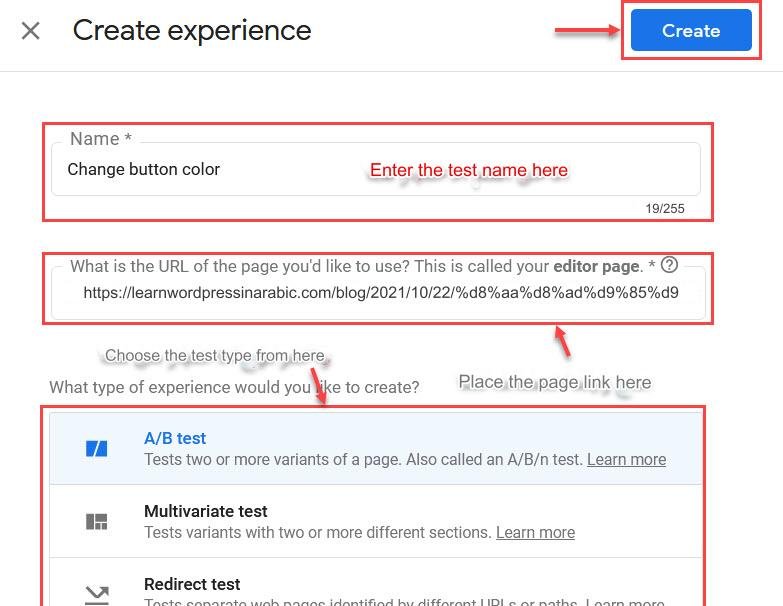
After creating the test, you will go to its page, and you must create the variables whose effect you want to measure from that page, then set the goals and start the test so that after its completion you obtain the results that enable you to make the appropriate decision.
On the test page, click on the (Add Variant) button, then enter the name of the variable (for example: the button color is red), then click on the (Done) button. The variable you created will appear in the Variables section on the test page. Each variable in this section represents a version of the page on which we are conducting the test. The new variables do not differ from the original version of the page in anything when you create the variable, but you must specify the properties that You want to change it to create a new version of the page that is different from the original.

You must add variables to the number of versions of the page different from the original version that you want to create and display to visitors, and then you must modify each variable separately from the other through a dedicated editor, so it can be used by clicking on the ( Edit ) button located in the variable line within Variables section on the test page.
Note: When you click on the ( Edit ) button, which is supposed to take you to a page that enables you to make the modifications you want to the original version of the page, the site will ask you to use the Google Chrome browser if you are using another browser, and if the Optimize Chrome extension is not installed on it. browser, you will be asked to install them. Do what the site asks, then click the button again to go to the editing page.
You can easily make any modification you want within the editing page, as the page includes many tools that facilitate the task of modification, and there are also many options that facilitate moving between different versions (variables), undoing changes, and so on. After you finish making the modifications you want, you must click the ( Save ) button.
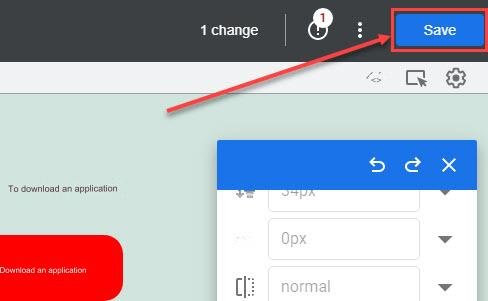
It is worth noting that in addition to making modifications to the appearance of elements on the page, you may have to make modifications that help you track what visitors do on the page in order to know the effect of the change you made on the way the visitor behaves.
After making the modifications you want to all versions of the page, you must select the objectives on which you seek to study the impact of the changes you have made from the Objectives section on the test page itself.
There are two ways to define goals. The first method depends on choosing the goal from the list, which is the easiest method, but it only provides the ability to specify a goal from the default goals such as bounce rate, number of page views, and session duration, or from the goals that you previously created in your account in Google Analytics .
The second method enables you to define and create a custom goal yourself, such as clicking on a button on the page or something else, but explaining it requires more than just a paragraph because there are many types of events that the user can do on the page, and it also requires creating a trace for the event. In Google Analytics, so we will not explain this method here.
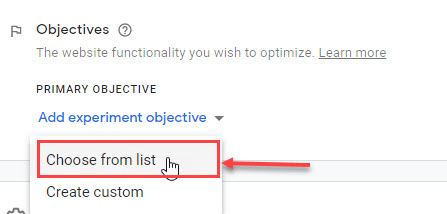
To specify a goal in the first way, you must click on the (Add experiment objective) button, then click from the drop-down list that appears on the (Choose from list) option, as the default and pre-set goals will appear to you, and you can choose from them.
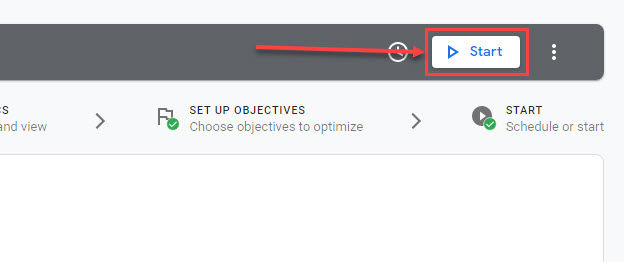
Then, after selecting the goals on which you want to study the impact of your changes on the page, you will be able to start the test by clicking on the (Start) button at the top, and then re-clicking the (Start) button again in the dialog box that appears.
After running the test, you will be able to follow the results on the test’s “Reporting” page, which provides all the information you will need to determine which version of the page is best for the goal you specified (the version that is best at pushing visitors to perform the task required to achieve the goal), after a sufficient period of time has passed and the tool has been collected. Information required to determine which version is best with great accuracy.
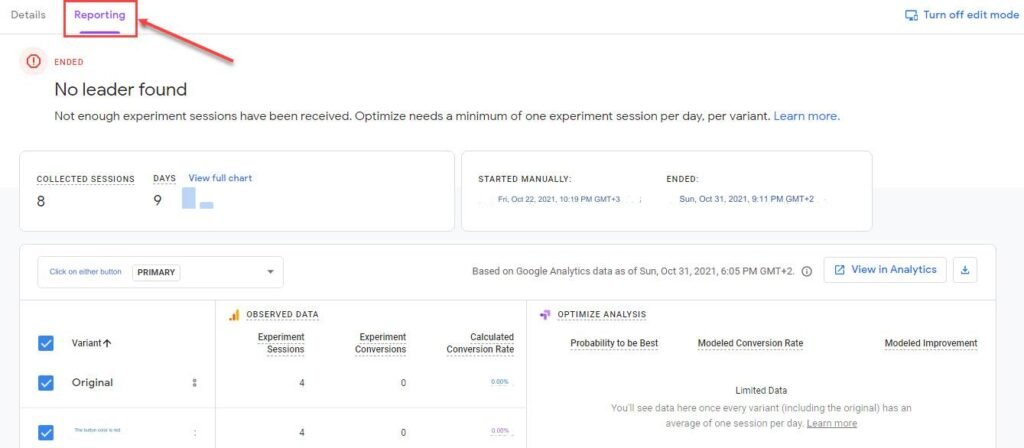
After knowing the best version of the page, you can adopt it to appear to all visitors instead of only a specific percentage of them, thus ensuring that you get greater benefit from the visitors who visit the page.
Thus, we have finished explaining A/B testing and its benefits, introducing you to its different types, and giving you a detailed overview of how to create it in WordPress. In conclusion, we point out that the Google Optimize tool that we explained here provides many other powerful options related to split testing that we did not mention. In this article, you can try it and use it to see how powerful it is and the benefits it can provide to the website.


Leave a Reply