WordPress website owners realize the importance of staying in constant contact with customers and members who subscribe to the site, and email is considered one of the best ways to do this.
There is no doubt that you, as a website owner, have previously faced problems with the arrival of your e-mail messages, such as them entering the spam folder, or not arriving at all.
So, in this article, we will guide you on how to avoid these problems and ensure that your email messages arrive safely and on time by using an SMTP server.
The importance of email access
Whether your WordPress site is an information blog , or an online store that sells goods or services, you need to use email to either:
- Register a new user on the site or activate his subscription
- Change the member’s password or attempt to recover it
- Receive alerts about comments or purchase requests
- Send promotions, newsletters and invoices
Why do emails not reach the recipient’s inbox?
By default, WordPress uses the PHP email service, known as PHP Mail, which is a function built into the PHP language that does not use a dedicated email server.
With the many security measures used by well-known email services such as Yahoo, Gmail, Outlook, etc., your emails sent via PHP often fail to pass these security obstacles. They are either delayed in arriving, or thrown into the Spam folder, or Access is originally denied.
For this reason, we advise you to dispense with the PHP function in sending email and use another, more efficient method.
Send email using SMTP
Initially, email can be sent and received on WordPress sites through three methods:
- Using PHP Mail that we talked about earlier.
- Using an off-the-shelf external server or a popular email service such as Gmail or Yahoo! Or Outlook, Mailgun, or SendGrid.
- Send email via an SMTP server dedicated to your site, with a personal email address. You often pay for this service in advance, as it is available through most hosting sites, and this method is the topic of our article today.
What is an SMTP server?
SMTP stands for Simple Mail Transfer Protocol.
It is an application used by mail servers to send and receive e-mail, and it is relatively safe from hacking, and from corrupting your site if you make a mistake in configuring it. It is also guaranteed to perform for sending and receiving e-mail messages.
Advantages of SMTP server
Using SMTP in conjunction with email from your hosting site will provide you with a server with the following specifications:
- Free : The server and email used are provided with most hosting sites, so you will not need to pay an additional fee to use them.
- Custom : So you can use your name or website name after (@), such as: Support@Example.com. This contributes to strengthening your brand, and gives you a more official character in your correspondence.
- Relatively secure : SMTP servers have security settings (often TLS) to encrypt important and sensitive data being transmitted such as passwords or payment details.
- Guaranteed : Properly configured SMTP servers can bypass security barriers employed by popular email servers, and the latter recognize them more easily, ensuring that emails are received and received as intended.
- Easy to set up : You only need to transfer some data from the hosting site to your site.
Disadvantages of SMTP server
Also, using an SMTP server is not without some disadvantages, such as:
- Saving your email username and password on the WordPress control panel constitutes a security vulnerability that hackers could exploit.
- Having to limit yourself to one email address in all WordPress emails
- Linking email to the hosting site exposes you to it stopping working if the server stops for any reason
- Some mailers that use SMTP require that you change your email password in the WordPress control panel whenever you change your email password.
- Some hosts limit the number of emails sent through their servers
How to set up an SMTP server to send email
You can set up an SMTP server to send email through an external plugin that makes it easier to connect your WordPress site to the email and server provided by your hosting.
There are many plugins you can use to set up an SMTP server for sending email on WordPress sites. But in our article, we will focus on a reliable and popular plugin: WP Mail SMTP from WP forms .
You can install the WP Mail SMTP plugin – like other WordPress plugins – through the WordPress control panel by going to the ( Plugins ) tab and choosing ( Add New )
Then search for the plugin in the search box to find that it appears among the results for you, then install and activate the plugin as we explained in the article Steps to install a WordPress plugin and activate it on your site correctly .
Then, after installing and activating the add-on, we move to the next step, which is setting it up.
Setting up the WP Mail SMTP plugin
To access the plugin settings page, go to the WordPress control panel, then choose the name of the plugin directly from the side menu in the WordPress control panel, and click on the Settings option.
After accessing the Settings page, open the Setup Wizard by clicking on the Launch Setup Wizard button

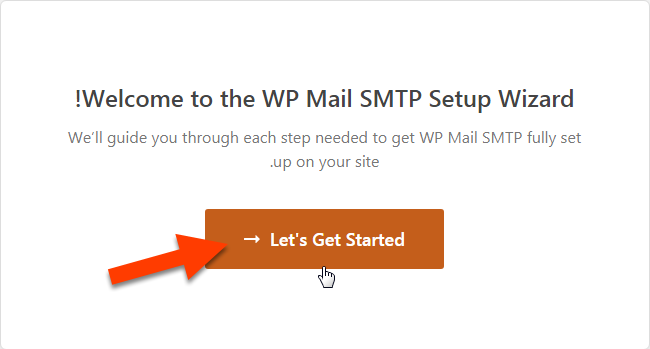
Wait for the setup wizard to run, then the following page will appear:
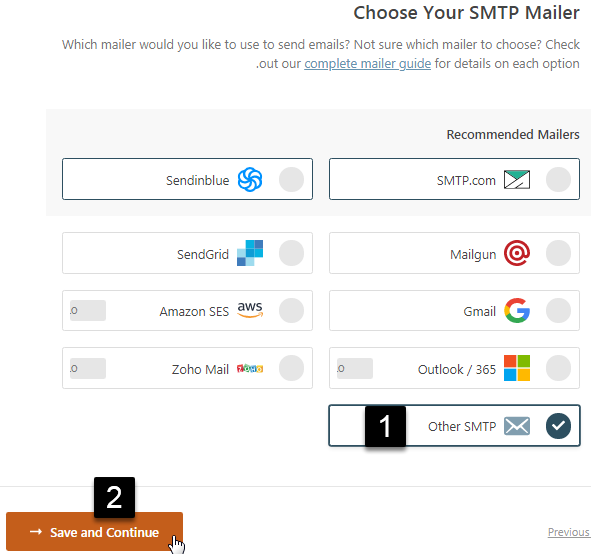
Then choose the digital sender ( Mailer ) that you will use to work with the add-on. The add-on provides you with several options for sending. Choose from the free sender option Other SMTP, then click Save and Continue
The following window will appear asking you to set up and fill out your custom email information:

To obtain and fill out this information, you must go to the second stage in setting up SMTP, which is to fetch the necessary information from the hosting site.
Obtaining email data from the hosting
After that, go to the control panel (CPanel) of the hosting site you are using, and search for your custom email account, or create one if you have not done so before.
Since the Cpanel control panel interfaces are not much different, you can follow the following steps to create your own email:
Go to the Email Accounts section in Cpanel: in our example, it can be accessed through the following destination:
cPanel >> Home >> Email >> Email Accounts

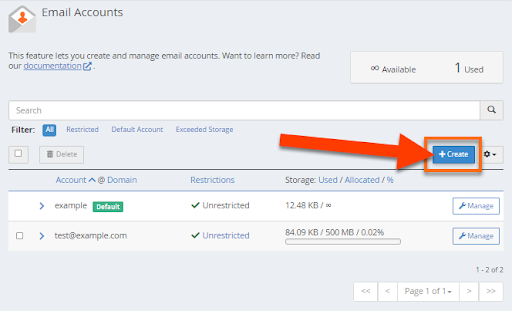
Then, after logging in to your email accounts, click on the Create+ button .
The page for creating a custom email address will appear, asking you to fill in the following information:
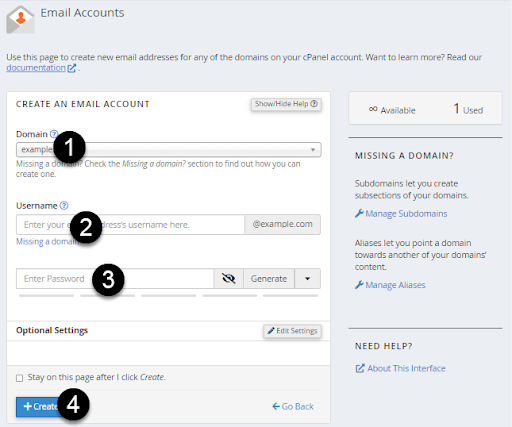
- Domain or Domail, which in our example is wordpress.hichem.com
- The username that the email address begins with (before @): In our example, it is Support
- Email password
- After filling out the required data, we click on the (Create+) button and thus we have created the custom email address that we will use on the site: Support@wordpress.hichem.com
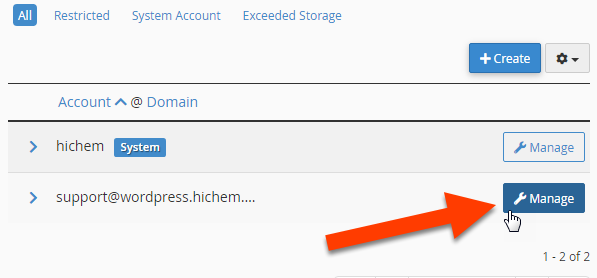
Then we need to obtain the rest of the email data in the hosting, by returning again to the Email Accounts page, then clicking on the Manage button next to our email.
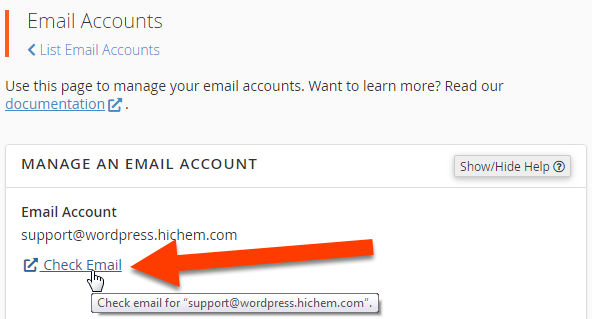
Then we click on the Check Email link as shown in the following image:
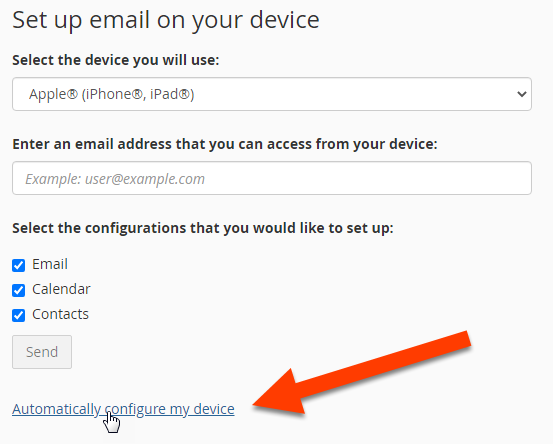
Finally, we choose the link Automatically Configure My Device
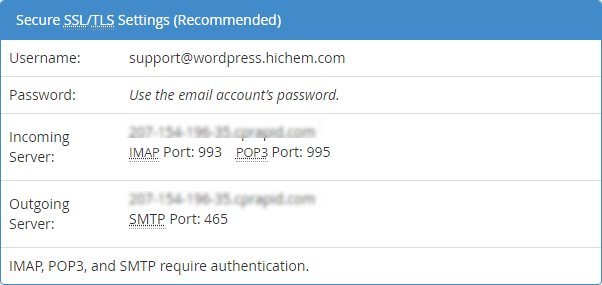
Here a window will appear containing the information we need (under the Mail Client Manual Settings section
These settings are the parameters of the setting with a layer of protection.
The following image is for unprotected settings.
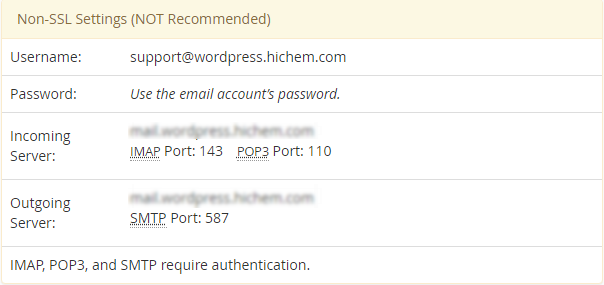
Of course, we recommend using protected data because it provides greater security. We also need to copy the host (written next to the incoming server or outcoming server) and the port number for this email.
After we obtain the required data for our email, we return again to the setup wizard in the control panel of our WordPress website and paste this information.
On this page we also need to select the type of encryption and we will choose (TLS) and enter the username and password that we used when creating this email as shown in the following image:
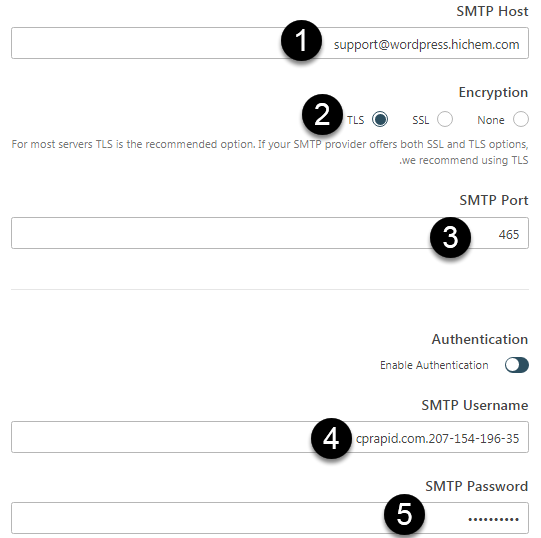
Then we fill in (sender’s name) and (e-mail address) and activate the other options that appear to us according to what suits us and click Save and continue as shown in the following image:

You will then see a group of additional features or features that you can activate in the email sending service as follows:
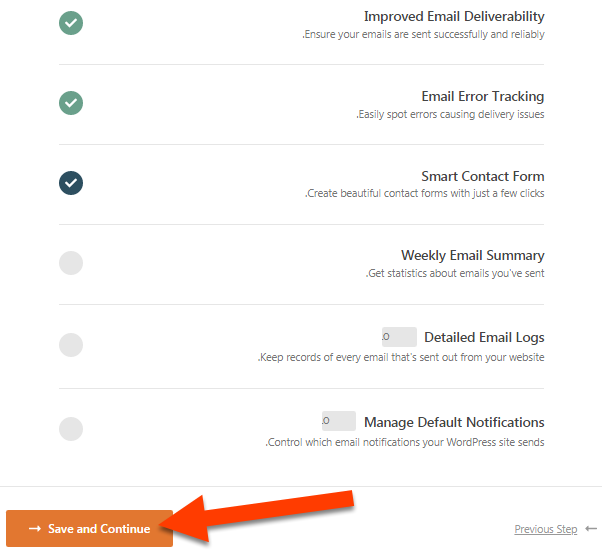
- Improved Email Deliverability means (improving message delivery) and is a feature that ensures the success and security of accessing and receiving emails.
- Email Error Tracking is a feature that tracks message delivery errors to make it easier to identify them when they occur and resolve them quickly.
- Smart Contact Forms to create stylish contact forms in just a few clicks.
- Weekly Email Summary Creates a weekly summary of the emails you’ve sent.
- Detailed Email Logs is a feature that gives you a detailed report on all the messages you sent from your website.
- Manage Default Notifications To manage and select the notifications that your site sends via email.
Then, after choosing the features that suit you, click the Save and Continue button
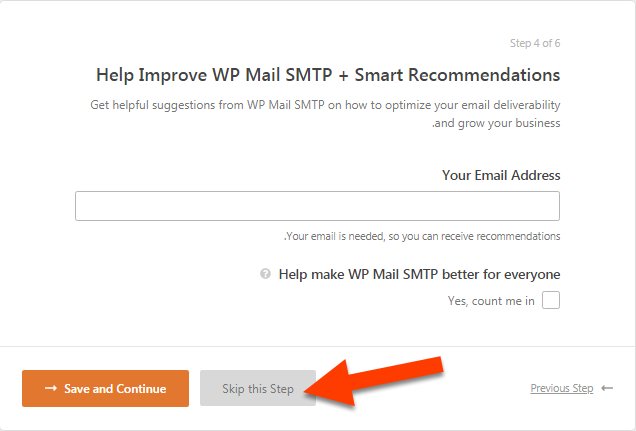
The following page will appear, and here you can fill in your personal email to help the plugin development team improve the plugin, or receive their recommendations to improve your use of it. You can also skip this step by clicking the Skip this step button
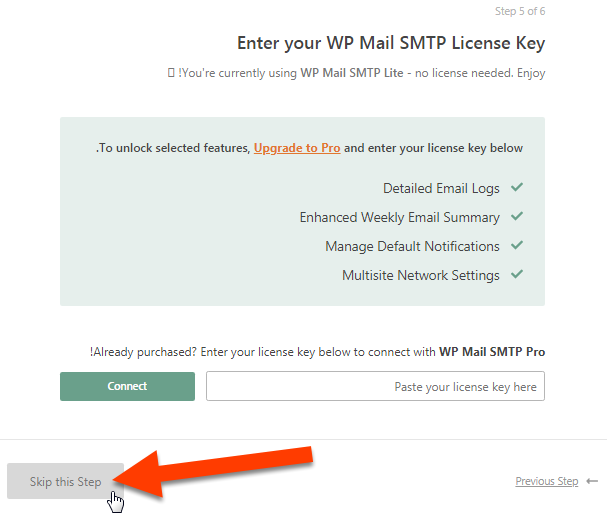
The next step requires you to purchase an activation key to obtain the paid version with the full features of this add-on. You can also skip it by clicking Skip this step
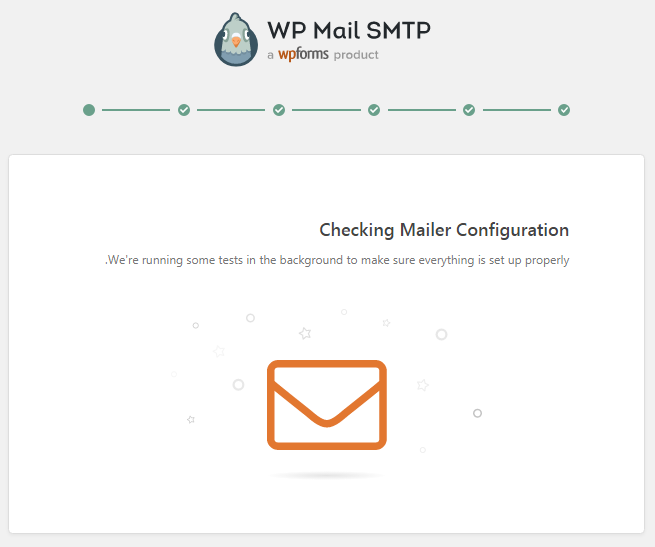
You will then reach the sixth step, which is to perform an automatic check to ensure that you have set up your email correctly.
If there is anything wrong with the settings, the following page will appear:
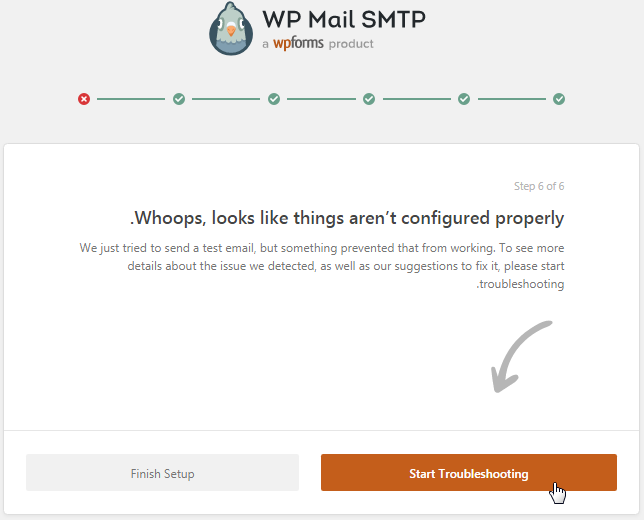
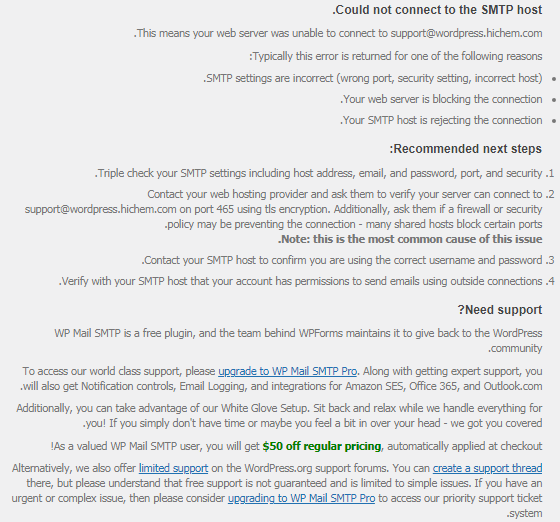
By clicking on the Start Troubleshooting button , you will be taken to the Test Email page in the extension, and you will get a set of suggestions to try to correct the error in the settings.
Most of the suggestions here focus on contacting your hosting site to ensure your email setup is correct, allowing your firewall to access it, and double-checking your host and port number.
If you have configured SMTP properly, you will see the following image telling you that everything was done successfully:
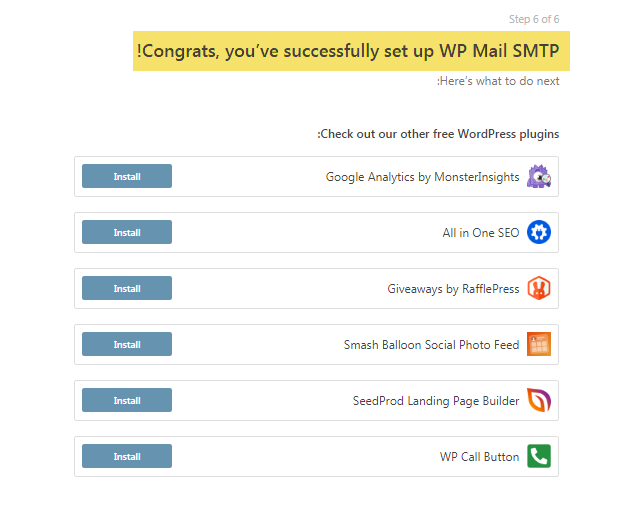
All you have to do now is test the email sending process by clicking on the ( send a test email ) button indicated by the arrow in the previous image to send an email message and test it using the SMTP server you created.
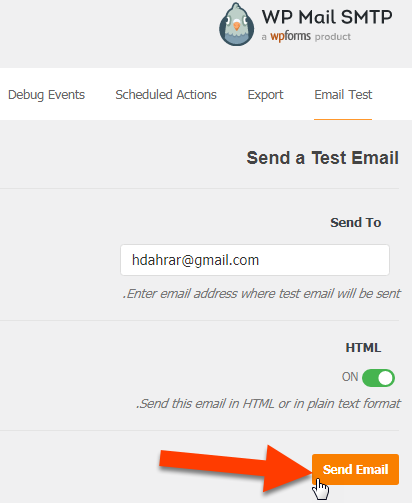
This will take you to the Email Test tab in the plugin settings on your WordPress dashboard.
Fill in the first field ( send to ) with the email address where you want to receive the verification message, and click Send email (here you can enter any email you have access to)
The following image will appear confirming that the sending process was successful
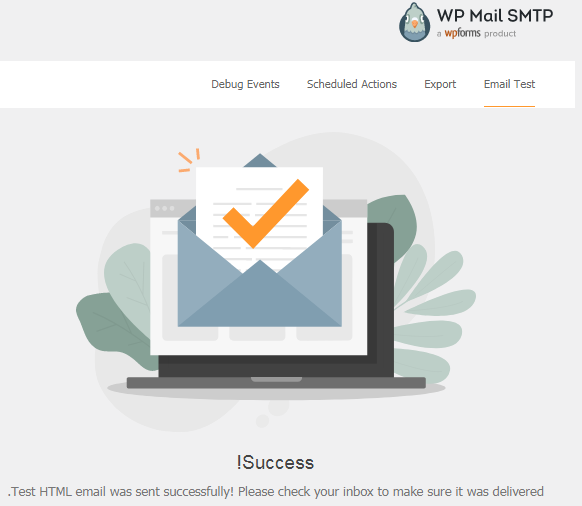
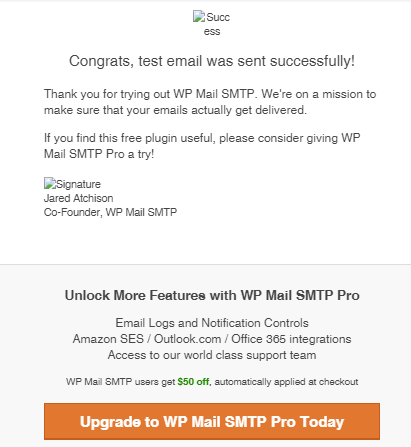
Congratulations that’s it! All you have to do now is go to the email address you entered to make sure the message arrived.
In the end, we remind you that the simple mail sending protocol (SMTP) linked to your hosting server may not be sufficient to bear the requirements of a commercial website that frequently communicates via e-mail, but it is certainly better than PHP Mail, as it is free, easy to set up, and fast and has guaranteed performance.
That is why we invite you to try using it on your WordPress site to communicate with your customers if you are dealing with a simplified form of sending newsletters to ensure that your messages arrive in their receiving inbox.


Leave a Reply