Recurring payments are one of the most popular payment methods used when selling virtual products in online stores. If you have a store based on selling virtual products such as hosting, domains, or other products that need to be paid for periodically and at intermittent intervals, then recurring payments are the best way for that, as they help you obtain permission from the customer to withdraw value. The product will automatically renew when it is time to renew your payment or subscription.
Therefore, in this article, we have provided a complete explanation of the importance of adding recurring payments in the WooCommerce store, explaining how to add them through the most famous payment service providers, and how to link the payment service provider with the product you want by adding (WooCommerce Subscriptions), which works to transform your product from A one-time subscription product over a period of time that you specify. Follow us for a complete and detailed explanation of recurring payments.
Recurring payments and their types
Recurring payments (or recurring payments) are a method of collecting money through which you can obtain permission from customers to withdraw a specific amount from their accounts automatically and periodically without consulting them, in exchange for obtaining a good or service provided.
Once customers grant your store permission to receive recurring payments, the amount will be deducted automatically and at specific time periods until the customer cancels the permission, or until his subscription to the requested service or item ends.
For example, this method is used in electronic stores that provide digital services that require a monthly subscription, and when the customer purchases the service, the price of the service will be automatically deducted from the customer’s account monthly without consulting him until he cancels the subscription himself.
Types of recurring payments
There are two basic types of recurring payments:
1- Regular recurring payments: In regular recurring payments, the same amount is paid monthly on a fixed basis without any change. This is, for example, when subscribing to a fixed service, such as subscribing to sports clubs, or subscriptions to paid content platforms, etc., where the same amount is paid monthly.
2- Variable recurring payments: In variable recurring payments, the payment price is calculated based on the amount of customers’ use of the service you provide. For example, in our daily life, water and electricity bills are paid on a variable monthly basis based on the volume of our monthly consumption. This is the best example of variable payments and you can apply it to the electronic services that you provide on your store.
Types of sites that use recurring payments
The recurring payments feature is often used on websites that provide virtual services, and the most prominent of these sites are:
- Subscription sites : Payment is made on a recurring basis for subscribing to services, such as e-book services, hosting and domain services, or syndicate subscriptions, and all other types of subscriptions that are paid at intervals of time.
- Membership sites : In this case, membership subscriptions are paid, such as club memberships and paid professional organization memberships.
- Donation sites: On these sites, monthly donations are paid periodically to charities or humanitarian organizations.
- Expert recruitment services sites: where sums of money are paid in exchange for hiring an expert to solve a problem you have, whether it is in legal services, child care, private lessons, or others.
The importance of enabling recurring payments in WooCommerce
As we mentioned in the previous paragraphs, on sites that rely on monthly payment services or need to receive sums of money at regular intervals in exchange for the services they provide, recurring payments are the most appropriate solution to maintain their current customers and collect money from them, so if your store on WooCommerce is of this type, it is preferable to enable It has a feature of recurring payments because this adds the following features to your store:
- Complete electronic invoices automatically without the need for any manual intervention from you or the customer.
- Save time as you will not have to manually create your invoices every month and wait for the customer to accept the payment process.
- Reducing payment delays by customers, as the payment process will occur automatically every regular period of time.
- Improving the experience of existing customers, and retaining them since customers will not be bothered to checkout.
In the following paragraphs, we will provide you with a full explanation of the practical steps on how to add recurring payments to your WooCommerce store.
Steps to accept recurring payments in your WooCommerce store
Recurring payments on WooCommerce stores are supported by a set of custom add-ons that enable you to automatically receive recurring payments from your users.
But to be able to accept automatic payments you need to follow two basic steps:
The first step: is to search for a payment service provider. There are many payment gateways or payment service providers, the most famous of which are PayPal and Stripe , so we will explain how to subscribe to each of them and you can choose the method that suits you.
The second step: is by integrating the payment service provider with your site, and activating automatic payments through it.
Here is a detailed explanation of these two steps:
The first step is to register with the payment service provider
Here we will explain two types of payment service providers, or what are known as payment gateways: Stripe and PayPal, which are the most famous and used types of payment gateways in electronic stores. Read also: Payment methods in WooCommerce stores and how to choose the most appropriate method .
1- Register on the Stripe payment gateway .
1. Log in to the official website of the Stripe service portal, and register a new account through the following link: Register with Stripe.
2. Enter your email, full name, select the country for your business, then enter the password, and finally press the Create account button as in the following image.
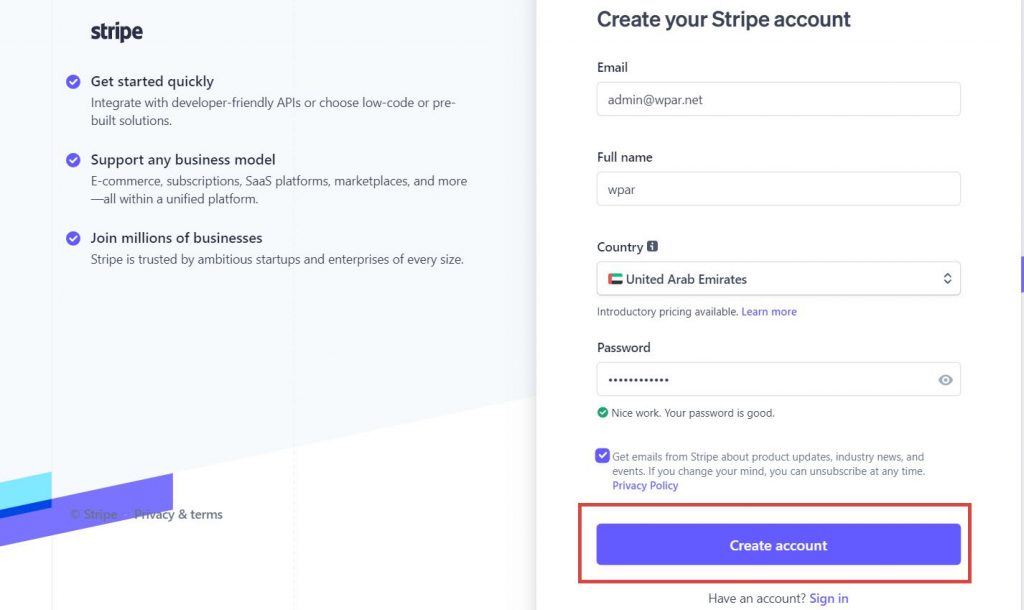
Note: You must select a country supported by Stripe, as the Stripe online payment service is supported by companies in 46 countries. You can learn about them through the following link. If the country of your business is supported, then you can accept payments from anywhere in the world.
3. You will be transferred to your account control panel, and you must first confirm your email so that you can continue setting up the account.
4. Then you must activate your account (Activate your Stripe account) and enter all your business data, as well as enter the data of your bank account to which you want to receive any transfers you receive from Stripe.
It should be noted that you must enter a phone number from the same country that you initially entered when registering for your Stripe account. You also need to enter the tax data for your activity and the link to your website or online store so that you can activate the account correctly. All account data will be verified after adding all your information, and after verifying it, the account will be opened.
5. Finally, you are asked to upload documents proving your identity (official card or passport) and proving your address.
6. After completing the account setup, you will receive API keys for the portal that you will need when setting up payment in your online store.
2- Register on the PayPal payment gateway
1. Log in to the official PayPal website from here
2. Click on the “Register” button so that you can create your own account on the site.

3. Now you must choose the type of account you want to create. The account must be a commercial account (PayPal business account) so that you can link it to your online store)
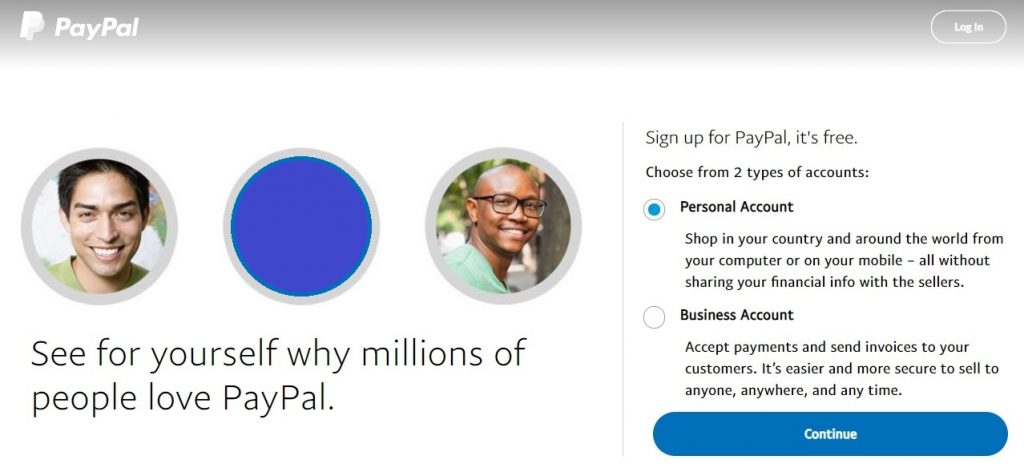
4. Here we selected a business account, then clicked the Continue button to continue.
5. Now enter your email.

6. Now the site will ask you to enter the password you want for your PayPal account. Enter a strong password and click the Continue button.

7. Now you must enter your business data. You will be asked to enter (name, phone number, business name, activity address, activity description, and also the official currency you want in your account) and enter your personal data to secure your account.

8. After filling out all the required data, click on the Agree and Continue button, and now you must confirm your email so that you can use your PayPal account through the link that you will receive on your email to complete the process of creating your account.
9. After clicking on the account confirmation email link, a page will appear consisting of several procedures that you must perform to complete the account setup, the most important of which is the step of linking the PayPal account with your bank account so that any amount sent to you via PayPal will be transferred to this account.
9. You can do this from the main menu of your account page on the site. Choose the Payment and Receive Payments tab. A list of options will appear. Choose bank accounts and bank cards.
10. Click on link a new bank account (your bank account must have at least $2 in order to be able to link it successfully)

11. Enter your bank account information, and then PayPal will complete the linking process within 24 hours.
12. Then you must contact the bank’s technical support and request the PP code from the bank, and then return to your account and enter the code in the box on the bank accounts page within the bank account that you added as in the picture.
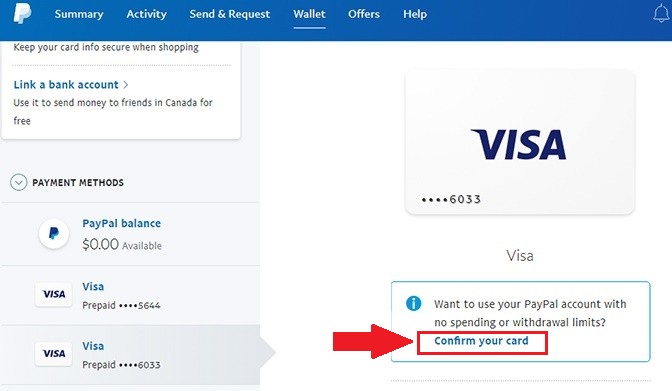
13. With this, you have successfully activated your PayPal account and linked it to your bank account.
Note: PayPal services vary from one country to another regarding activation and restrictions imposed on them. In most Arab countries, the account must be linked to a Visa bank card (physical or virtual card) in order for the account to be confirmed, the PayPal service to be activated correctly, and to be able to receive funds through it.
Step 2 Add recurring payments to your WooCommerce store
There are many add-ons that help you add the recurring payments feature to your site or store, but unfortunately most of them are paid add-ons, so in our explanation we will rely on two add-ons. The first is paid, which is the official WooCommerce Subscriptions add-on from the WooCommerce store and its price is $199 , but it is the best add-on currently available. Then we will explain to you. A free alternative add-on with fewer specifications but that meets the basic requirements is the Subscriptions For WooCommerce add-on. Here is how to use them with detailed steps.
Explanation of WooCommerce Subscriptions for activating recurring payments
Purchase the official WooCommerce Subscriptions plugin from the WooCommerce Store here
Now go to your site: Add-ons > Add new and choose Upload add-on, then upload the add-on you purchased.

Now add a new product through WooCommerce as usual, and add the data for the product for which you want to activate recurring payments.
Scroll down to the Product Data option and you will find a drop-down menu. Choose Simple Subscription

Activate the Default Product button to specify that this product is virtual.

Choose Variable Subscription if your product has multiple options, for example if you want to offer three subscription packages from your default product (Normal Package, Medium Package, and Professional Package) with each package at a different price.

Then specify the price of your product and the time period for which you want to activate recurring payments (daily, weekly, monthly, yearly or any other period you deem appropriate).

You can also cancel the payment expiration period by setting the option value to Expiry After: equal to No Expiry if there is no expiration date for recurring payments for this product, or specify a specific expiration date for it at which time the process of withdrawing payments from the account will be automatically stopped. The client immediately upon reaching the specified date.
You can also activate the free trial feature for the product, whereby the price of the product will not be calculated during the free trial period that you specify. This is useful if you want to give customers an opportunity to try your product before actually purchasing it. You can of course turn this feature off if you don’t want it.
With this, you have finished adding the product to your store and preparing the recurring payments process for it. Now publish the product in your store.
Step Three: Connect your payment gateway through WooCommerce Subscriptions
Now let’s remember what we have done so far:
In the first step, we created our own account in the payment gateway, and in the second step, we set the default product on which we will activate the recurring payments feature. All that remains for you is one final step, which is linking your payment gateway with the WooCommerce Subscriptions add-on so that you can receive all payments instantly. Directly on your bank account or credit card that you have linked to the payment gateway.
Go to your WooCommerce store control panel > choose Settings > Payments > PayPal Checkout and activate it through the activation key and then click on the Manage button

Now you will be taken to the link page with PayPal. Click on the (Connect with PayPal) button as shown in the picture.
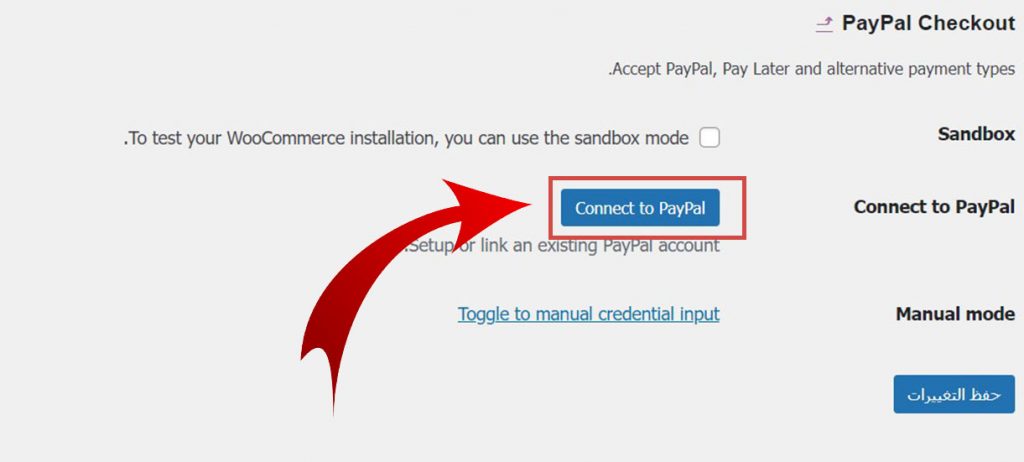
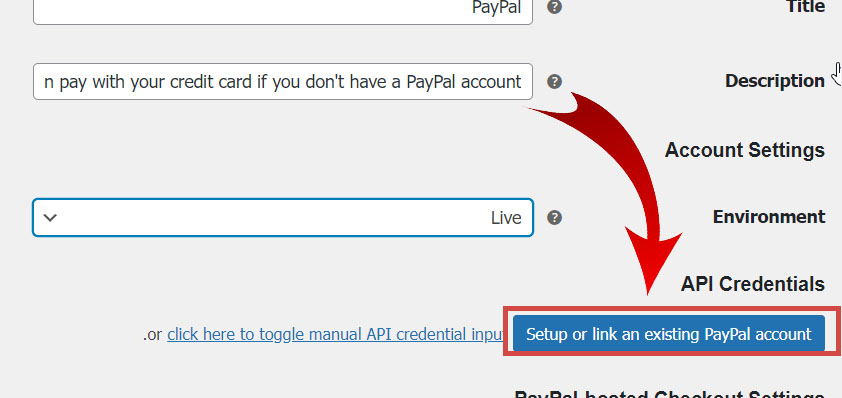
Click on the Setup or link an existing PayPal account button and then you will be transferred to the PayPal website. Enter your data to complete the linking process, and thus you have added the PayPal service provider to your store.
You can follow the same steps to add a Stripe gateway, but in the second step, choose Stripe instead of PayPal. You can also activate the Stripe and PayPal payment gateways together
Use Subscriptions For WooCommerce
In the previous explanation, we explained the official add-on from WooCommerce, but due to its high price, we will explain to you in this paragraph the best free alternative to it, which is the Subscriptions For WooCommerce add-on , which is one of the few add-ons that gives you most of the features of the WooCommerce Subscription add-on itself. Here is how to use it.
1. Install the plugin by going to Plugins > Add New > Subscriptions For WooCommerce
2. After installing and activating the add-on, you will be directed directly to the add-on settings page. First, select the text you want to appear above the Add to Cart button and the Order button as in the picture. Then click the Next button to continue.

3. Now you will be directed to the page to create a product that accepts recurring payments. You first need to add the product name, description, price, and renewal period.

4. Now link the add-on with the payment gateway. Choose the payment gateway you want, whether Stripe or PayPal, and here we will choose PayPal.
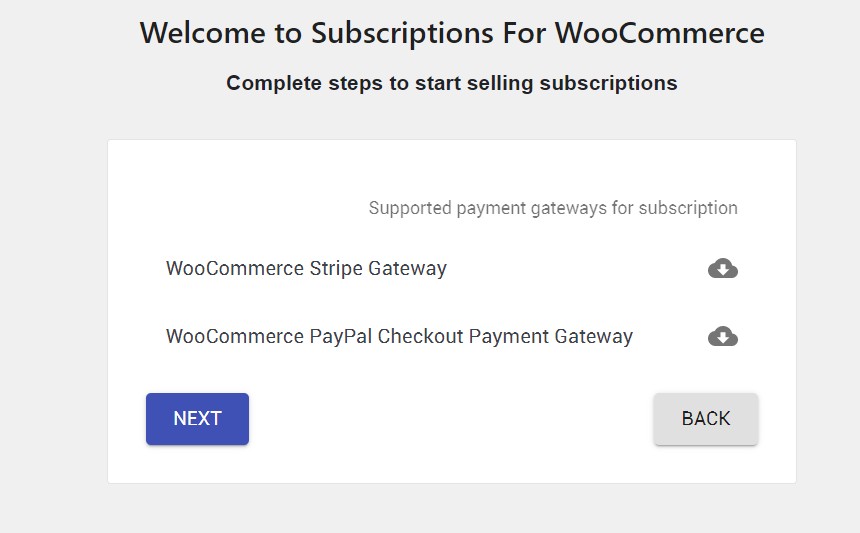
5. With this, we have successfully completed the add-on settings, and we have also created an initial product that accepts recurring payments. What remains for us is the step of linking a PayPal or Stripe account to the service to receive payments on it.
6. Log in to your WooCommerce store control panel > Choose Settings > Payments > PayPal Checkout and activate the PayPal payment gateway by clicking on the Manage button as we explained in the previous addition.

7. Then click on the Setup or link an existing PayPal account button, and then you will be transferred to the PayPal website. Enter your data to complete the linking process.

8. With this, you have successfully finished adjusting the add-on settings, and fully linked it to the PayPal payment gateway.
Does the customer have to have an account or subscription on my website in order to be able to subscribe to the recurring payments service?
In fact, the answer to this question depends on the add-on you use. In the first official paid add-on from WooCommerce Subscriptions, any customer can subscribe to recurring payments without creating an account on your site. As for the second free add-on, Subscriptions For WooCommerce, the customer will not be able to subscribe to automatic payments without He has an account on your site, and perhaps this is the fundamental difference between the two add-ons.
Conclusion
With this, our article about recurring payments in WooCommerce has come to an end, in which we explained extensively and comprehensively all the features of recurring payments in WooCommerce, and showed you how to add them, starting with identifying your payment service provider and how to create an account with it, all the way to explaining how to add a virtual product to your store with the subscription system. Finally, we showed you how to link the payment service provider to the product so that the explanation is complete and comprehensive about everything related to recurring payments.
All you have to do now is apply these steps in your store, as we explained in detail. If you encounter any problem, do not hesitate to contact us and let us know about it in the comments section.


Leave a Reply