need to create an additional website on the same main link to your website , which may be a blog, a store, or a communication page. This task is not difficult, all we need to do is create a WordPress website in a subdirectory at the same link as the current website.
The subfolder will be part of the site and not a stand-alone site like a subdomain. In this article, we will learn about the importance of the subfolder and how to rely on it to create a WordPress subsite.
Benefits of using a subdirectory
The main and fundamental benefit of using a subdirectory is to index your site and organize it professionally, especially if your site deals with several specializations within one field. As a result, you will get a simplified website with a smooth user experience, as you will be able to bookmark all pages of your website, as in the following examples:
- https://www.wordpress-1409476-5242918.cloudwaysapps.com/map
- https://www.wordpress-1409476-5242918.cloudwaysapps.com/category/guides/
The subfolder organizes the website content by adding code and files to each path; This facilitates the process of modifying or transferring to any other path within the primary domain. In addition, you will not need to purchase separate hosting and SSL security certificates , which makes managing websites easier and less expensive.
It is also worth noting that a subfolder allows you to have all of your site’s analytics in one place unlike subdomains , each of which is a standalone site. Subdomains also differ from a subdirectory in the structure of the URL, as it looks like this:
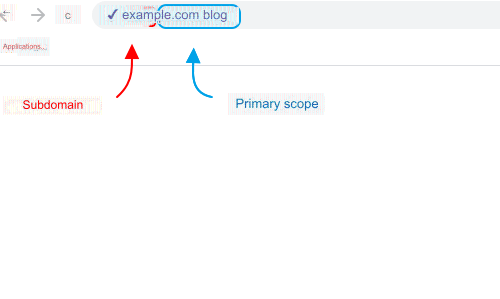
Steps to create a WordPress website in a subfolder
Now that we have learned about the benefits that can be obtained from using a subfolder on your site, we will move on to a detailed explanation of how to create a WordPress site in a subfolder. It is simple and uncomplicated, and does not require any programming or technical expertise. You will only need to have a basic domain and a cPanel control panel. We will go through this experience in four simple basic steps:
- Create the database for the new path.
- Download WordPress.
- Create a file for the path in the public_html file under the File Manager on the Control Panel.
- Complete the installation of WordPress and link it to the database.
1. Create the database
Our first step is to create a database to store the new path files, which we can create by going to the cPanel control panel, then scrolling down until we reach the Databases section, after which we will click on the MySQL Databases option, as in the picture.
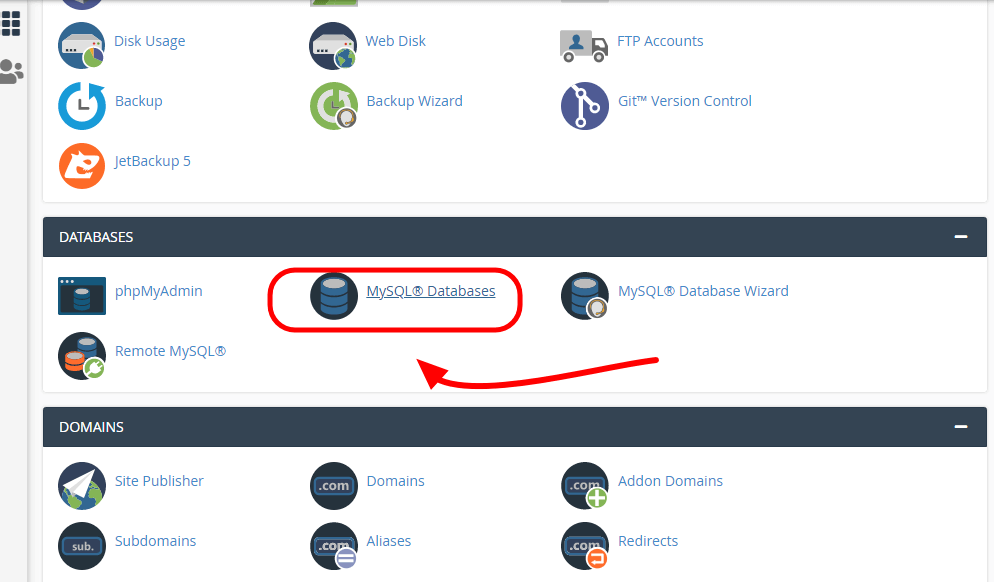
You will then be directed to the database creation window. In the new window, you must enter a name for your database, and it is always preferable for the name to be simple and not complicated. After writing the name, click on the Create Database option as in the image below.

Then a window will appear informing you that the database addition process was successful. You must copy the database name and write it down in any text document ( Notepad ) because we will need it in the next step.
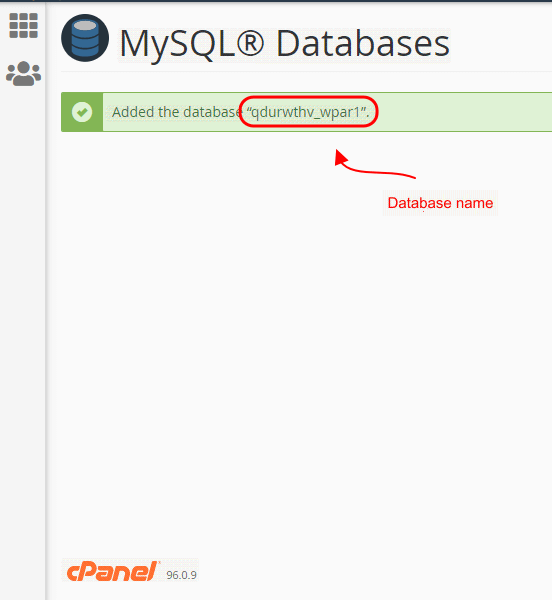
After copying and saving the database name, click on Go Back option .
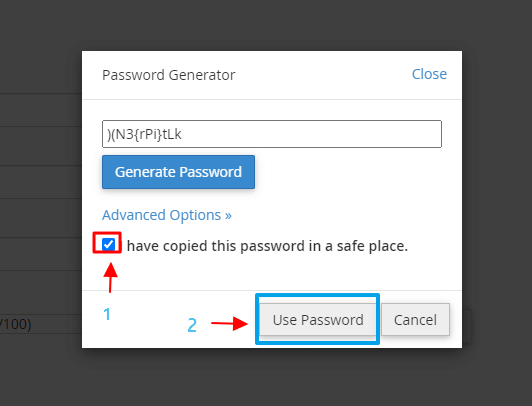
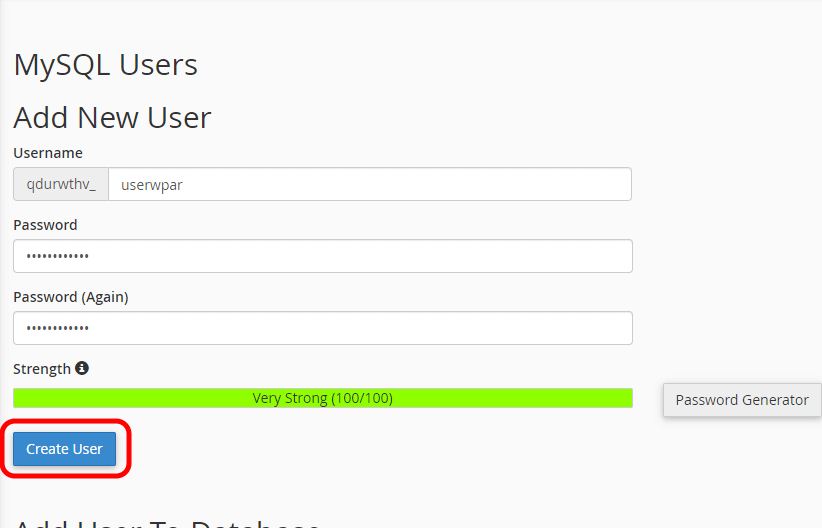
Now we will return again to the Databases window. From this window we will scroll down to the MySQL Users section , and we will enter a new user name for the database, after that click on the Password Generator option .
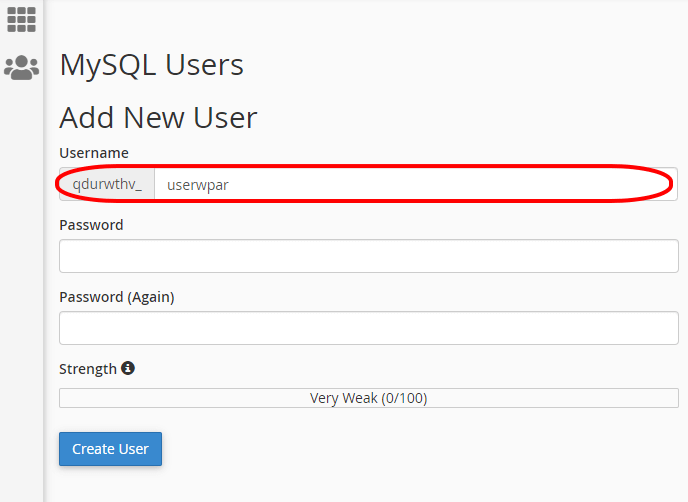
Now you have to copy the password and save it in the file in which you saved the name of the database in the previous step. Now put a checkmark on the option “I have copied this password in a safe place” and click on the option “Use password.” Password” ( Use Password ).
Then we will click on the “Create User” option . A new window will appear in which we will write the name of the database and the password that we copied previously and click on the Create user option .
After that, copy the database username and paste it into the same file in which we saved the database name and password.
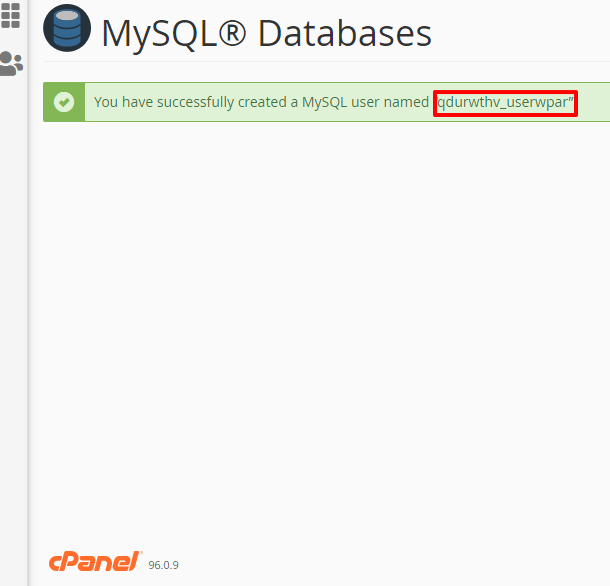
Click Go Back .
So far, we will have succeeded in creating the database with the name specified previously and it will appear to you in the list of databases as shown in the image.

Important note: We must remember the database name, password and user name as we will need them again in the next steps.

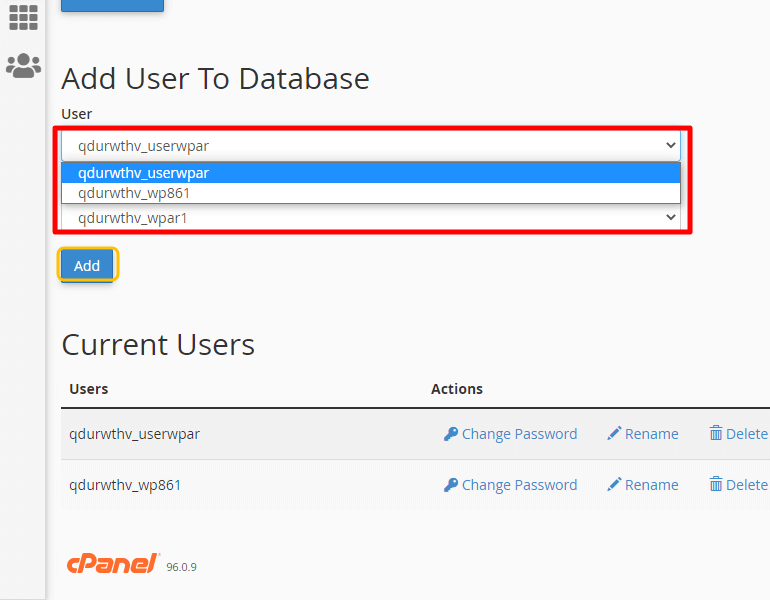
There is one last step before completing the database setup. We have to scroll down to the Add User To Database section, then choose the username and database name that we created previously and click on the “Add” option.
Our next step now is to specify the permissions for the entered username, in this case we have to select all the options placed in the window, as in the following image. Then scroll down and click Make Changes
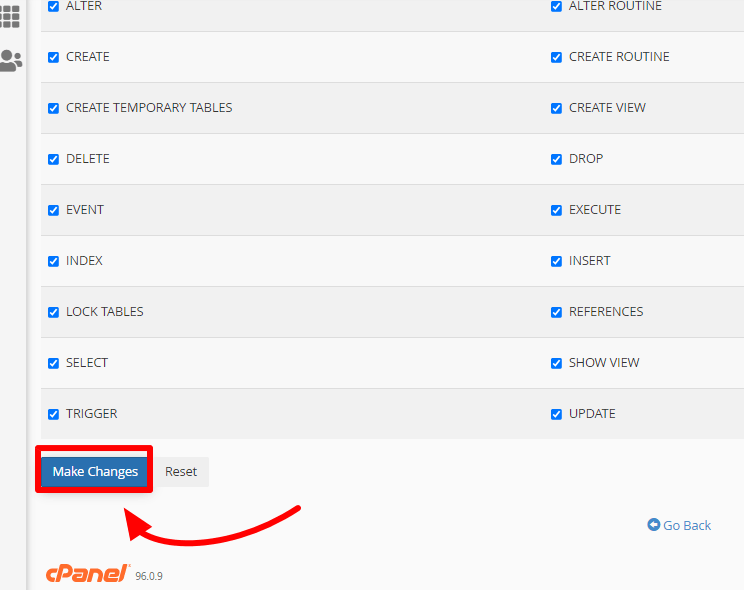
After that, this window will appear, indicating that you have successfully saved the permissions for the username. Then we will click Go Back and move on to the next stage.
2. Download and install WordPress
In our next step we will download and install WordPress on the new path. To accomplish this step, we will first go to the following link: https://wordpress.org /, then in the upper right part of the screen click on the Get WordPress option .

After that, click on the download icon in the center of the screen to download the latest version of WordPress.
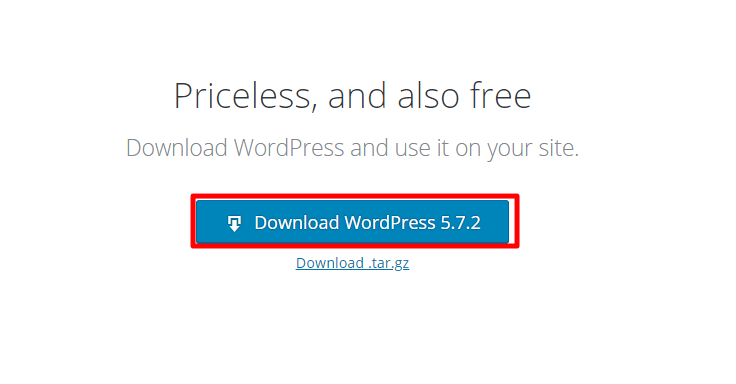
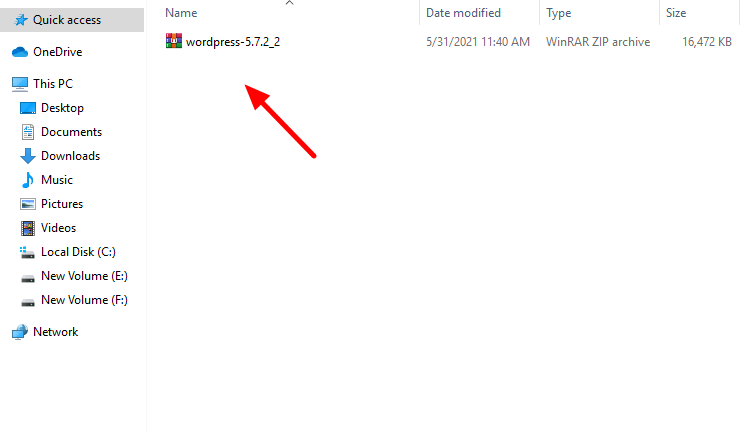
Choose a download location anywhere convenient on your computer. The file will be downloaded in zip file format, but be careful not to decompress it now, we will reach this stage later. Make sure to save where you downloaded the file because we’ll need it soon.
3. Create a new path file
In this step, we will specify a name for the new site path, which could be blog for blogs, map for the site map, about-us for the About Us page, and other names related to the site’s content. In our explanatory article, we will choose the word “blog,” and the link will be as follows:
example.com/blog
To accomplish this step, we will go to the cPanel control panel, search for File Manager and click on it as in the picture.

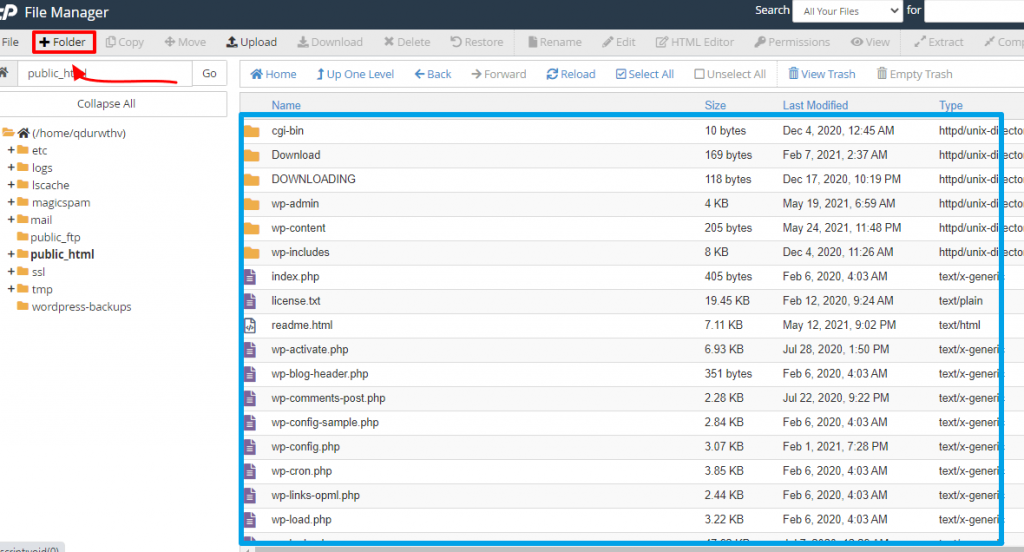
After that, a window will appear that includes the site’s files. We will choose the public_html file from among the files and click on it.
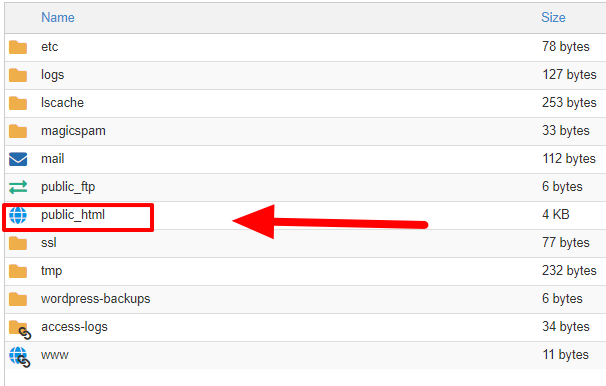
In the window that will appear to us, we will create your subfolder file by clicking on the “+ Folder” icon at the top of the screen as in the image below, and as you can see in the files within the blue box there is no file named “.blog”.
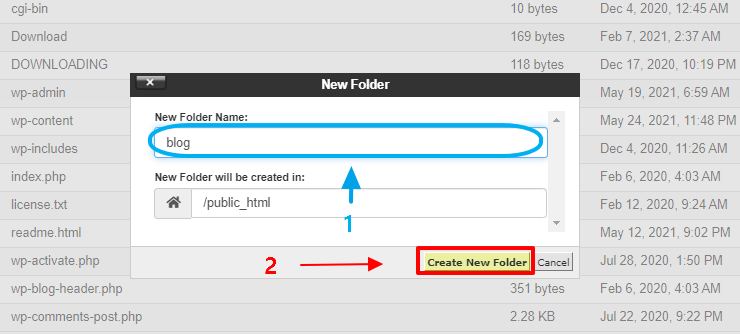
In the new window that will appear to us, in the first field we will enter the name of the file, which is “ blog ”. Of course, you can name it according to your desire or the content that you will share on the site, then we will click the “ Create New Folder ” option.
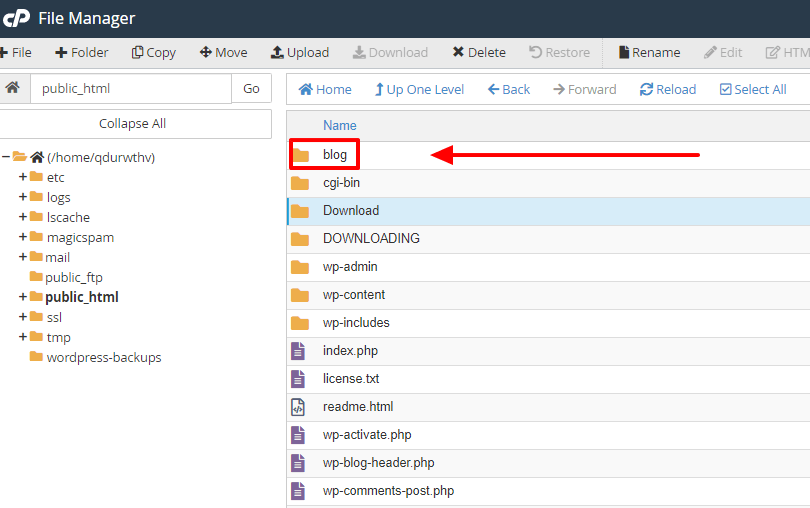
Now, we will have succeeded in creating a file for the new path, and you can see it in the list as in the image shown.
4. Complete the installation of WordPress and link it to the database
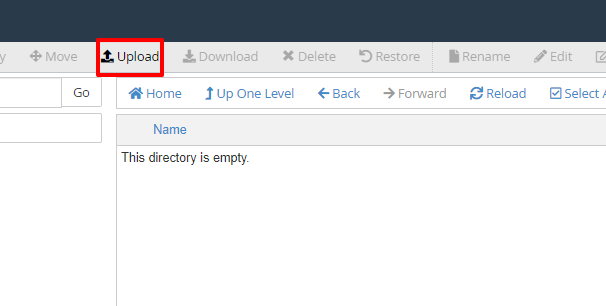
In this step, we will complete the installation of WordPress, after we downloaded it to your computer in the second step. What we have to do now is open the “blog” subfolder file that we created previously inside the public_html file and then click on the Upload option as in the picture.
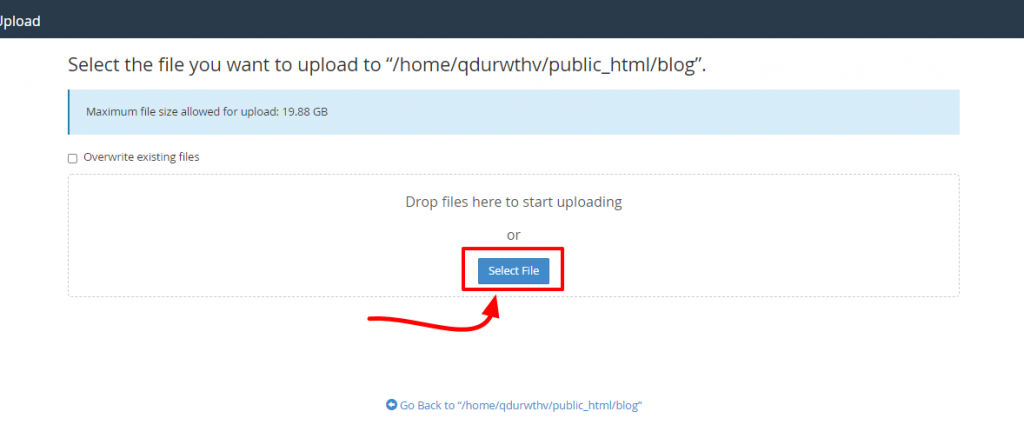
In the new window, we will click on the “ Select File ” option, and we will select the WordPress file from your computer in the location where we saved it previously.
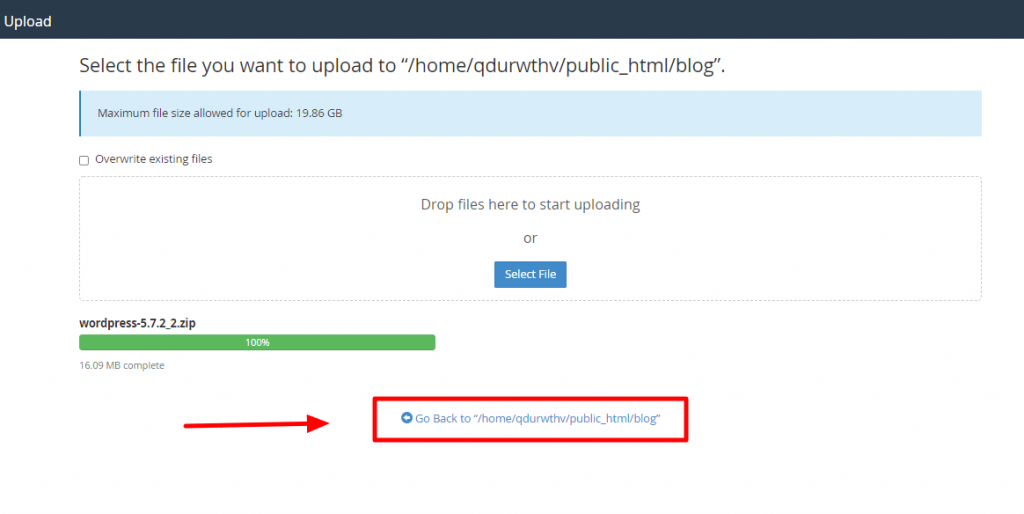
We will now wait for the downloading process to complete, then we will click on the “ Go Back ” option.
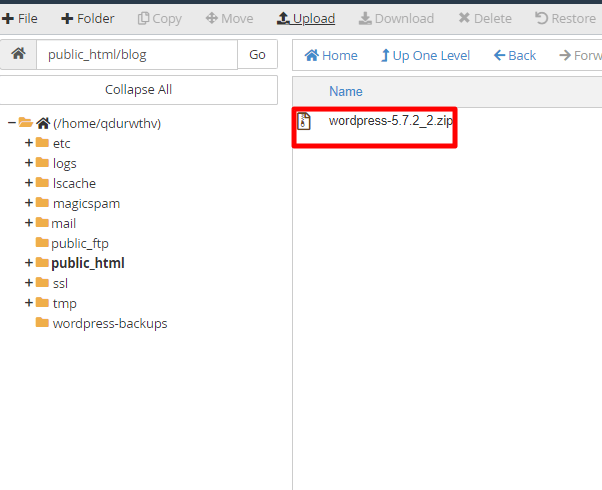
After the previous step, you will find that the WordPress file that we uploaded will be located inside the “blog” file. If it does not appear, just click on the “ Reload ” option to refresh the page.
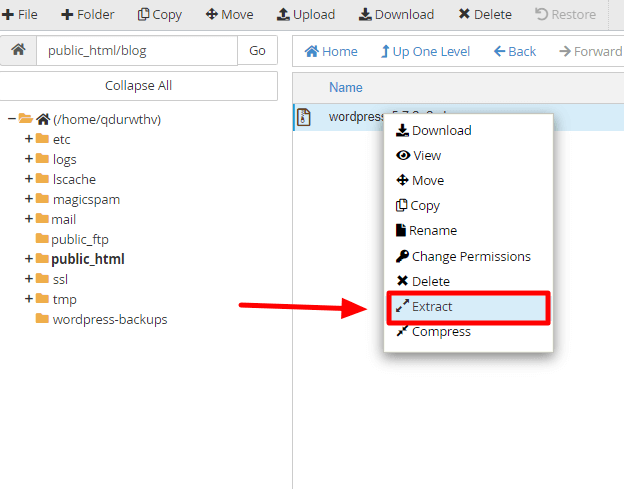
As we mentioned previously, the file is in zip format. So we have to unzip it by clicking the right mouse button and then selecting the Extract option from the drop-down menu as in the picture.
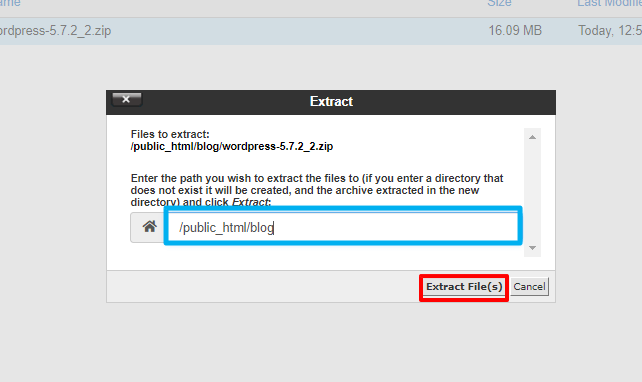
We will now specify the location where the files extracted from the compressed file are saved, and they will certainly be inside the blog file. After specifying the location, we will click on Extract files .
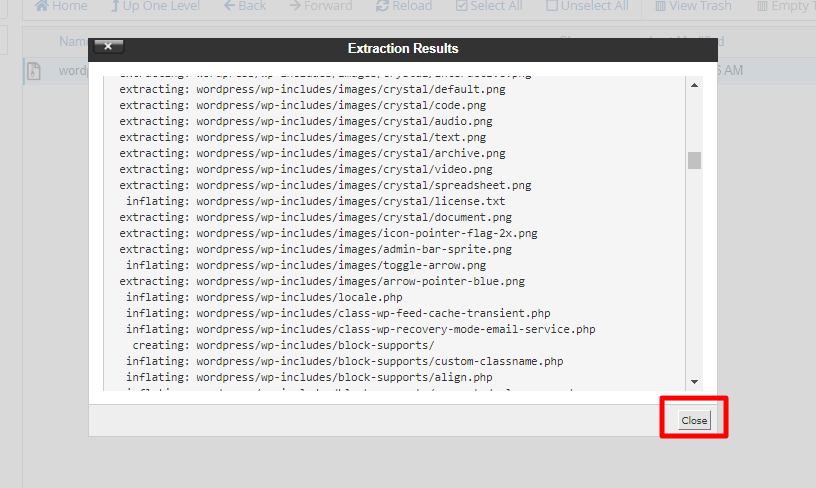
After the decompression process is complete, click on the Close option at the bottom of the window.
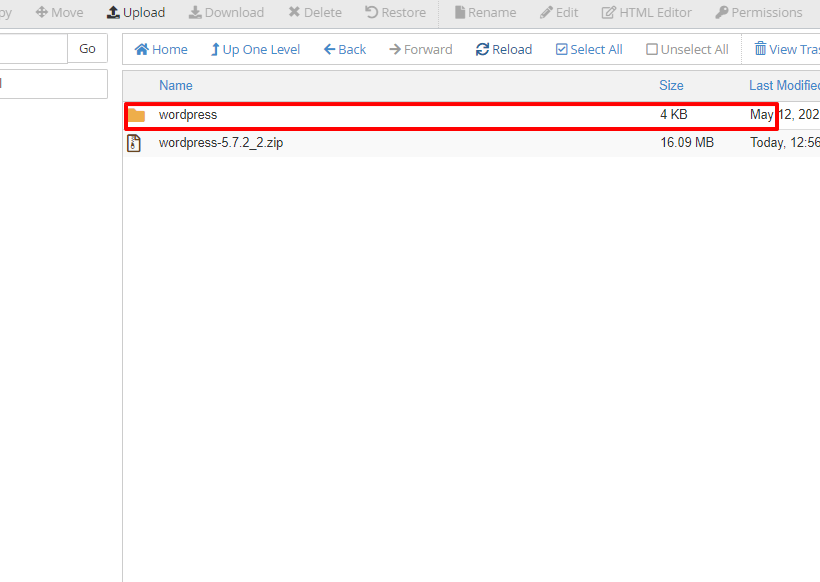
You will then notice that the WordPress file has been extracted and decompressed into the database.
But that’s not all. If you go to the subfolder, you’ll find it looks like this:
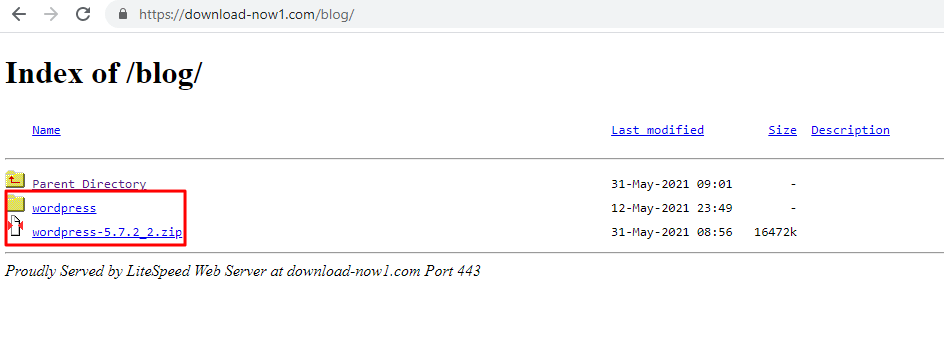
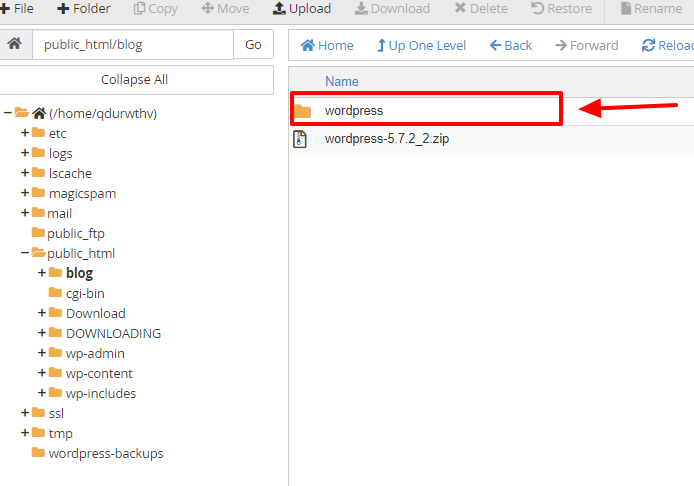
Now we will click on the WordPress file, and you will be directed to the WordPress installation window. We now notice that the page link contains the WordPress extension, as in the picture.
To fix this, you must open the WordPress file in the database.
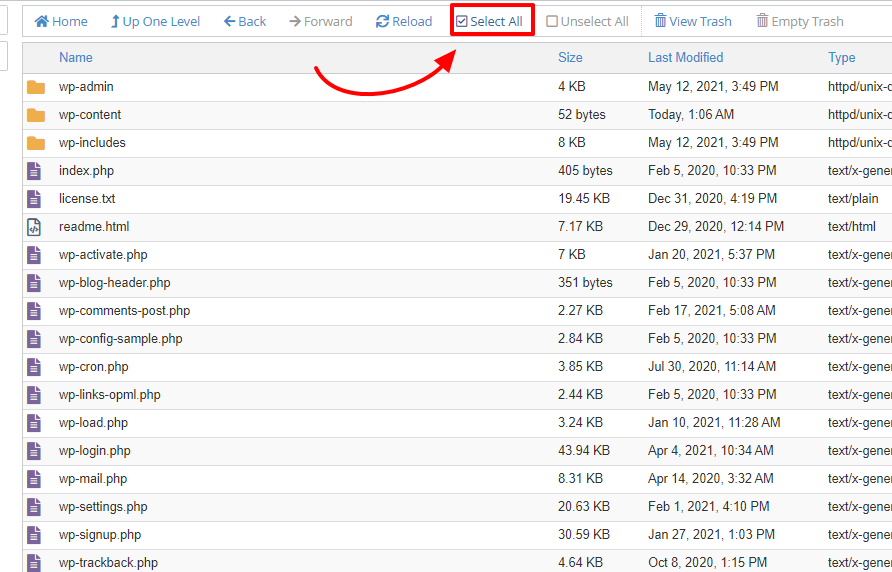
And select all files within the file, by clicking on the Select All option.
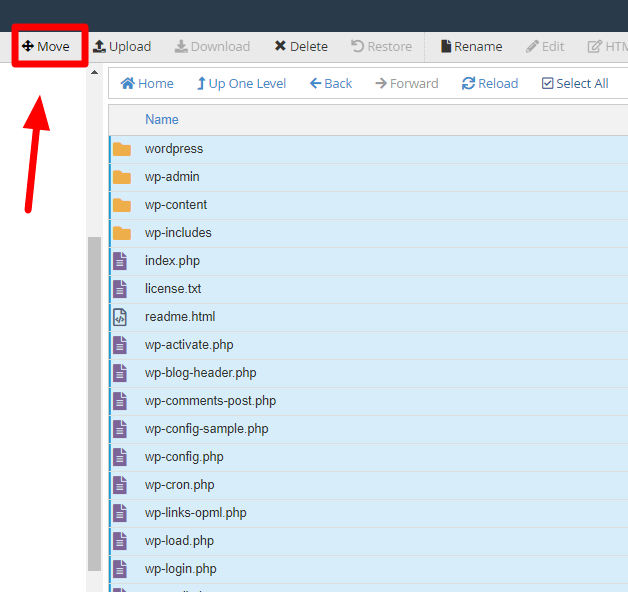
Then click on the Move option .
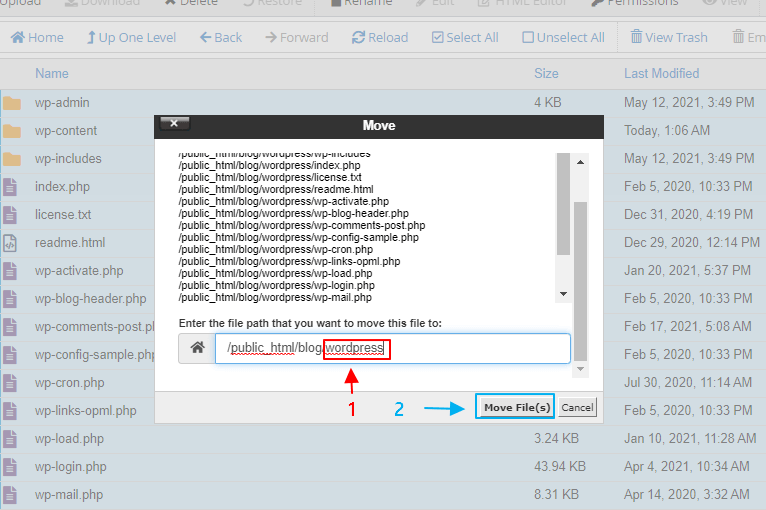
After that, you have to delete the word WordPress in the box for the path to which we want to move the files; This is in order for the files to be transferred to the blog. Then click Move File .
Now we must delete the WordPress zip file (wordpress-5.7.2_2) that we downloaded and extracted the files from in the previous steps.
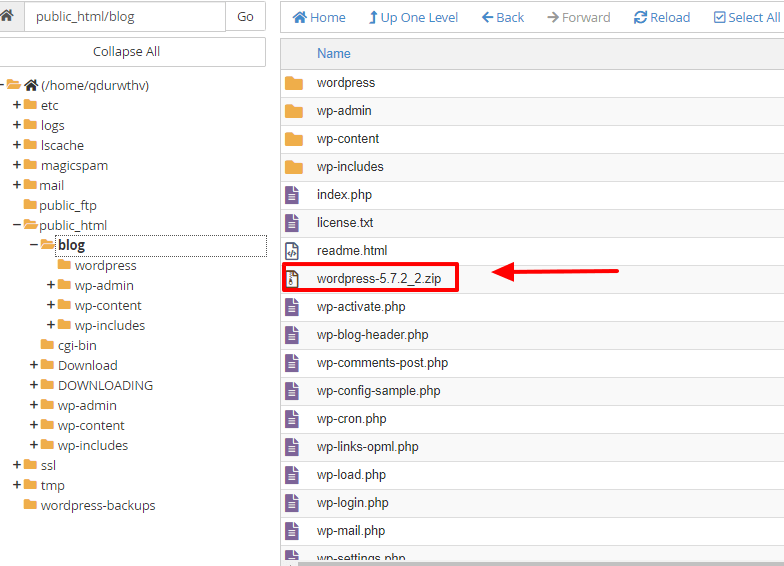
Now that we have completed these steps, we will go back and click on the subfolder. The WordPress installation window will appear. To begin, select the language you want – we will select Arabic – and click on the Continue option .
Then this window will appear to you with a set of instructions related to the database, which we saved previously. Click Start Now.
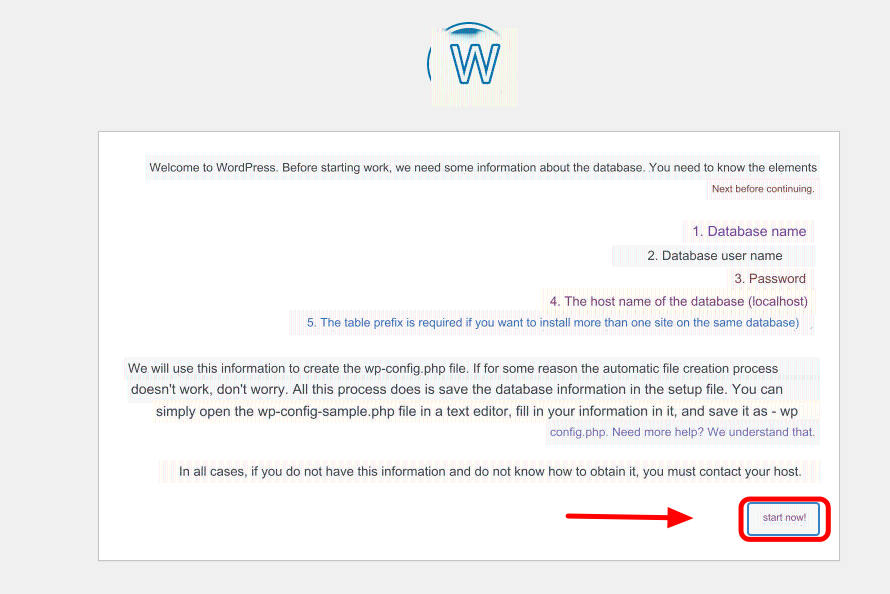
After entering the required data such as the hosting name, password, and user name, the following window will appear, where you must click on the option to start the installation process.

A new window will appear asking you to enter some information:
- Site name : is the name of the site or path.
- Username: This is the username that we will use to enter the path.
- Password: The password for the website.
- Email : The website administrator’s email.
Appearance in search results: Through this option, you can stop the site from being indexed and from appearing in search results until you have completely designed the site. After that, click on the “Install WordPress” option.

After that, your WordPress site will be created in a subfolder and ready to be edited.

Thus, we have succeeded in creating a WordPress website in a subdirectory. As we have noted, the process is simple and does not require much effort, and the fruits that you can reap from it are worth putting into your plan to develop and expand the area of your distinguished site


Leave a Reply