Online store owners care about the way products are displayed inside the store, the quality of delivery, and the store’s logistical matters, but few people care about the “thank you for completing the order” page.
The thank you page for completing the order is the last stage that the customer reaches inside the store after successfully completing the order. Therefore, this page is considered the last impression the customer gets about the store, and it is possible that this page can be used to encourage the customer to return again and complete more orders.
In this article, we will learn about the different ways through which we can design and customize a thank you page for completing the order in a professional and distinctive way that helps double the store’s profits.
How to customize the page (Thank you for completing the order) using plugins
WooCommerce provides a default design for the thank you page for completing the order, and the appearance of this page varies depending on the template you use within your site, but in general the default page contains a summary of the order made by the customer, starting with the name of the product and its picture, the total price, shipping details, and other basic data for the order. .
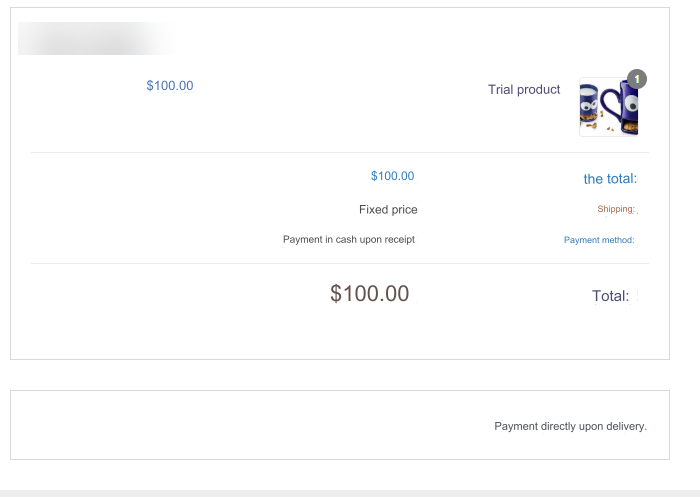
But we do not want to adhere here to those default options that appear on the thank you page for completing the order, as we will apply many changes to the page in order to increase the percentage of sales within the store.
There are many WordPress plugins that help in designing and customizing the Thank You for Completing the Order page, including paid and free ones. In the article here we will use one of the free plugins, which is Nextmove, as this plugin provides many options for customizing the Thank You for Completing the Order page in its free version.
After installing and activating the add-on on the site, go to the settings tab for WooCommerce, and from there enter the settings tab for the add-on.
You will find in front of you the name of the “Thank you” page for completing the request. Click on the “Edit Page” button :
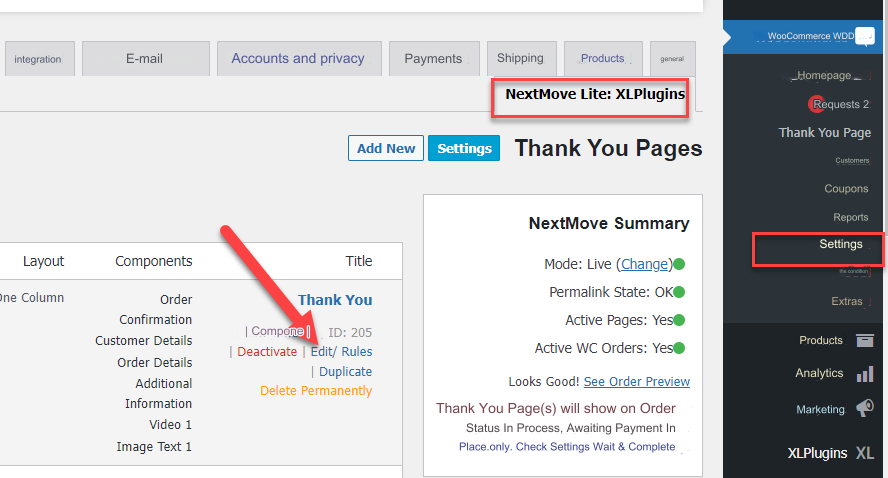
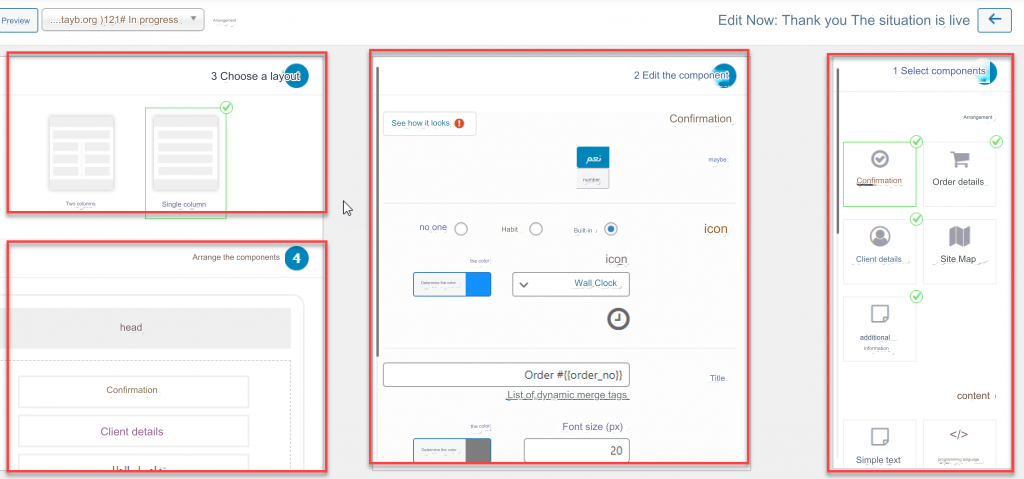
The page editing panel will appear in front of you, which consists of 4 main parts as follows:
- Select Components: From this part, you can choose the components that you would like to include on the Thank You page to complete the order. The add-on provides you with many components, whether related to product details and data, or various components such as images, text, video, etc. You can drag any component you want to insert directly into the second part.
- Editing the component: In this part, you assign the components to it from the first part so that you can modify it and customize it to exactly the shape and appearance that you want.
- Choose the layout: The third part provides you with the ability to choose the layout of the Thank You for Completing the Order page, where you can choose whether you want the page to be shown as only one column or two columns.
- Component order : From this part, you can drag the components up or down depending on the order you want them to appear on the page.
After you have reviewed the basic options provided by the add-on, we will discuss in the following paragraphs the most important and best modifications that we can apply to the thank you page for completing the order in order to increase the store’s sales rate and persuade customers to order more products.
1- Write a personalized thank you letter to the customer after completing the order
One of the things that helps improve the user’s experience on the Thank You page for completing the order is to write a personalized thank you message other than the default message that appears on WooCommerce.
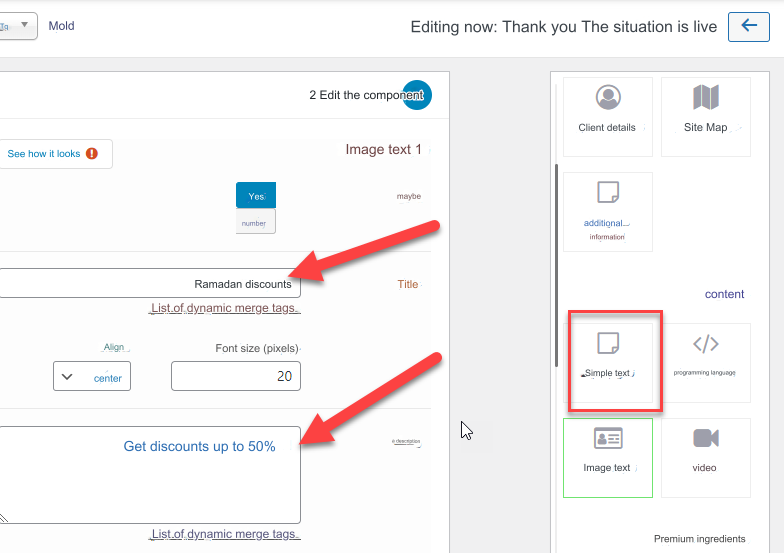
You can write a custom message on the Thank You page for completing the order through the addition mentioned in the previous paragraphs, where there is a component ( simple text ) that you can click on to have the component added to the page, then write the title and description of the text you want to show:
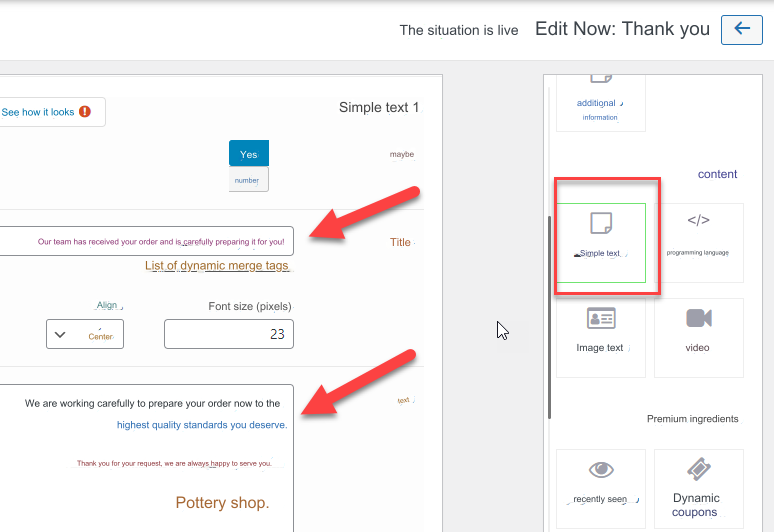
After you write the title and text you want to appear on the page, click the Save button.
Now, when the customer completes the order inside the store, the message you wrote will appear on the “Thank you for completing the order” page:

Make the text message customized according to the type of products you offer to the customer, so that he feels that you care about him a lot and treat him with special attention and care, as the function of this text message is to increase your customer’s confidence in the store and thus increase the probability of returning to order again, which means increasing sales within the store.
2- Insert an image with the Browse Products button
The visual element is one of the important things that attracts the customer’s attention inside the store. You can add an attractive image of him to the Shirka page to complete the order, which encourages customers to complete more orders to obtain additional discounts.
Using the previous add-on, you can insert images with the Browse Products button easily, by choosing the component (image text), then writing the title as well as the description that you want to appear next to the image:
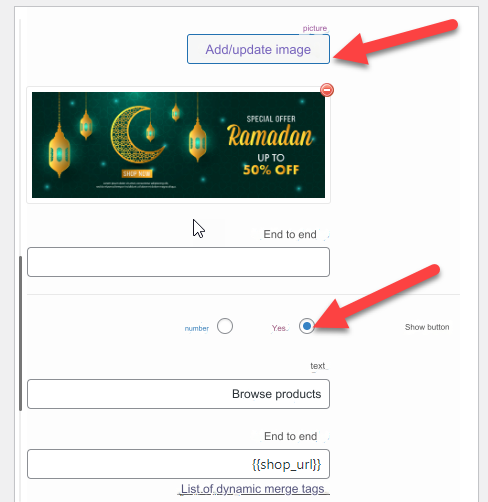
Scroll to the bottom to find the image upload button. Choose an attractive image that expresses the type of discounts you provide in the store, then activate the Show button below the image. You can set the text that appears on the button as well as the link that you want customers to face when they click on it. It is best A link to a page containing products that have discounts:
After completing the settings, save the page, and then you can test a new order within the store until you reach the “Thank you for completing the order” page, on which you will notice that the image and button appear inside it as follows:
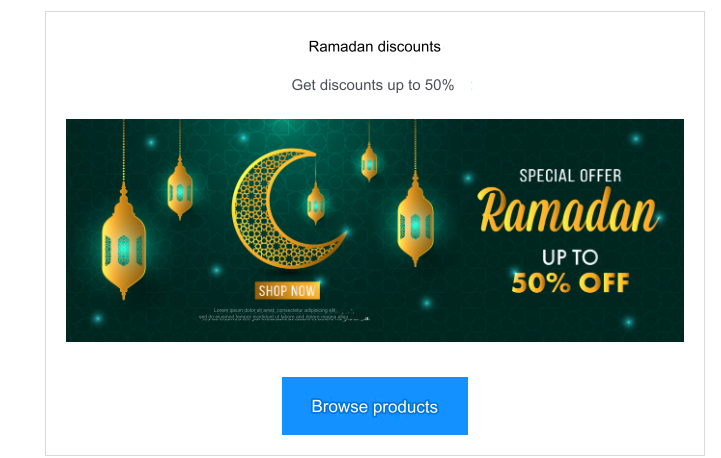
It is best to change the image that appears on the Shukran Order Completion page as the seasons change for the products you sell, and focus on displaying eye-catching images that have a close connection to the type of products sold in the store so that you can gain customers’ attention and thus achieve more sales.
3. Send a message containing purchase vouchers
Most large stores send an email to the customer immediately after completing the order informing him that he can obtain discounts using purchase vouchers the next time he orders from the store, and this will encourage customers to complete more orders inside the store.
Email messages containing discount coupons can be created immediately after completing the order using some free WordPress plugins, including the thank you page customizer plugin .
Immediately after installing and activating the add-on, go to its settings panel, and enable the add-on so that it starts working properly on the site:
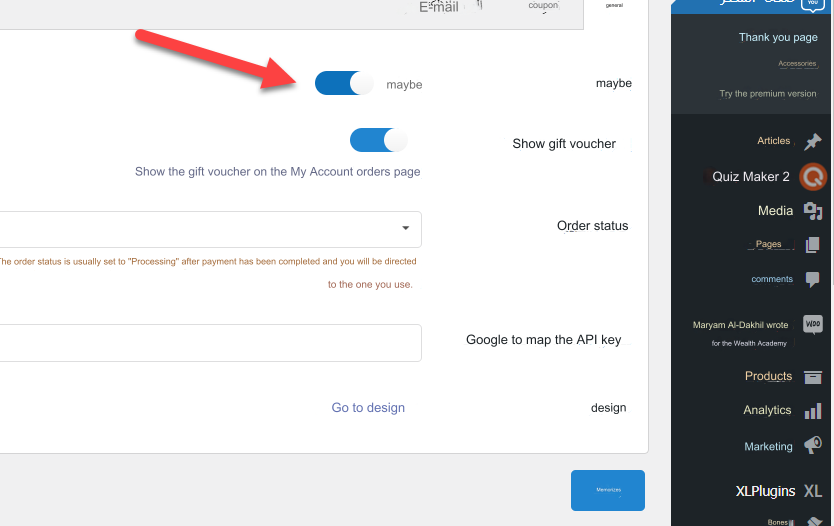
After that, go to the coupon tab and create the coupon that you want to send by mail to the customer after completing the order inside the store, where you write the coupon code and its value:
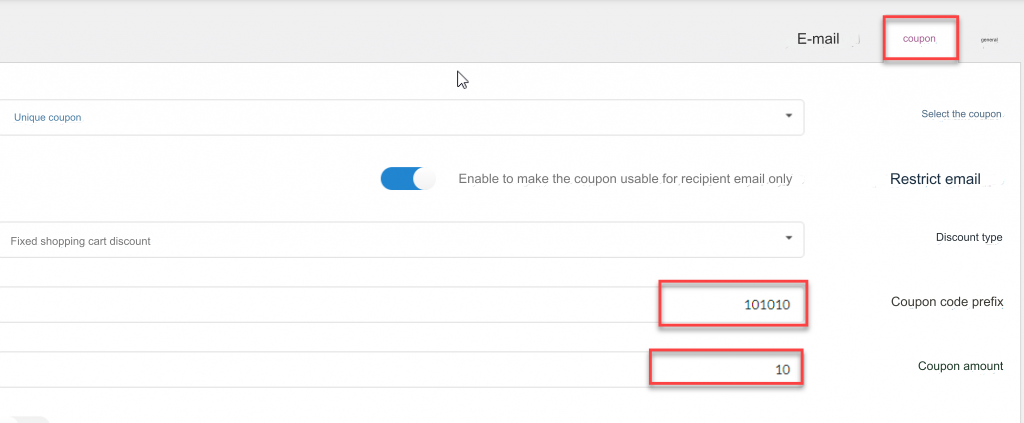
Then, from within the email tab, you can control the text of the message that is sent, which must contain the coupon that you created in the previous step, and thus an email will be sent to every customer who completes the order, which encourages him to return to the store and complete more orders:
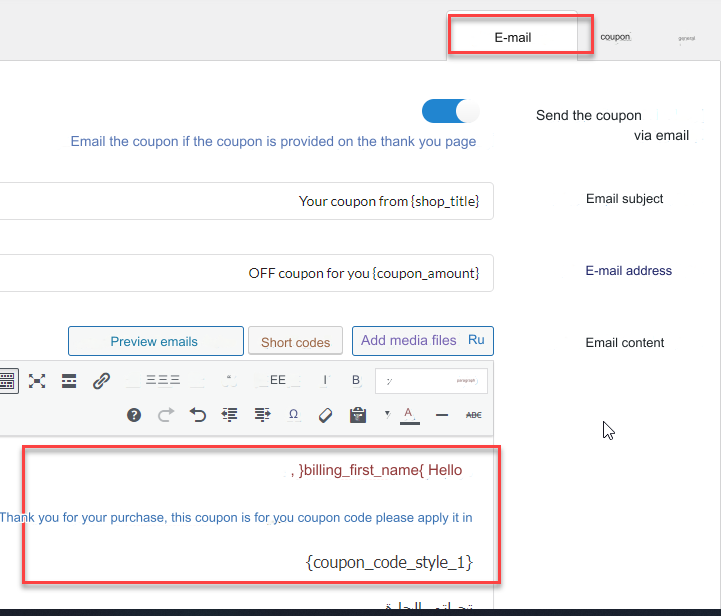
After you create the discount voucher and allocate its value in the manner we explained in the previous paragraphs, a notification will appear to customers about obtaining the voucher immediately after completing their order:

How to customize the page (Thank you for completing the order) using the code
One of the most useful ways to customize the “Shukran” page to complete the order in a professional manner that is more attractive to the attention of customers inside the store is by using software code that opens the horizons for you to modify more freely on your site.
We advise you before writing or modifying any software code within the site to create a backup copy of WordPress completely.
You can access the WordPress file manager and open the functions.php file and write the following code, through which you can change the “Thank you for completing the order” page to any other page within your site:
add_action( 'template_redirect', 'woo_custom_redirect_after_purchase' );
function woo_custom_redirect_after_purchase() {
global $wp;

if ( is_checkout() && !empty( $wp->query_vars['order-received'] ) ) {


wp_redirect( 'www.site.com/thankyou' );

exit;

}

}

Of course, you must change the link indicated within the code with the link to the page that you wish to set as the default page for Shirka to complete the request.
This idea allows you to create a completely customized page, whether using the plugin editor in WordPress or one of the website building plugins, to build the page from scratch and control its appearance exactly the way you want, and then set it as a default page.
Thus, we have explained in the article the ways to change and customize the Thank You page for completing the order within WooCommerce, whether using add-ons or using the code to build the page from scratch and set it as the default page.
You may have now noticed the great importance of customizing and designing the Thank You page for completing the order in a customized way in order to encourage customers to return for repeat orders within the store.


Leave a Reply