

In today’s article, we highlight the WP-CLI command line tool, which is considered one of the favorite tools among WordPress developers because it allows them to manage their sites with ease and flexibility via a console without the need to use a web browser or click the mouse to move from one place to another in the admin control panel. .
Through this tool, you can perform many operations such as installing a new WordPress system, updating the current version of WordPress, installing and managing templates and plugins, managing users, controlling content, maintaining the site, and many other tasks.
What is WP-CLI?
WP is an abbreviation for WordPress , and CLI is an abbreviation for Command Line Interface . Therefore, the WP-CLI tool : It is a command line interface for WordPress, and it is a tool that allows developers to perform many tasks related to WordPress by writing different text commands without the need for them to move within the web browser screens and click the mouse from one place to another.
By relying on this tool, you will be able to write simple commands to perform any task you need on your site, such as installing WordPress, updating the theme or plugins installed on the site, or controlling the site’s database, all from within the command line window.
In the following paragraphs, we will explain how to use and install WP-CLI on a Windows operating system that has been converted to a server using XAMPP, so we will assume that you have already run XAMPP on your local machine before starting to install and use the tool.
Read more: Create a WordPress site on a local server (LocalHost) using XAMPP
How to install WP-CLI
The WP-CLI tool is designed primarily for the UNIX operating system and its compatible systems (such as OS Paragraph.
To install the tool on your local computer that uses the Windows system, first download the file wp-cli.phar on your local computer from here . You can also download it directly from within the Windows command line prompt (CMD.EXE) by writing the curl instruction, which is responsible for transferring data to and from the server as follows:

After the wp-cli.phar file is completely downloaded, move it to any path you choose on your computer. For example, I will choose to create a folder in the local disk D named wp-cli and then I will place the file inside it.
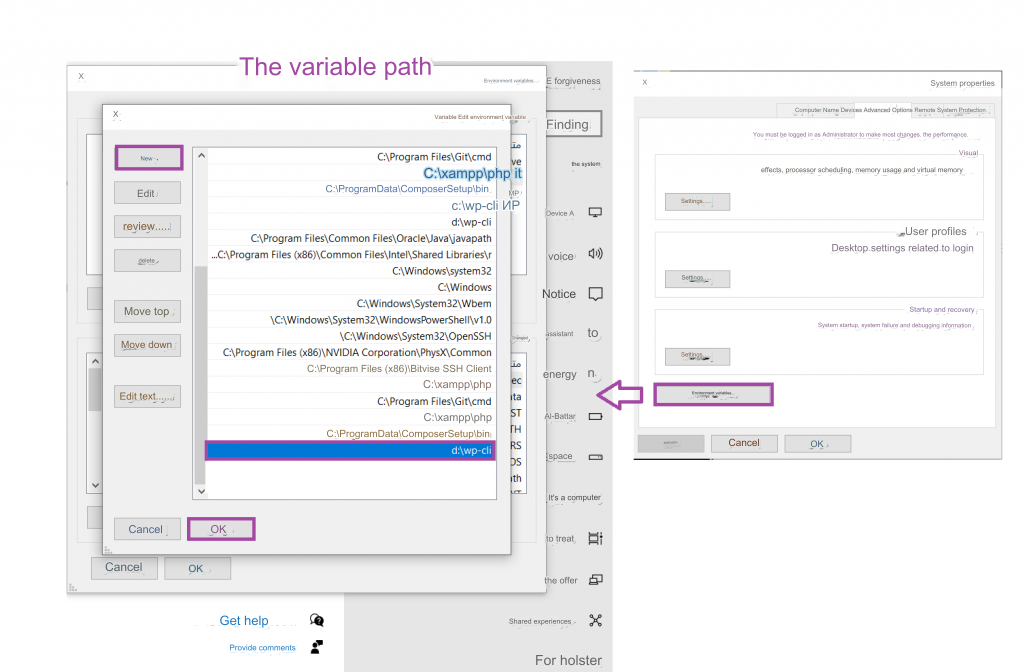
Then you have to add the path of the file d:\wp-cli to the path environment variable in the operating system. This can be done by right-clicking on the computer icon on the desktop, and choosing Properties > then Advanced system settings > as shown in the picture. next.
Then click on Environment Variables and choose the path variable, click on the New button and then add here the path of the file wp-cli.phar in order to enable access to it and run its commands from within any directory on the command line.
The next step is to create a wp.bat batch file in the same folder where you placed the wp-cli.phar file in order to make this file executable. So create an empty file named wp.bat , right-click on it and choose Edit , then type the following commands into it. :
Of course, you must modify the path in the previous commands according to the location to which you added your file.

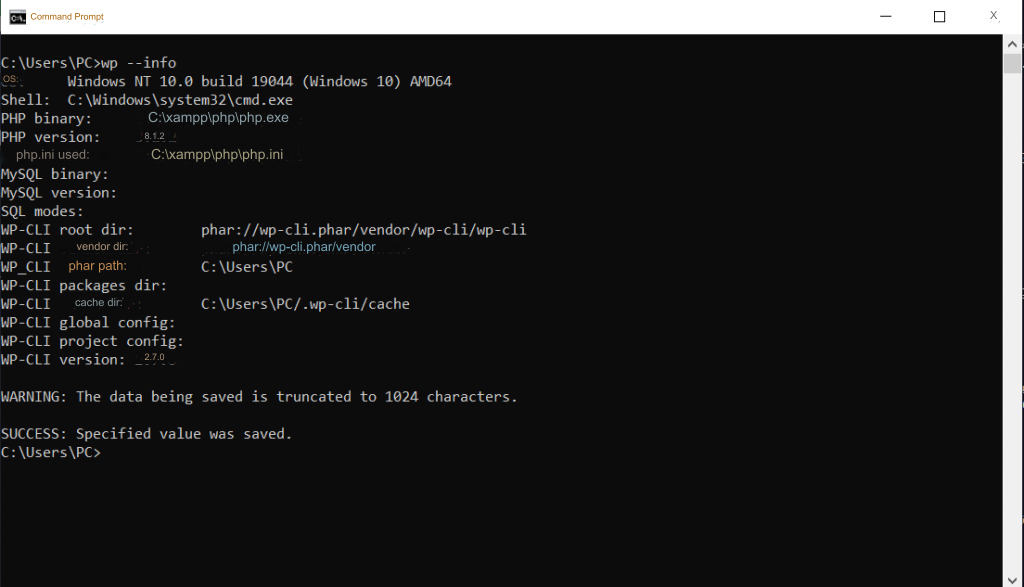
With this, you have finished installing the tool on your local machine, and you can check whether the tool is working properly by typing the following command at the command line prompt:
If the task is completed successfully, you will see information about your operating system, the version of PHP you are using, and the version of WP-CLI as in the following screen:
Or you can write the following command to verify that the tool is working properly:
Install WordPress core on the server through the WP-CLI tool
You can download the WordPress system on your hosting server or on your local computer (after you have converted it to a server, as we mentioned, initially using simulation programs such as XAMPP ) through the wp core download instruction , and in our article today we will apply the instructions to a local server.
But if you want to connect to the actual server (and here I mean the remote hosting server) through the WP-CLI tool and install the WordPress system on it, you must have access to the server via the SSH (Secure Shell) protocol, which encrypts commands and transfers data to and from your server. It provides secure access to the server and executes commands directly on it.
Then you have to connect to the root folder of your website via the SSH protocol. You can do this in the Windows operating system through dedicated applications such as PuTTy. After successfully connecting to the server, you must enter the tool’s commands in the application’s WP-CLI command line.
Read more: Explaining SSH and the importance of using it for WordPress website owners
Let us now return to the wp core download instruction and install WordPress on the server through it. Pay attention before writing this instruction in the command prompt, you must make sure that you are located inside the server’s root folder (docroot). If you wish, you can create a subfolder for the site inside the root folder to organize things, and here I will create A folder called olablog, then you can download the WordPress core into it by writing the following instructions:
After the download process is completed successfully, you will see an explanatory message at the command line prompt as follows:

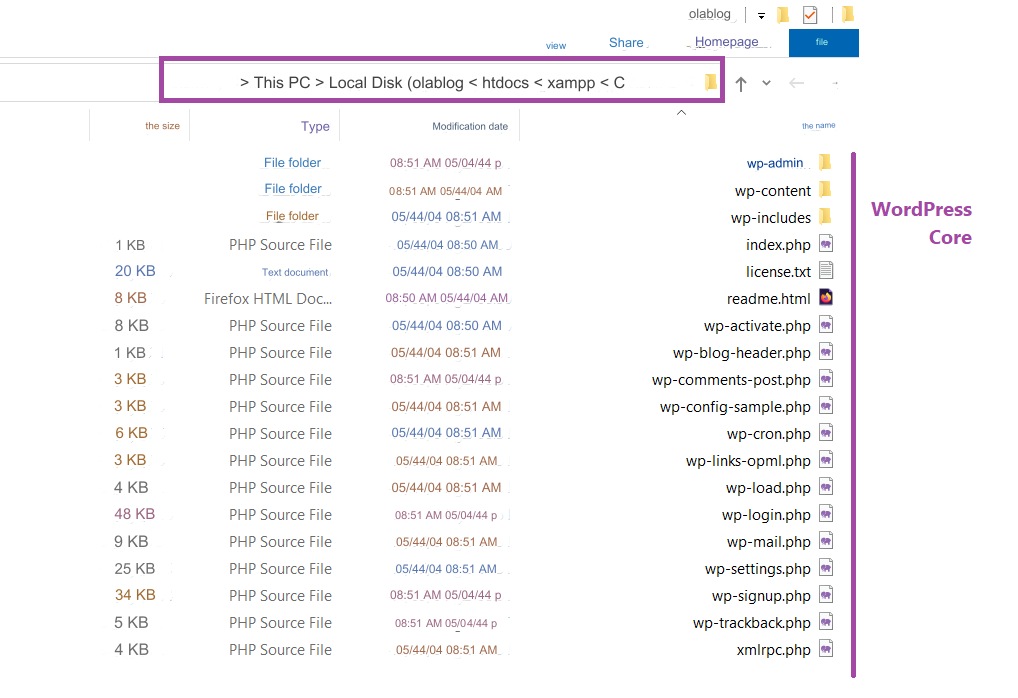
Now if you go to this directory or folder that you just created, you will find that all the files for the latest version of the WordPress kernel have been fully loaded here.
Read more: Learn about the WordPress programming system and its core files
In our case, your WordPress site will be located at the following link: www.yourdomin.com/olablog.
When you go to this link, a welcome message for installing the WordPress system will appear, asking us to enter information about the sites and its database.
So, you now have to create the database using phpMyAdmin, named olablog_db, and then you can complete the WordPress setup process through the installation screen.
You can also set up your site’s wp-config.php file by typing the wp core config directive within the WP-CLI tool itself and passing your database credentials as follows:
- -dbname The name of the database
- –dbuser The name of the database user
- –dbpass password
- –dbhost The host name of the database
- –dbprefix table prefix (required if you want to install more than one site on the same database)
As you will notice, you must pass the same data that you normally write in the WordPress database setup interface, but in the form of text commands
In our case, the data passed to the instruction will be as follows:
note:
If you see the following error message: ‘mysql is not recognized as an internal or external command’, then add the following MySQL path to the path environment variable and try going back to PHP 7 because the tool is not compatible with PHP 8 well.
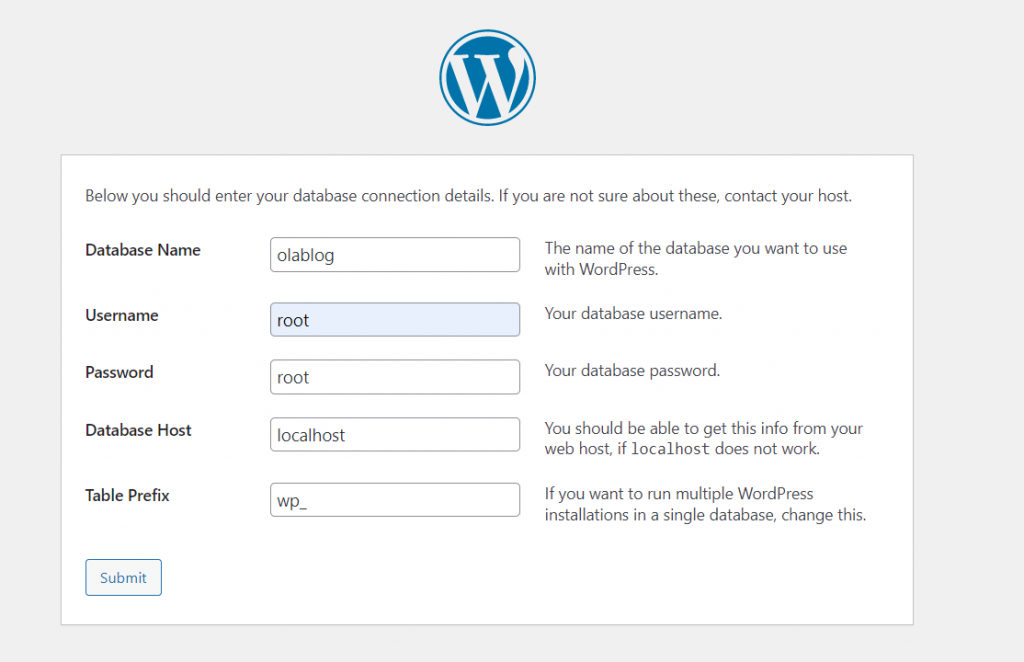
After executing this instruction, the wp-config.php file will be created using the correct credentials. You will have to continue setting up the WordPress system and write the WordPress installation instruction, passing the website information and the site admin information as follows.
As you can see, this instruction is also equivalent to entering site-specific data into the following WordPress installation screen:
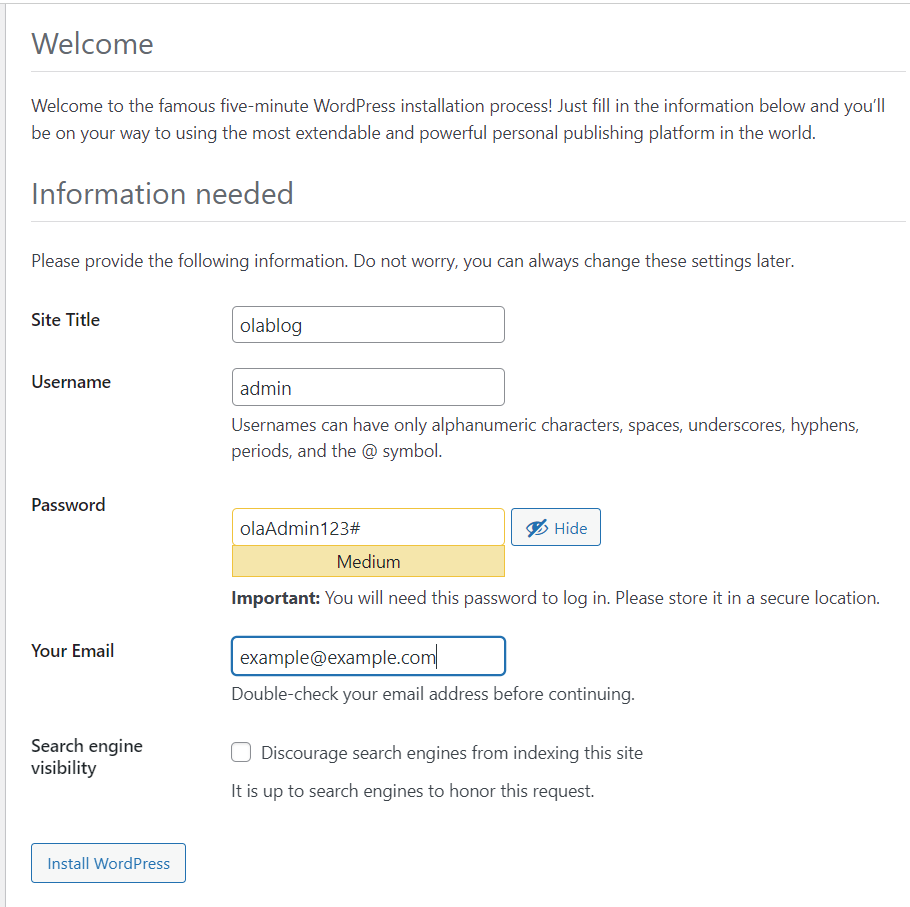
After you have successfully executed the previous instruction, your site should now be ready to work, and you can now use WP-CLI to do anything you want on your WordPress site.
Examples of the most important WP-CLI instructions
WP-CLI commands always begin with the word wp , followed by a basic command and a basic command, followed by a parameter and data set for an instruction. A directive may have both mandatory and optional parameters.
Install and activate a new addition to the site
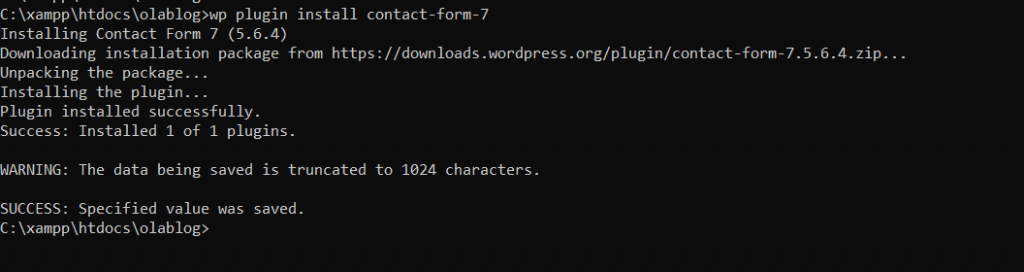
You can install and activate plugins using the wp plugin install directive, to which you can pass as a parameter the plugin’s slug name, the plugin’s ZIP file, or its URL.
For example, we can install the contact-form-7 add-on on our olablog website through the following instruction:
To activate the plugin, we write the instruction wp plugin activat

You can also install and activate several add-ons at the same time on your site, as follows:
In order to deactivate the plugin, use the wp plugin deactivat command
To activate/deactivate all add-ons at once, type:
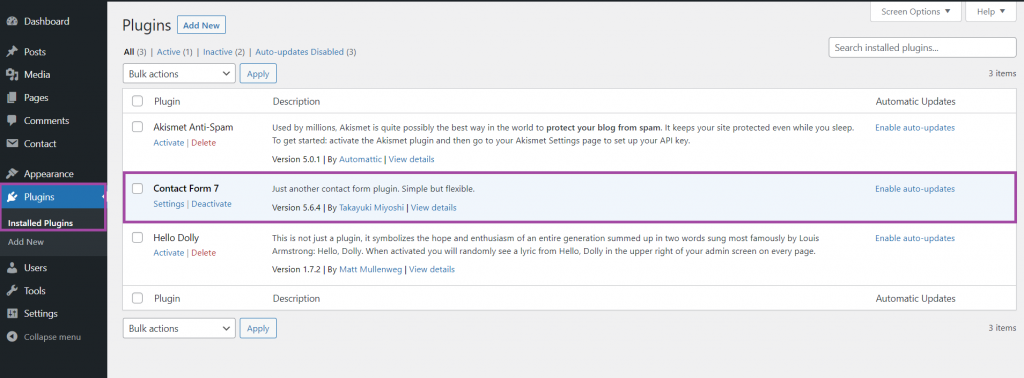
If you activate the add-on and then go to the control panel and review the add-ons installed on your site, you will find that the contact-form-7 add-on has already been installed and activated on your site and you only needed to write two simple instructions to complete the task.
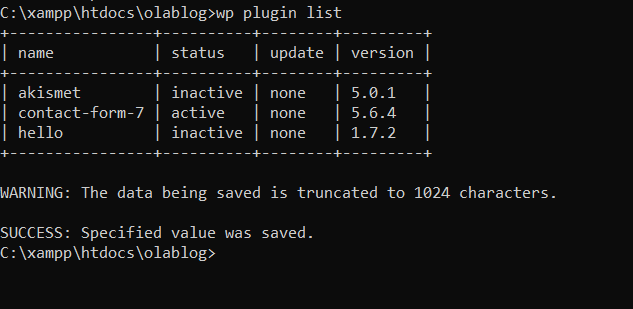
To view a list of the names of all plugins installed on your site, their status and version, you can write the wp plugin list command as follows:
In the same way, you can install and activate templates in WordPress by replacing the word “plugin” in the previous instructions with the word “theme.” For example, to install and activate the Astra template, we write:
WordPress core instructions wp core
Using WP-CLI, you can check for damaged or modified files in the WordPress platform and verify their integrity using the following command:

You can restore WordPress to a previous version by writing the following command:
You can also reinstall a clean copy of the WordPress core on your site without the default themes and plugins as follows:
Finally, you can clear your WordPress site’s default cache using the following command:
These were some of the instructions for the WP-CLI command interface. The tool provides many, many other instructions through which you can do everything you can imagine on your site, such as managing a multi-site WordPress installation , controlling users, improving the site’s database, creating articles and pages, and much more, and the article does not have room to mention it. All these instructions… All you have to do is know the appropriate instruction, write it, and pass the correct parameters to it.
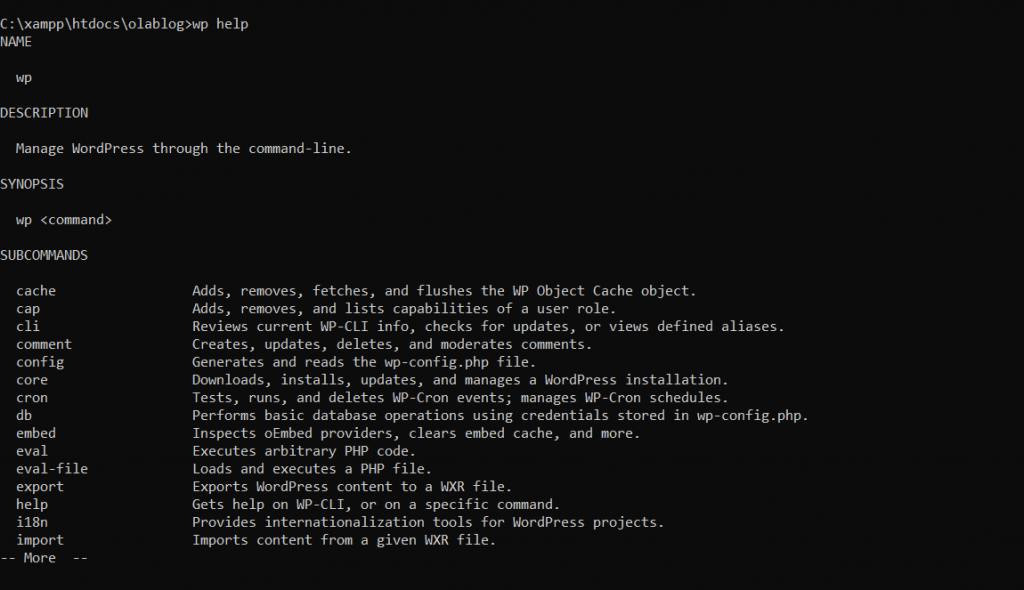
You can see a list of all the commands that you can apply to your site by typing the wp help command, and the tool will display them to you, arranged in alphabetical order as follows:
Conclusion
In today’s article, we learned about one of the great ways through which WordPress developers can interact with their sites quickly and efficiently through a single window.
We explained how to set up WP-CLI on a WordPress site on a local computer that has been converted to a server using XAMPP, but as we mentioned, you can apply these instructions to any site located on a remote server, provided that the SSH protocol is available to communicate with this remote server and execute commands remotely.
We also learned about some important WP-CLI instructions through which we can install plugins and themes, update them, activate them, and much more. If you are a WordPress developer, we advise you to try this tool, which makes managing a WordPress site a flexible and fast task.