This question may have occurred to you before: Do I add free shipping offers to my deals or lower prices? Which one would be more beneficial in terms of profit and gaining new customers?
In this article, we will discuss this question together. We may not reach a definitive conclusion, and I will not hide from you that this article is a form of thinking out loud, but we will explain the benefits of each method, perhaps it will help you make the right decision at the right time.
Free shipping
Why would you offer free shipping to your customers even though you bear the shipping costs? The returns of free shipping are not hidden from a merchant, no matter how small the size of his store. Free shipping encourages customers to buy and thus increases your sales . Free shipping works to enhance the average order value. That is, when you set a condition for obtaining free shipping that the value of purchases be above a certain limit, the customer is affected and increases. of the order value to reach this limit to get free shipping and you both benefit, and this strengthens the bond of loyalty between you and your customer.
Free shipping makes the customer happy and affects his purchasing behavior, as 9 out of 10 people consider it the primary motivator for ordering online, so do not miss exploiting this point to your advantage.
When do you offer free shipping?
Do not expect the answer to be a specific date, for example, or a specific occasion. This is entirely due to the nature of your company, the status of your sales, your profit index, what your competitors are doing, etc. However, you can choose specific conditions that benefit you to offer free shipping, such as offering free shipping when purchasing a certain number of products, or when shipping A specific weight, and this is what we will explain in detail during the practical part through an add-on that supports free shipping options.
You must take into consideration the cases in which you cannot offer free shipping offers, so you can reduce the shipping value for the customer, so as not to pay it in full. Therefore, the customer sees that a product worth $5 is paid $2 in shipping value and not $6, for example.
You may not have to pay any actual shipping costs and offer free shipping offers. How so? By influencing customer behavior and making the product, which is priced at $5 and shipped at $4, priced at $9 with free shipping. This is of course a clever move from the store owner, but it is not always offered. He offers real offers from time to time.
WooCommerce’s many and varied add-ons always help in making decisions easier and not worrying about what comes after the decision is made, as they facilitate its application. If you want to offer free shipping or provide discount coupons, add-ons are here to solve the problem. Next, we will discuss two main add-ons that are useful in this topic, which are the Advanced coupons add-on and the Advanced add-on. free shipping.
Practical explanation
WooCommerce offers good options in the field of coupons, but you must enable the coupons option for customers first, through (woocommerce) and then click on ( Settings ) in the general settings. Move your mouse down to discover all the options. You will find the option ( Enable Coupons ) and it is surrounded by a check box, click on it. To activate your feature.
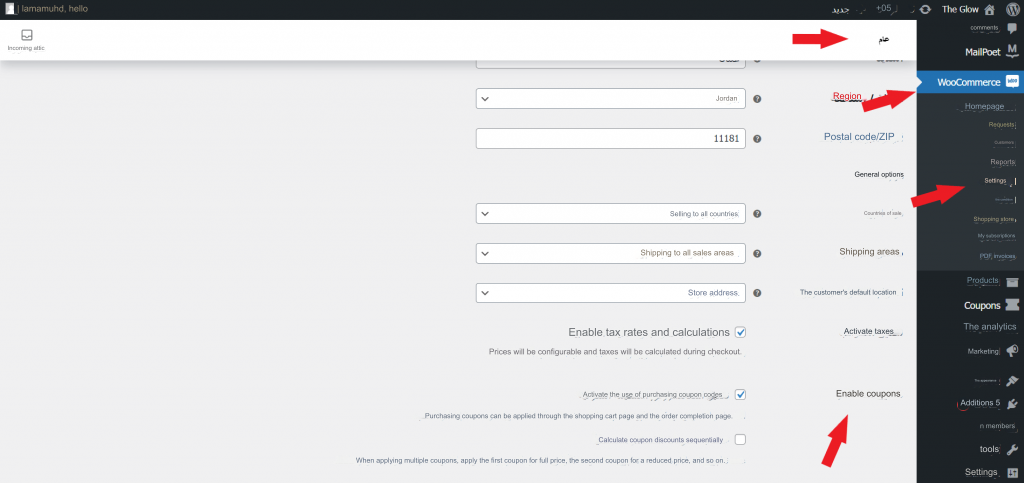
Then the (coupons) option will appear in the side menu on the main panel, and its options are limited, so if you want wider options you have to install an add-on for that, and the add-ons are many, but we chose for you the Advanced Coupons for WooCommerce Coupons add-on, which has been installed by +10,000 sites, for its wonderful free options.
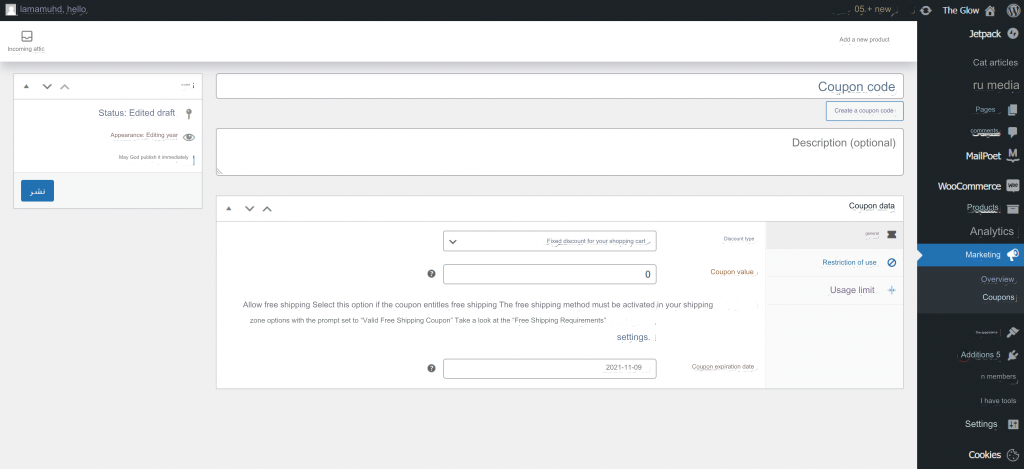
In this illustration, the coupon options appear before installing the add-on:
On the home page of the WordPress control panel, click on ( Add-ons ), then click on ( Add New ). Then we search for the add-on in the keyword search box or by its full name, and then it will appear to you quickly.

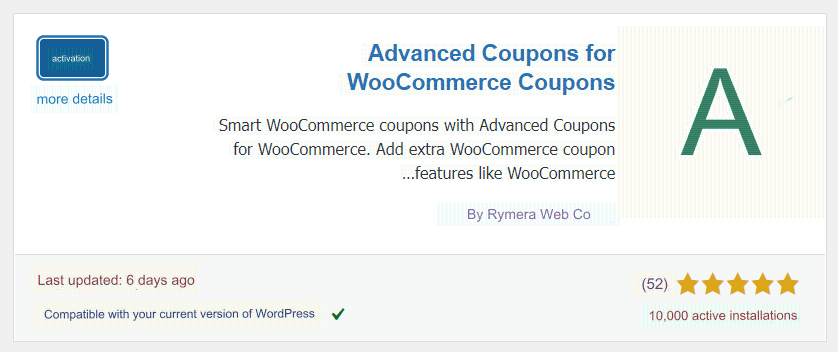
Notice the word ( Install Now ) appearing next to the add-on. Click on it, then wait a little while and the word on the box will change to become ( Activate ). Then click on the Activate button to activate the add-on completely for you, noting the information available on the add-on card such as the rating and the number of active installations for it, and whether it is Compatible with your version of WordPress.
After a while, the page will take you to the page displaying all the add-ons you have installed, and you will see a confirmation message that the add-on has been activated.

After activating the add-on, click on the word ( setting ) below the add-on in the list of installed add-ons, to adjust the settings and customize the vouchers as you want. Together, we will notice new additions to the voucher settings after activating the add-on, such as BOGO vouchers (buy one, get the second for free), and they allow you Add-on settings: The option to display coupons via a specific link, allocate coupons to one category of your customers rather than another, and more.
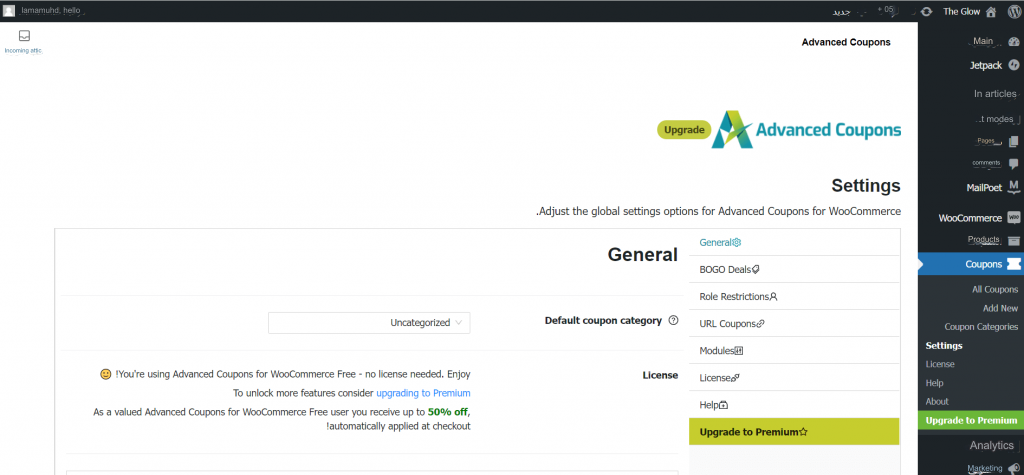
There is no need to adjust any general settings, as you do not need any license to use this add-on. As for the BOGO, it is an offer that ends the customer’s hesitation to buy, when he finds an additional advantage for purchasing a specific product and the use of these features is done through the coupon settings, in which you can notice the additions after activating the add-on:

It’s not difficult to create a new coupon. Start with the coupon code so you can write it manually as you like, or click (Create Coupon Code) to suggest random codes. The code is the set of letters, numbers, or special symbols used by the customer to get the offer, then write a description. About the coupon is an optional field.
Then we move to the coupon data. Choose the type of discount offered, and these are its options. Note that the BOGO option is added by the add-on. The percentage discount provides a discount of a certain percentage from the total invoice, and the fixed discount for the shopping cart provides a fixed discount on the total invoice, regardless of the value of the invoice. The total, if you set its value to $10, for example, and the first customer bought for $50 and the second for $20, then the total of his bill would be 40 and the second would be $10. The last option offers a fixed discount on the price of one product and not on the total value of the bill.
After choosing the type of discount you want to offer, specify its value and you can allow or disallow free shipping. Then, if you want to choose the expiration date of the offer, you can do so.
You can verify from your store the validity and effectiveness of the coupon, and here we have verified that the coupon code is effective:
As for the BOGO option(Buy one and get the second for free). You can select the product you want to add the offer to, through the first box entitled (Customer Buys) and add it by clicking ( Add Product ).

Search for the product you want to add the offer to by name on your store, then choose the quantity and click ( Add ).

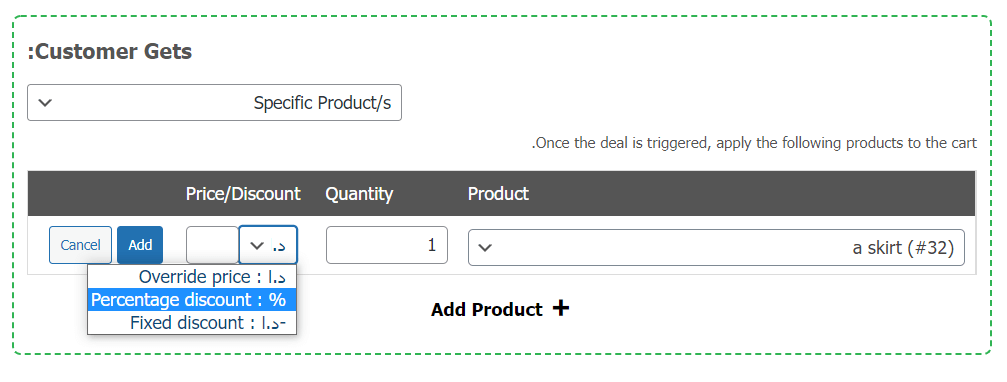
Then we move to the reward part, or what the customer will receive when he purchases the previously specified product, and it may be another product completely free, or at a specific discount, and the discount may be at the same old price, i.e. free, or a percentage of the price of the second, or a fixed number, and you can add more than one product. naturally.
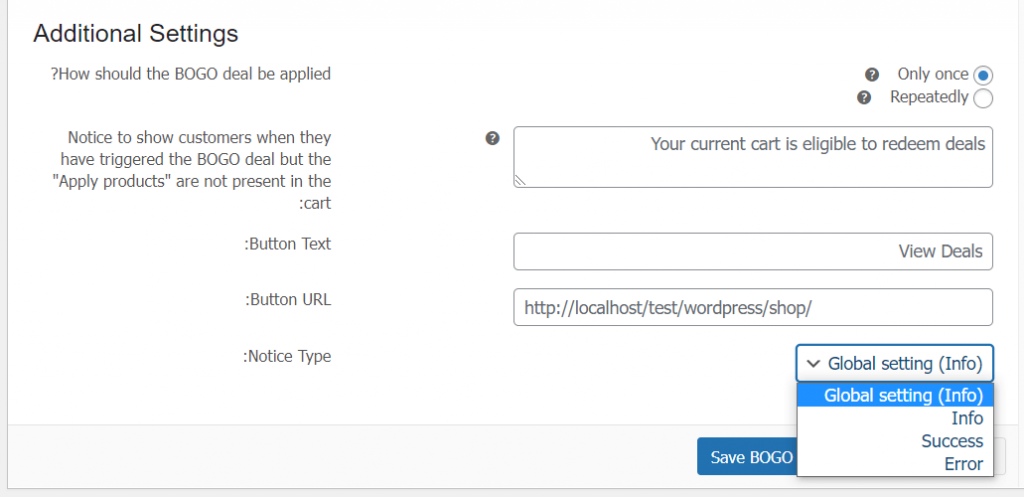
There are additional settings as well, to adjust BOGO deals, so you can choose that the coupon be used only once or can be used multiple times (repeatedly) when it meets the appropriate conditions for it each time.
The customer must be informed of the completion of the deal through the message in the second field, and put the appropriate word to display the deals available to choose from, and the default word is (View deals), then we will place a link that takes the customer to the location of the deal, which is the link to the product to which you added the discount, and finally choose the type of notification that you want the customer to know. After the process is finished, then save the settings after verifying them.
We will move to another part of the add-on options, which is (Role Restrictions), which means role restrictions, which is an option to allocate the coupon to a specific category, and not allow it to be used for another category. If you want to allow your online store editors or managers to use the coupon, you can do that.
First, you must activate the feature, by clicking on the checkbox next to the phrase (Enable role restrictions) and then specify whether you want to allow/disallow the category you will select next from using the coupon.

Then select the category and the available options are:
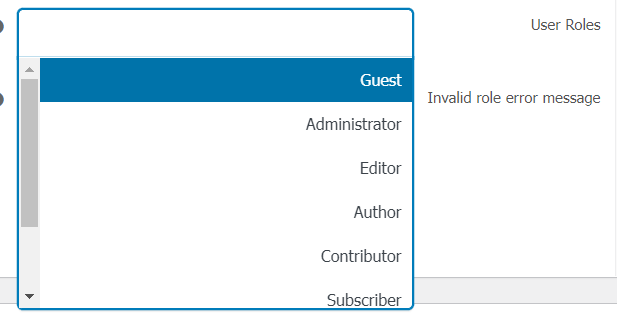
In addition to costumer, shop manager, you can choose more than one category, of course, and this means allowing these categories to use the coupon, and if they are from a category other than that, it is not allowed, so this must be explained to them when using the coupon, through the last field, and you can write the message you want, of course. :

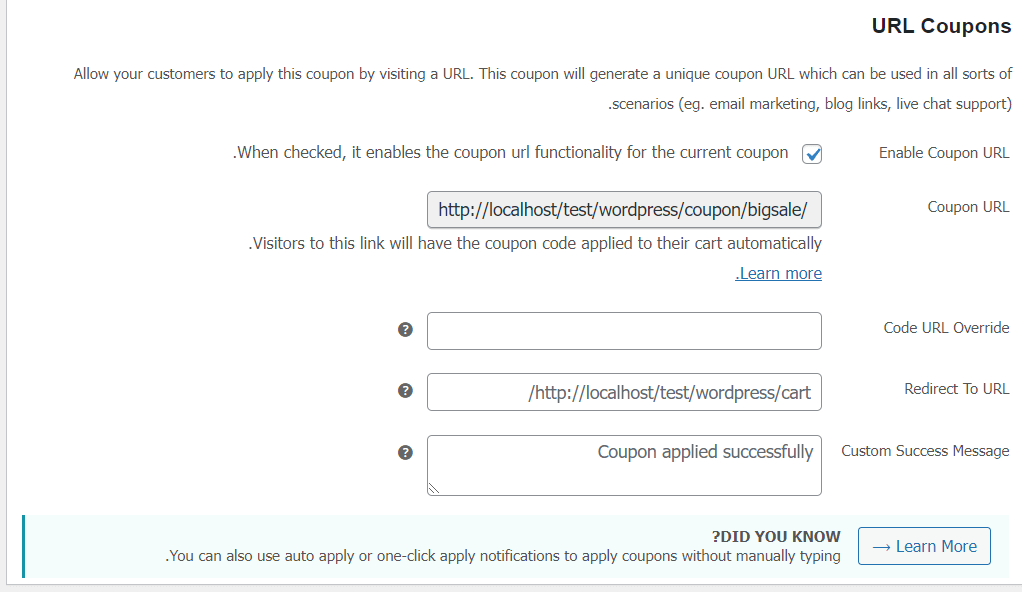
We now move to the URL coupons part, which is simply providing the coupon to customers when they visit a specific link, so that a unique and special link to the coupon is created and its goal is to encourage customers to use a specific feature, such as live chat support, for example.
Activate the feature via the check box, then put the coupon link you want so that this coupon will be applied to all visitors to the link automatically, then select the tab link on which you want the coupon link to take customers, and for the purpose of transparency and giving clarification to the customer, send a message informing him of the success of applying the coupon.
As for the rest of the features, they are driven by the addition, so we will skip them, and with this we have finished filling out the coupon data, and what remains is the shopping cart conditions section, which allows you to set conditions for benefiting from coupons in relation to the total value of the sales basket, and they are either common or separate conditions, so that one of them suffices for the purpose. , or it may be a compound condition.
It is either about the total value of the basket, the number of its items, or conditions about the product or product categories, or about the customer himself and others.
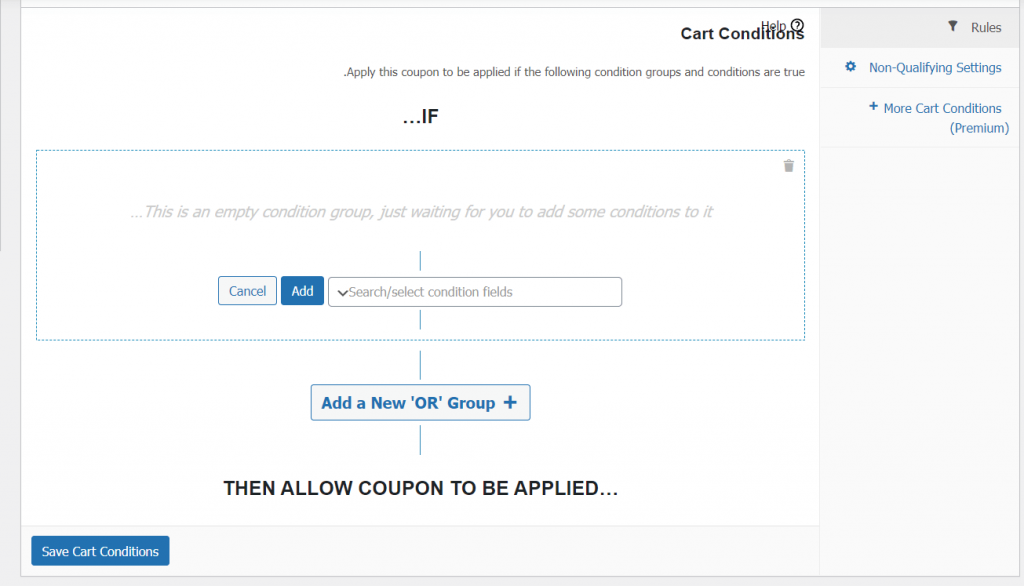
We added a condition on the quantity of items in the basket, so the coupon will only be applied and benefited if the number of items in the basket is more than 4.

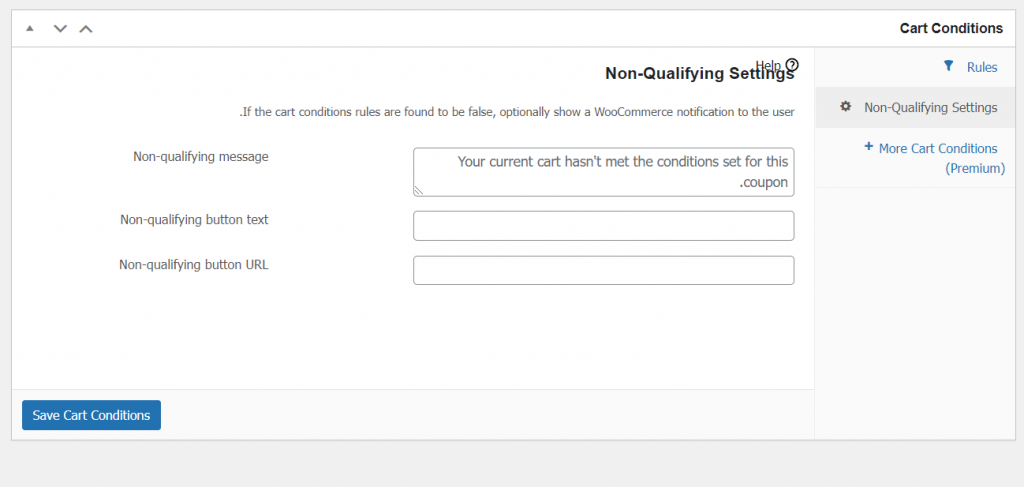
As for the second section, it is the exceptional settings. If any of the conditions of the shopping cart are incorrect, WooCommerce sends a logo to the customer accordingly. Write the text of the message that you want in the first event, then write the text that you want to appear on the logo button, then the link that opens when you click on the button.
Finally, check all the fields, and save the basket settings, and here we have finished adjusting the settings for the Advanced Coupons add-on, which is very rich and full of options.
Now we will move to the second addition, which is the Woocommerce Advanced Free Shipping add-on, which allows you to control the free shipping offers that you want to activate from time to time, as it gives you a wide choice of conditions through which the customer gets free shipping, such as reaching a certain value of the price of the desired products. Purchasing it and other conditions based on quantity, weight, quantity, shipping class, etc.
We first search for the add-on by clicking on ( Add-ons ), then ( Add New ), to open the suggested add-ons page. Through the search box, we type the name of the add-on and the first suggestions will appear. We click on the ( Install Now ) button and wait a while, then click on the ( Activate ) button. A list will open for us that includes Previously installed add-ons, including the new add-on.

Click on the word ( setting ) or the settings below the extension to start adjusting the settings as you want.
When activated, the extension will be added to the woocommerce settings page, specifically the shipping section, so you can access it that way as well.
As you can see, the settings are simple and uncomplicated. You can activate/disable free shipping, and you have the option to hide other shipping methods when shipping is free. Therefore, you can add your offers so that your previous offers appear in the table if you were hosting any of them.

Let us click on ( Add free shipping rate ) to add a new offer, and the following page will appear. Enter the appropriate title for the offer and it will be whatever you want. It is preferable for it to have a meaning that indicates what the offer offers, if it is according to location, for example, or according to quantity, or something else.

After setting the appropriate title, we move to the fields detailing the terms of the offer. From the first drop-down list, we choose the classification of the offer, that is, based on what this offer is given. The options are divided according to the following:
1) The shopping cart, which is: the total price with tax, the total without tax, taxes, the quantity, it contains a specific product, the coupon, the weight, it contains a specific shipping category.
2) User details : zip code, city, state, country, user condition
3) Product : width, height, length, stock, product status in stock (available/unavailable), and classification.
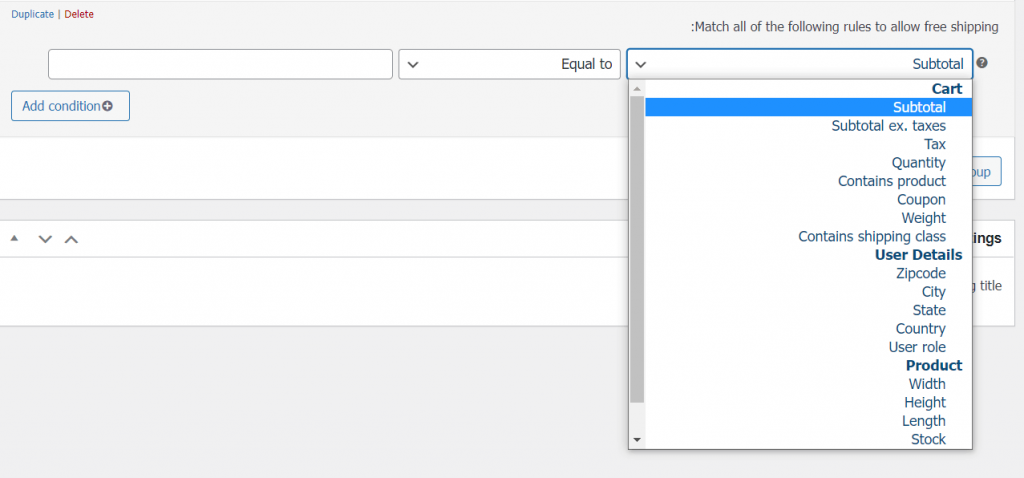
The second and third fields change according to the first condition. If you choose quantity, for example – which is the quantity of items in the shopping cart -, you then choose the equation according to which the availability of the offer is determined, and the options are either (equal to / not equal to / greater than or equal to / less than or equal to) and in the field Finally, you put the value in numbers, so the equation is as follows:
If the quantity of items in the shopping cart is equal to 15, the shipping will be free, with a mark on it. In the following illustration are other examples of the terms of the free shipping offers, and you can add whatever conditions you want with the customization you want.

Finally, provide a shipping address, preferably direct in meaning, such as (free shipping).

Save the draft and click ( Publish ) contained in the box at the top left of the screen, after you have confirmed all the settings, and tested them on your site, products, and prices.

The window will take you back to your woocommerce shipping settings to see your previous setting saved.

Conclusion
After completing the installation of the two add-ons, and explaining their most important features, we return to the question of the article, and we say that there is no specific answer to this question. You may ask yourself more than once with different circumstances, and the answers will be different even if it is the same store, as there is no single strategy that works in all situations. Situations and circumstances, so you have to study your store well to know all the numbers that help you make the right decision, and we hope that you make correct decisions every time so that your store grows more and more.


Leave a Reply