WordPress has increasingly provided advanced features and tools that allow website owners to manage and design their sites with high professionalism. One of the most prominent and important tools included is the Query Loop Block, which was added to WordPress in which was launched in July of 2021.
In this article, we will explain what Query Loop Block is, introduce you to its uses, and explain in detail how to utilize it on a WordPress site to build visual blocks that pull content from posts (or others) and display it where you want.
Query Loop Block concept
Query Loop Block is a component or block present in the full site editor (Editor) that allows you to build dynamic pages in your WordPress site, and it is somewhat similar to the Latest Posts Block, which displays the most recent posts published on the site, except It is more advanced, useful and customizable.
The full site editor (Jogtenberg Component Editor) is a new way of editing the site that includes many features that focus on using blocks to edit various sections of the website, not just the content section, which is the content of articles and pages . Therefore, in this editor you can modify the page header, sidebar, and other features. Sections in a way similar to editing posts and pages in the component editor .
The Query Loop block allows you to add sections to your site’s pages. These sections display posts from your site in a variable manner (posts change whenever you add new ones) according to options you specify, including the option to display posts that belong to a specific category and not others. It works not only with articles, but also with custom posts , and with WooCommerce products .
In the phrase (Query Loop Block), which expresses the name of the tool, the word Block refers to a block or component. The word Loop in Arabic means a loop and it expresses the repetition of performing a certain operation. Query refers to a query, and here it expresses the ability to display certain sections of the available information and not They all depend on what you want, so if you are Arabic in WordPress, you will notice that the name of this component is (Query Loop).
Uses of Query Loop Block
The Query Loop Block can be used in many applications, including adding sections containing posts to your existing pages or creating pages that display posts or products in a beautiful and customized way. The most prominent examples of what can be built with the Query Loop Block are the following:
- Create a custom list or grid of items that display blog or website articles.
- Create a custom list or grid of items that display the various pages of the site.
- Highlight an article, page, or product by displaying it clearly.
- Create a custom list or grid of items that showcase WooCommerce products.
- Create a custom list or grid that displays custom posts.
- Build a home page that includes the latest posts and the latest products.
- Create a custom list or grid of articles on a specific topic.
- Create a custom list or grid with articles that follow a specific category.
In each of the above, the number of items in each row in the grid can be specified, in addition to the colors in both the grid and the list, and many other properties. The Query Loop Block also allows you to move to the next and previous page to view more posts and return to old posts (this can be customized (or cancel it as well).
How to use Query Loop Block in WordPress
To use Query Loop Block you must use a WordPress theme that supports the full site editor. Previously, you had to install a WordPress plugin in order to be able to use this tool, but now you can use it without having to install any plugins.
In this article, we will use the Twenty Twenty-Three template to explain how to use the Query Loop Block, but you can use any template you want that supports the full site editor.
First: Access the full site editor
After ensuring that your WordPress theme that supports the full site editor is activated, you need to go to the editor to be able to add a Query Loop Block. This can be done by clicking on ( Editor ) under the ( Appearance ) tab in the WordPress control panel .
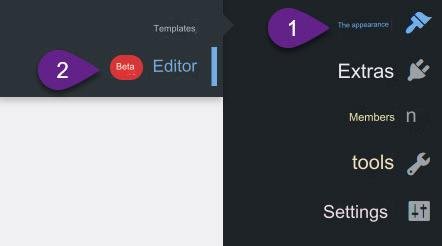
Before we start explaining how to add and customize a Query Loop block, there are a few things you should know about the full site editor:
- This editor allows adding blocks (components) to the site, and there are a large number of blocks that can be added, including menus, titles, images, buttons, and more advanced blocks such as page menus, social icons, latest posts, and the query loop.
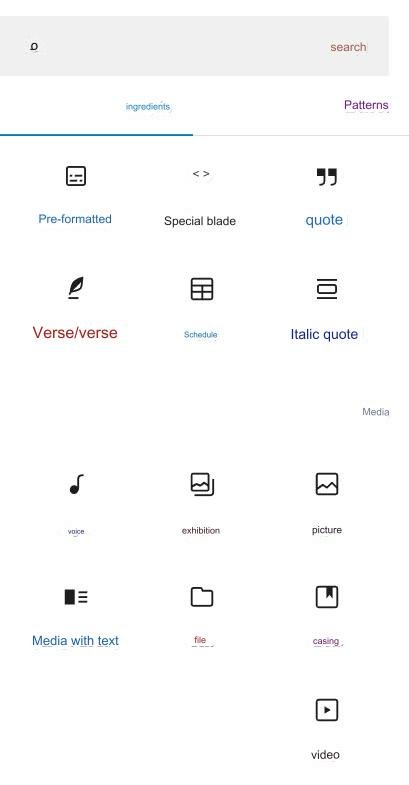
- Each block in the editor has a set of properties or options that control how it appears on the site. Some of these options appear in the toolbar at the top of the component when you click on it, while the rest of them appear within a window on the left side called (Component) or ( Component Options ).
- In the top bar of the editor page there is an icon in the form of 3 lines similar to a drawer. This icon is called ( View as List ), and when you click on it, all components of the template (we do not mean the complete theme, but rather the page template) being edited are displayed in the form of a list, where you can click on any component and modify its properties.
Second: Add a Query Loop Block to the site
First, in order to use the query loop block, we must determine which of the theme templates we are editing we want to add to it. The full site editor allows you to edit each WordPress theme template individually, and the template is a Web page layout within the theme. For example, the theme includes a home page template, as well as a search page template, a single article template, and others.
Choose a template to edit
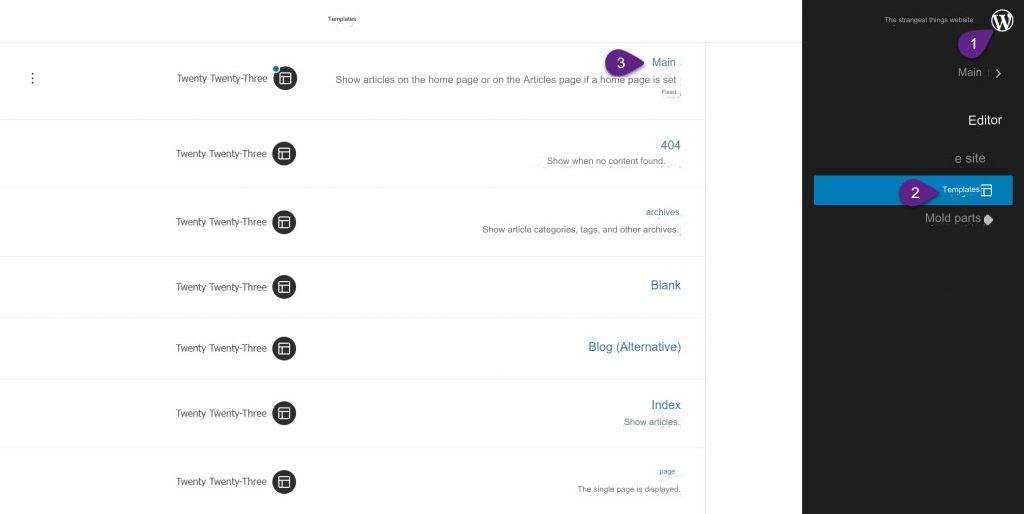
So first choose the template you want to edit to make it the template being edited in the editor window. You can do this by clicking on the WordPress icon at the top right, then on Templates, then choosing the template you want to edit from the templates that appear in front of you. Note that there is a description for each template that indicates where it is displayed and used.
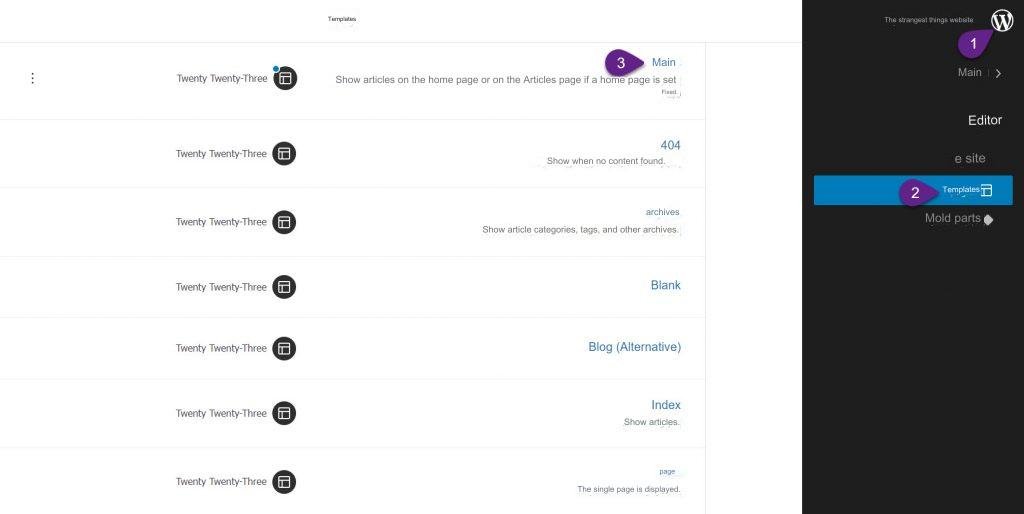
Note: One of the templates that you may need to edit and insert query loops into is the (Home) template, where you can, for example, add posts to it with the layout you want by adding a general Query Loop Block to a group of posts, then you can add query loops underneath it specific to each category, You can also add inquiry rings to display products or something else.
Add Query Loop component
After selecting the template, you will return to the window where you can make edits depending on the components. Here we have selected the main template to edit. We have removed all components from it and kept only the header and footer, in order for the query loop block to appear more clearly.
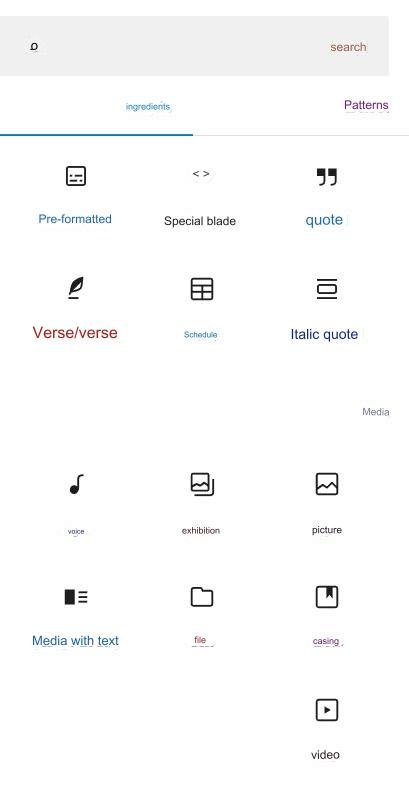
Now, in order to add the Query Loop Block to the editor, you have to click on the Add New Component button (+ sign) , then enter the phrase (query loop ) in the search box, then click on the component with this name in order to add it to the editor.
Note: There are several ways in which the + sign appears, which allows you to add components to the editor. It only appears as a large sign as in the previous image, or it may appear as a small blue button, or as a small black button, depending on where it appears.
Third: Dealing with the Query Loop Block and adjusting its properties
After adding a query loop component or block, you will see two buttons, one is (Select) and the other is (Empty Start). The first button, when clicked, allows you to choose a preset style from the preset styles that the template developer has added. These styles make it easier and faster to add the query loop because their properties are preset.
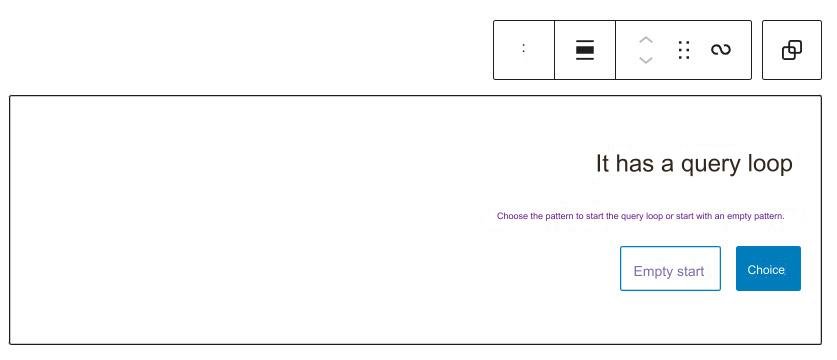
The Twenty Twenty-Three template includes many pre-set styles, which are convenient to use in many cases, but any WordPress theme that supports the full site editor does not have to include pre-set styles, so we will click on the ( Empty Start ) button to build the component according to We want.
After clicking the button, you will be shown a group of layouts from which you have to choose. These layouts relate to the information that will be displayed for each item in the episode. For example, when you choose the (Image, Title, Date) layout, images, titles, and publication dates of the articles will be shown.
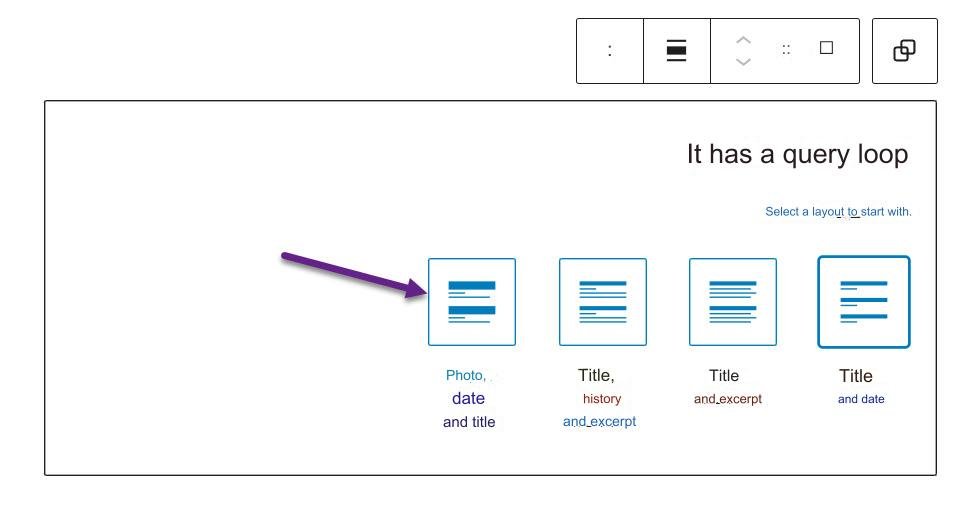
After choosing the layout you want, the post information will be immediately pulled and displayed in front of you on the editor page within the Query Loop Block. The component will initially look like a list, but you can convert it to a grid by clicking on the grid icon in the toolbar.
You will also notice that the query loop and the items within it have been added in the (View as List) section within the editor.
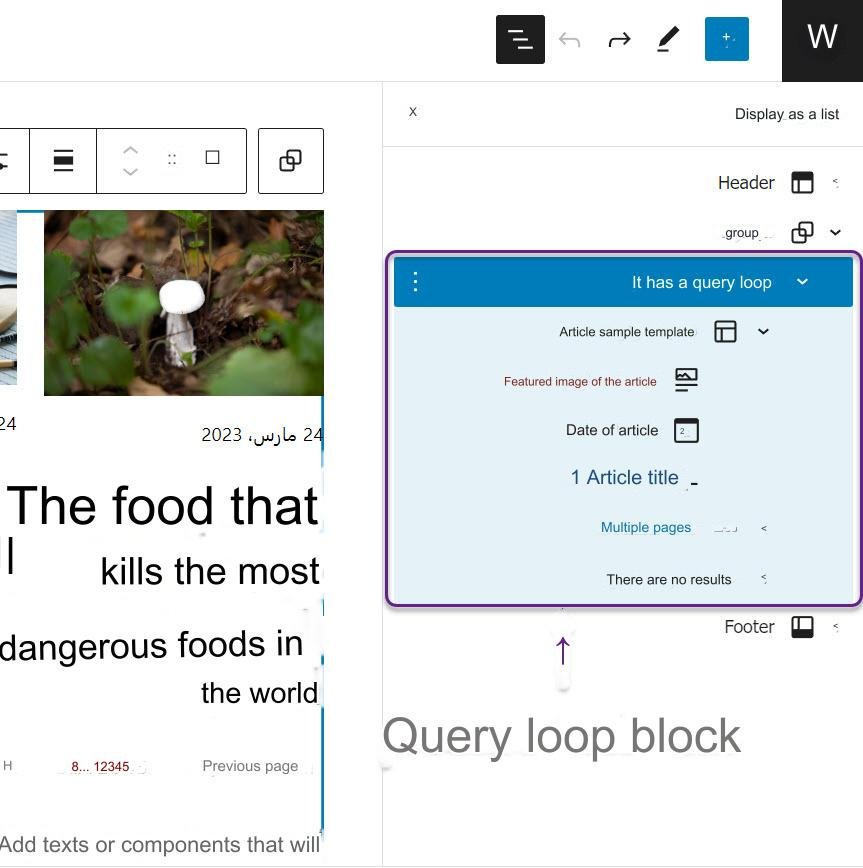
You can now adjust the appearance of the elements that appear in the Query Loop Block according to what you want by selecting the element you want to adjust, then modifying the properties in its toolbar, and in the component options section that we mentioned previously, which appears on the left side of the screen.
There are many properties that you can change for both the Query Loop Block and the elements in it, so we will not be able to cover them all here, but we will highlight the most important ones in the following paragraphs.
The most important features of Query Loop Block
In the following list, we explain the most prominent features and options of Query Loop Block:
- Switch between grid and list : This can be done by clicking on the corresponding button in the toolbar.
- Specify the number of elements that will appear on the page, the amount of offset, and the total number of pages : This can be done through the options that appear when you click on the ( Display Settings ) icon in the toolbar. It is worth noting that:
- Setting ( offset ) to a number other than zero causes the first elements in the loop to be ignored by the same amount that is specified.
- Setting ( maximum page width ) to a number other than zero leads to ignoring elements in the loop that are supposed to appear on pages whose ranking is higher than the entered value.
- For example, if the loop contains 100 elements, and you set the offset to 6, and the maximum page width to be 10, and the number of elements appearing on the page is 3, then only elements 7 through 36 will be displayed.

- Determine the width of the component : The width can be made as wide or not as wide as you want through the alignment icon in the toolbar. If the query loop is used to design a full page and not part of a page, it is preferable to use the wide or full width, as this will not leave parts of the screen Without using (footnotes).
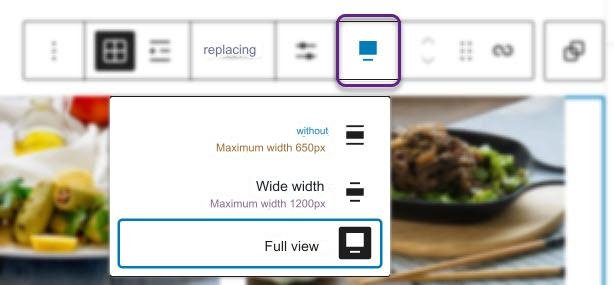
- Specify the type of posts to be included in the query string : This is done through the ( Content Type ) option located in the Component Options section on the left side of the screen. You can select one type of content. You can select (Article) to display articles within the episode, or you can select (Page) to display pages within the episode, or you can select (Product) to display products within the episode. You can also specify other types of content if your site includes others.

- Specify the number of columns in the grid : If you choose to display query loop elements as a grid, you can specify the number of columns in the grid through the Columns option in the Component Options section.

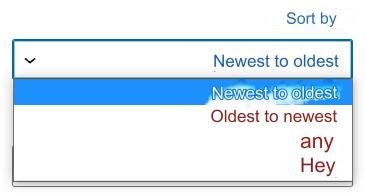
- Specifying the method of arranging posts : Through the ( Arrange by ) option located in the component options section, you can specify the method of arranging the posts that will be displayed in the query ring, as it can be arranged by date of publication or by alphabet (ascending or descending).
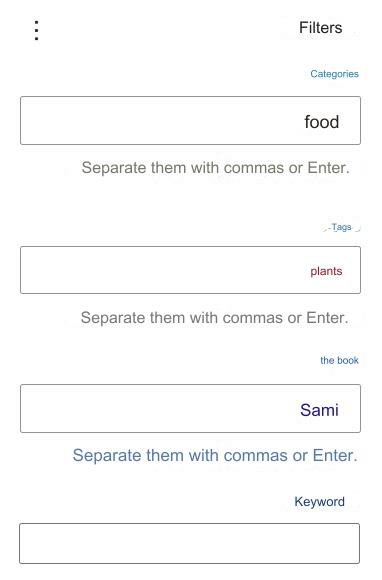
- Filters : These are located in the component options section. They are one of the most important features of the query loop component, as they allow you to filter posts according to classification, author, or keyword. You can also combine the three filters or two of them. For example, you can display posts that return To a specific category and a specific writer at the same time.
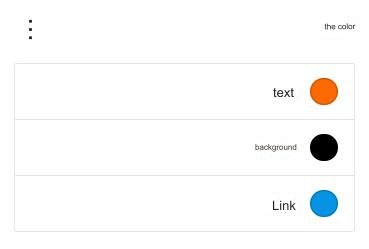
- Colors : Through the color settings in the component options section , you can adjust the various colors of the query loop elements, which are the background color of the component, the color of the text in it, and the color of the links it contains.
There are also many other properties that the Query Loop Block has, and you can explore them yourself by experimenting with changing them and observing what modifications occur to the component in the editor.
The most important properties of the existing elements are Query Loop Block
Also, all the elements in the query loop component, such as images, titles, excerpts, article dates, page numbers, etc., have properties that can be modified to produce posts exactly as you want.
Like the Query Loop Block options, the options for these elements appear within the toolbar and the component options section when you select them. For example, when you click on the featured image of the article, properties will appear that allow you to adjust the appearance of the image professionally, as you can specify its dimensions, show a frame for it, and make it a little dark. In addition to many other settings.
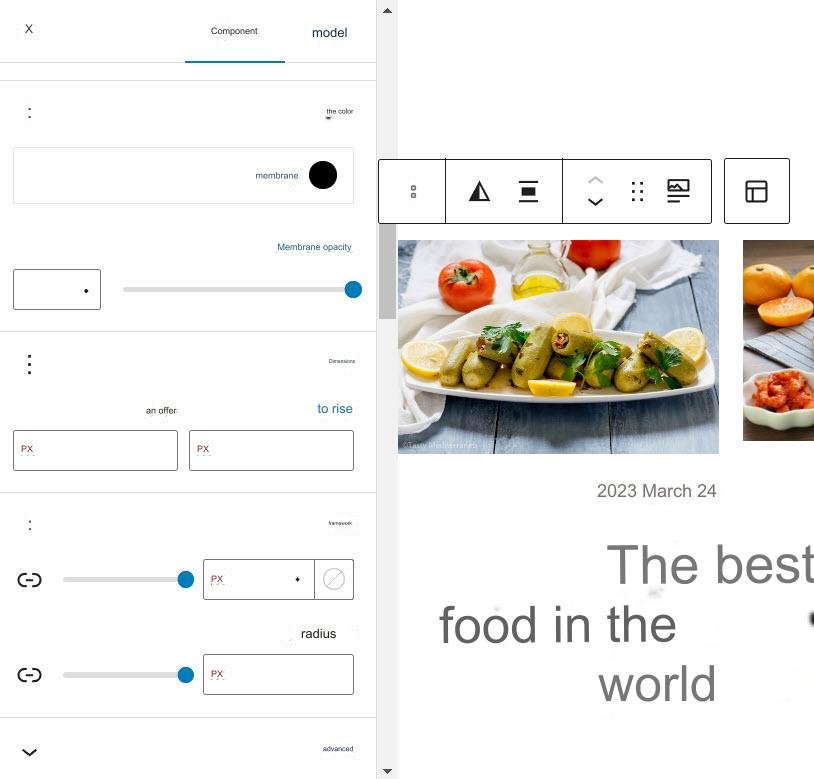
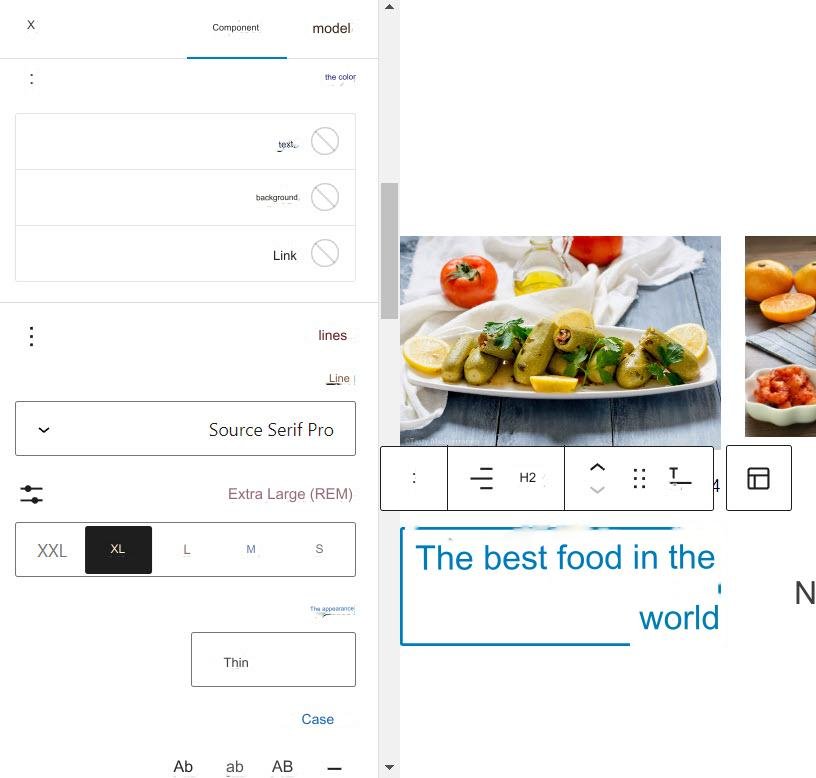
When you click on the date, many settings will appear through which you can adjust the way the date appears and appears, and the same applies to the title and other elements.
It is also worth noting that more elements can be removed or added to the Query Loop Block, including but not limited to: Article excerpt – Author – Category – Tags . To add any of this, you must select the element you want to add under by clicking on it, and then you must click on the Add Component button .
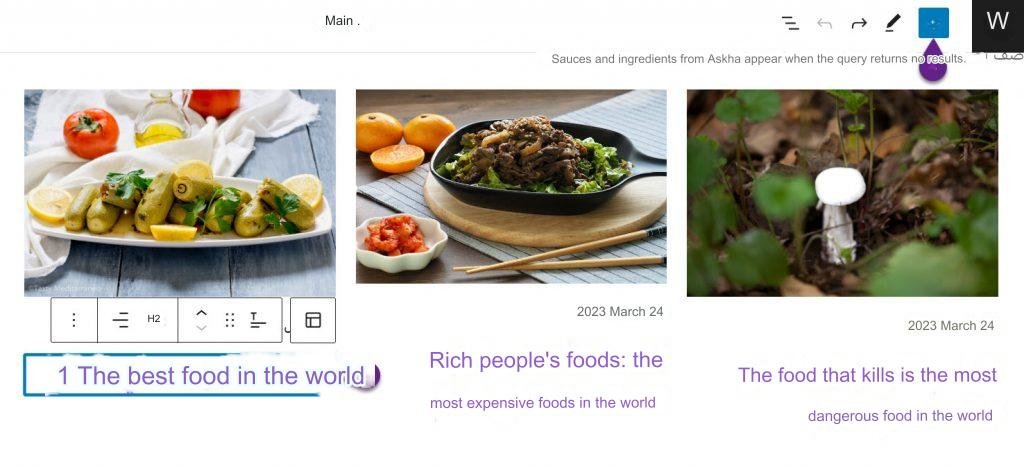
After that, you must choose the component that you want to add from the Components tab and click on it to be added directly to the query loop in the place you specified.

After you click on the component, you will notice that it has been added directly to the Query Loop Block within the editor, and its properties can be modified like other existing components.
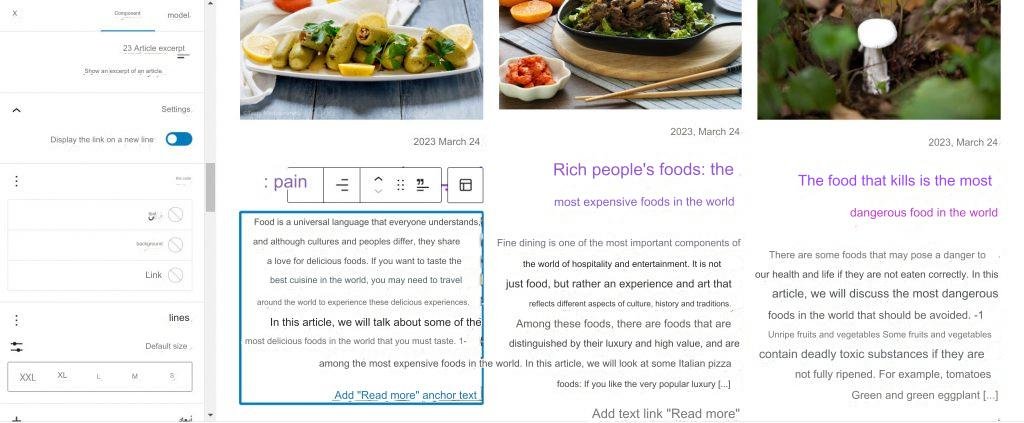
We must also point out that changing the properties of only one of the items in the query loop will automatically change the properties of other similar items. For example, if you change the properties of the featured image of an article displayed in the loop, the changes will be automatically applied to the rest of the featured images in the loop. The episode itself.
After you finish adjusting the settings of the Query Loop Block and the settings of the elements inside it, adding what you want to it, and removing what you do not want from it, you can click on the ( Save ) button located at the top left of the editor in order to publish the modifications you made to your website.
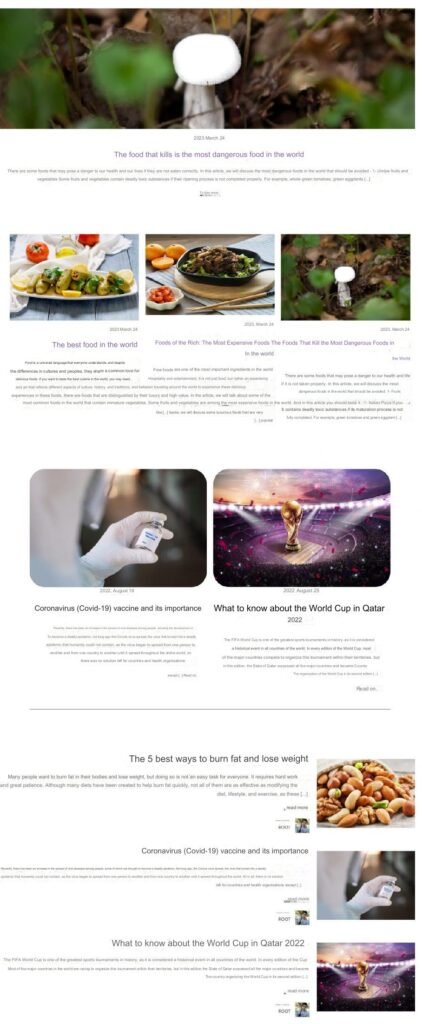
The following image shows some of the query loops that can be done with the Query Loop Block. In addition to what is shown in them, there are many other designs that can be made.
Tips for using Query Loop Block professionally
Using the Query Loop Block does not require any programming experience, as you noticed during the explanation we provided above, and therefore anyone with a little experience with WordPress can use it to build wonderful designs, but in order to use this feature in a more professional manner, be sure to follow the following tips:
- Use the query ring to highlight the most recently published post on your blog by creating a query ring that only it will clearly display on the main blog page. You can also highlight the two posts published before the last post more than the other posts through query rings.

- If you use a Query Loop Block to display articles, products, and other posts, do not use the same design for all of those loops. Rather, use a label for all the query loops that display articles on the site, and a different design for all query loops that display products. This will improve the user experience and convert Without distracting him.
- If you use two query rings on one page to display the same type of posts, be careful not to repeat the same post or posts in both rings by specifying the offset correctly. If the first query ring displays 6 posts, put the number 6 in the offset field of the second ring so that it does not Displays the posts appearing in the first episode.
This concludes our explanation of the Query Loop Block or the query loop component and how to use it in WordPress. In conclusion, we would like to point out that the examples we have reviewed here are only part of what can be done with this component, as there are many designs and ideas that can be applied based on it.


Leave a Reply