As it is known, the WordPress theme or WordPress theme is primarily responsible for the design and layout of your WordPress site and determining its appearance, while WordPress plugins mainly control the behavior and functions of the site.
Although you can include functions with a WordPress template, it is better to use plugins to secure these functions and provide these additions so that they work alongside the template that you are developing and expand its features and functions in an easy and effective way. In this case, you will need to provide these plugins that the template uses. To install once the template is activated.
In today’s article, we will learn through practical steps how you can include the required plugins to work with your WordPress theme (Required plugins), whether these plugins were custom-developed with the template, or they were ready-made plugins from the official WordPress repository and ask users to install and activate them in one step to provide certain features. Enhances the operation of the mold.
How to include plugins with WordPress templates
Perhaps the easiest way to include plugins with WordPress templates is by using a library called TGM Plugin Activation , which is a software library (not a WordPress plugin). It is lightweight, easy to maintain, and available for free. It is also hosted on a Github repository , where any developer can download it and modify it to suit their needs.
What is TGM Plugin Activation Library?
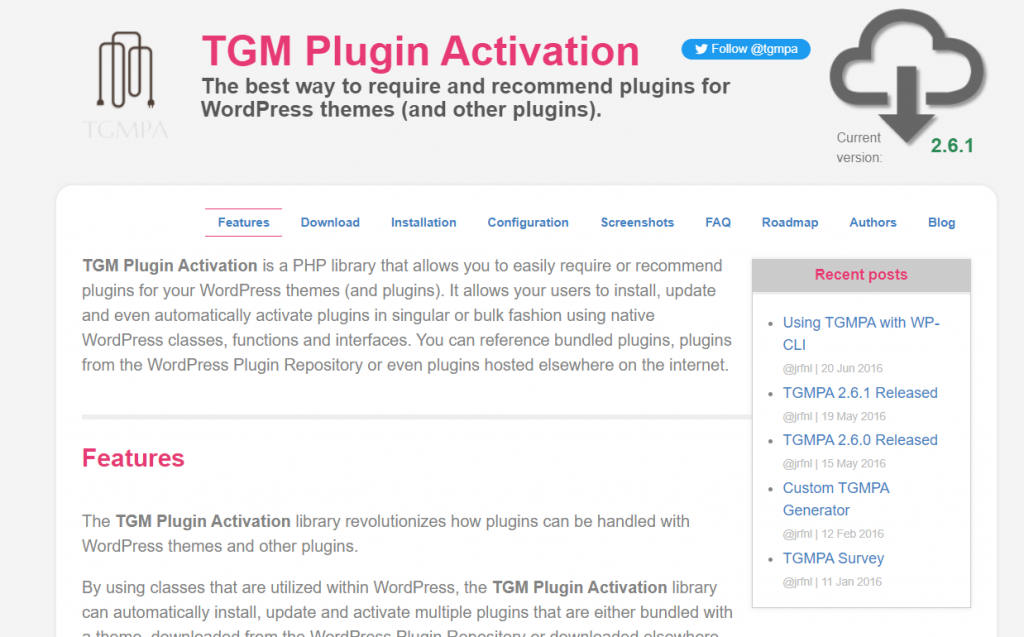
TGM Plugin Activation Library, or TGMPA for short, is a programming library written in PHP that allows you to easily request or recommend plugins for your WordPress theme, or even WordPress plugins themselves. It allows users to automatically install, update, and activate plugins individually or in bulk using core WordPress classes, methods, functions, and interfaces.
Using this library, you will not have to write a lot of additional codes and functions in the template you are developing in order to include a specific plugin, whether it is a ready-made plugin from the official WordPress plugin repository, a plugin hosted elsewhere on the Internet, or even a custom plugin that you developed yourself and placed in a folder. Your template..
Whether these additions are necessary or required to make the template work, or they are only recommended additions to make the template work better, using the TGM Plugin Activation library will enable you to achieve this easily, and it will display to the site owner a pop-up window with these additions and help you organize all the plugins and update them from one place. .
Steps to use the TGM Plugin Activation library.
In the following paragraphs, we will explain to you how to use this library and integrate it with your WordPress template, how to set it up, and configure the required and recommended plugins for the template with illustrated practical steps.
Step1. Generate the necessary library to work with the template
The first step you need to do is to integrate the library with your theme. To do this, go to the library download page from the official website and select the Theme option from the I’m going to use TGMPA in section because you will be integrating it with your WordPress theme.
Select from the I intend to distribute the theme section via how you intend to distribute the template, where three options are presented to help you ensure that the version of the library you are using is compatible with the requirements of the platform on which you will display your template, which are as follows:
- WordPress.org if you intend to display the template in the official WordPress theme repository.
- ThemeForest If you intend to sell the theme on ThemeForest
- Some other way if you use another way to display your template.
After that, fill in the necessary data according to your template, which is:
- Text Domain: The text domain for translating a WordPress template . It can be obtained from the template formats file. If you do not find it specified before, choose a special domain for your template and start using it everywhere you need to specify the text domain within the template code.
- Function Prefix: The prefix of the programming functions within the template so that the prefixes that you use in your template are added to the library correctly. By convention, the function prefix is usually the same as the name of the template (in lower case letters).
- Name: The name of the template.
For us, we want to integrate this library with a template called FrannaWP, so we fill in the appropriate template data as shown in the following figure:
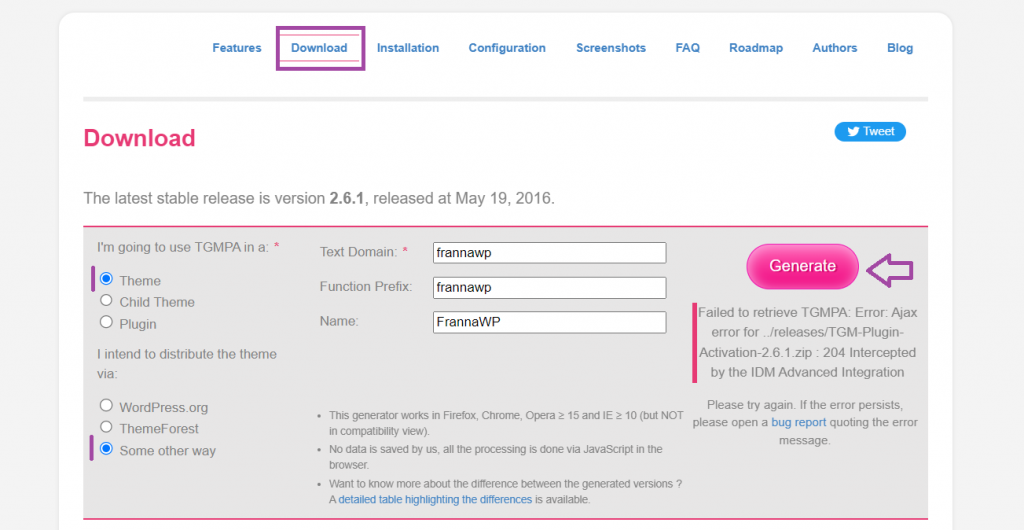
After filling in the necessary data, click on the Generate button to start downloading the library in the form of a compressed file TGM-Plugin-Activation-2.6.1.zip on your local computer according to the settings you used.
After that, unzip the file and its contents will appear as follows:
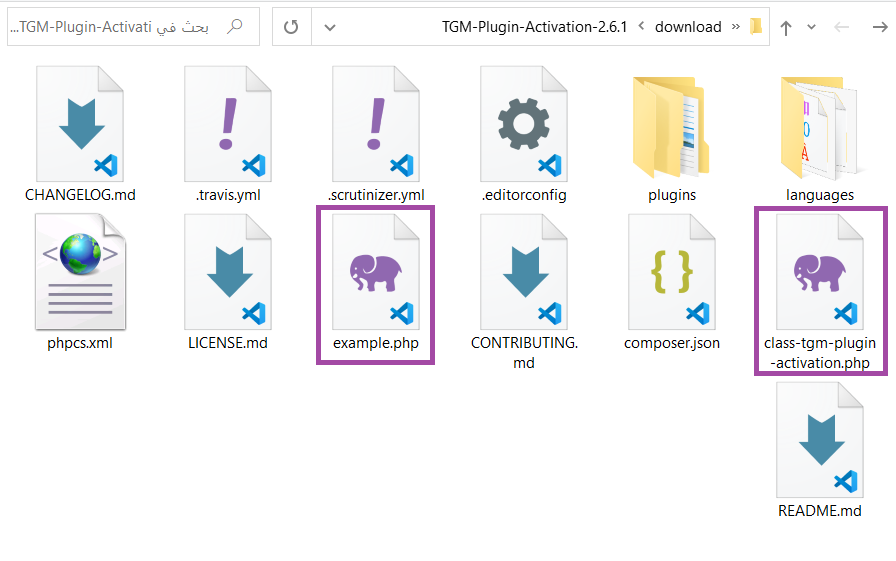
Of all these files, what interests us is the file example.php and the file class-tgm-plugin-activation.php, which we will integrate with our theme in the next step.
Step2. Integrate the necessary library files with your WordPress theme
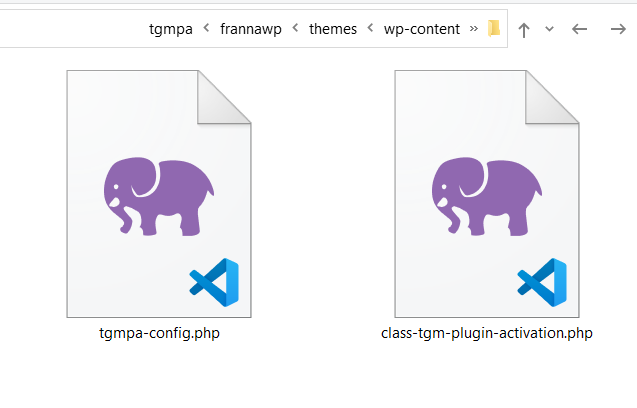
Go to your theme folder and create a folder somewhere in your theme with whatever name you choose. Here I will call it tgmpa and copy into it both the file class-tgm-plugin-activation.php, which represents the complete contents of the library, and the example.php file, which represents the settings file for the library. .
The next step is to rename example.php to a more expressive name, such as tgmpa-config.php, to obtain the following file directory:
You must then upload this setup file to your template functions file functions.php by writing the following code, and then you must modify it to suit the needs and settings of your theme.
note:
Make sure you type the correct file path into the request_once function call and modify it depending on where you place the library files in your theme.
Then open the tgmpa-config.php file with the code editor you are using and look for the line that ensures that the class-tgm-plugin-activation.php library file will default to the following form:

Edit this path so that it points to the library file correctly. In our case, the correct path will be as follows:

As you can see in the image above, below the library include line there is a tgmpa_register action hook which is used to call a function named my_theme_register_required_plugins, scroll down the hook a little to reach the definition of this function as follows.

If we ignore all the comments and experimental data passed to the function here, you will notice that this function has the following general structure:
As you can see, there are two variables to this function:
- $plugins is an array that specifies necessary and recommended plugins to be installed, and you need to create arrays inside that array so you can set their parameters.
- $config represents an array of settings for the TGM library setup process and includes a lot of information on how to customize the library to your needs.
The following paragraphs provide further clarification on how to prepare each variable.
More about the $plugins variable:
We can pass the following parameters through this variable:
- ‘ name ‘: Mandatory parameter representing the name of the extension
- ‘ slug ‘: A mandatory parameter that represents the name of the add-on and is usually the name of the folder containing the add-on files.
- ‘ source ‘: The source of the plugin. Here it should be noted that this parameter is not required for plugins belonging to the official WordPress plugin repository that do not need a source parameter and is only necessary for custom plugins and plugins located on external sites.
- ‘ required ‘: a boolean parameter whose value is either true, in which case the plugin is necessary to create the template, or false, in which case the plugin is only recommended to create the template and is not necessary.
- ‘ version ‘: An optional parameter that represents the minimum version required for the extension. This parameter is useful if you require a certain minimum version of a plugin for your theme to work. In this case, if the user has the add-on installed, but it has a version lower than the minimum required, in this case a notification will be displayed asking him to update this add-on to the latest version so that the template works properly.
- ‘ force_activation ‘: An optional boolean parameter whose value is either true or false. If this parameter is set to true, it forces the selected plugin to always be enabled while the current theme is activated. In this case, you will only be able to deactivate this plugin by changing the theme (although this is annoying for the user, but may be necessary in some cases).
- ‘ force_deactivation ‘: An optional boolean parameter whose value is either true or false. If this parameter is set to true, it forces the process of deactivating the specified plugin when changing the template. Once the user replaces the template with another, the plugins will be automatically deactivated. This command is useful for deactivating custom plugins associated with this template only.
- ‘ external_url ‘: An optional parameter that represents the extension’s external URL. If you pass a value for this parameter, the extension’s name will be associated with this address in the extension prompt notification in the Control Panel.
More about the $config variable:
- ‘ id ‘: A string that represents the unique TGM library you have implemented in your theme. This identifier is important. If there is another add-on on the site that also uses the TGM library, different identifiers will prevent conflicts.
- ‘ default_path ‘: A text string that represents the absolute default path for the plugins that we want to include in the template previously.
- ‘ menu ‘: the nice name or permanent link to the direct menu that takes us to the plugin installation page, for example ‘tgmpa-install-plugins’
- ‘ parent_slug ‘: Nice name for the main menu of the add-on installation page.
- capability ‘: The permission needed to display the add-on installation page, usually ‘edit_theme_options’
- ‘ has_notices ‘: Boolean or boolean value. If true, notifications are displayed to the admin about required and recommended additions to the template.
- ‘ dismissable ‘: a boolean parameter whose value is either true or false. If its value is true, the user can ignore and dismiss notifications and messages displayed by the library.
- ‘ dismiss_msg ‘: a boolean parameter whose value is either true or false. If its value is true, messages and notifications will not be displayed.
- ‘ is_automatic ‘: a boolean parameter whose value is either true or false. If this parameter is set to true, all add-ons will be automatically activated when they are installed.
- ‘ message ‘: An optional parameter representing optional HTML content that you can include before displaying the list of required extensions.
- ‘ strings’: An array containing the messages to be displayed. You can set them as translatable strings as well. You can check the example.php file to see a list of all these messages.
For example, this variable can be set up as follows
After you have learned the meaning of each of these parameters, all you have to do now is set up these parameters and pass the appropriate values to them in the appropriate manner, depending on the nature of the addition that you want to include within your template.
Practical examples of including a WordPress plugin with a WordPress theme
As you know, there are three cases for including plugins with a WordPress theme. You can include plugins from the official WordPress plugin store, plugins from an external source such as your server or a CDN , or an plugin from your template folder such as:
/your-theme/plugins/shortcodes.zip
Here is how to use the library for each type of these add-ons.
Example 1: Embed a plugin from the WordPress plugin repository with a WordPress theme
For example, to include the Default featured image plugin from the official WordPress repository and recommend installing it with our theme, we will write the settings within this function as follows:
All you have to do now is activate the template, and you will see a notification similar to what is shown in the following image appearing at the top of the home page of the WordPress admin control panel. This notification directs you to install the add-on – or set of add-ons – that you included with your template.

Clicking on the Begin installing plugin link will bring up a screen displaying the suggested plugin or set of plugins for you to install on your site.
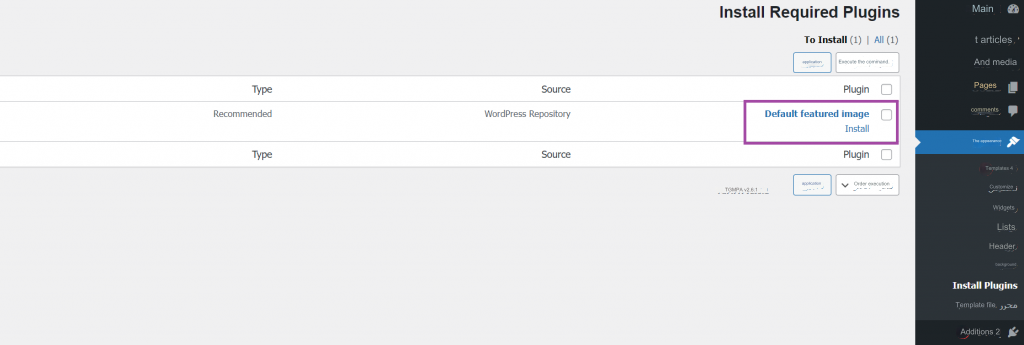
Then you must install the add-on on your site, and when it is installed correctly, you will see a message as follows:
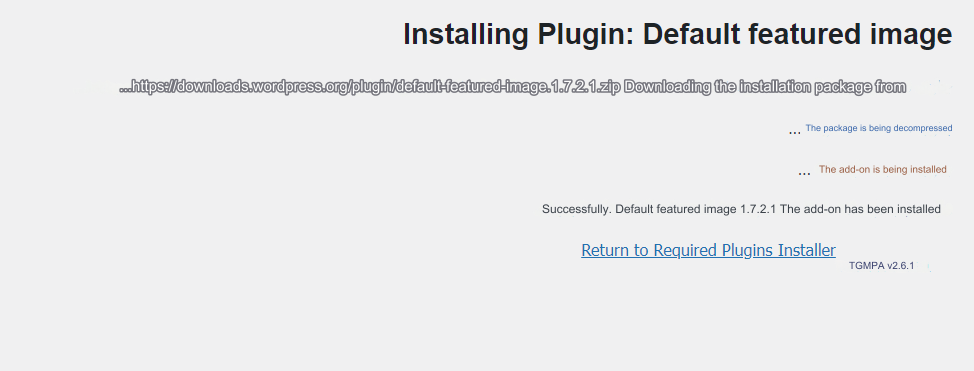
By clicking on the Return to Required Plugins Installer link in the image above, a table of all required plugins will be displayed with information about the status of each plugin.
Then you must activate the add-on on your site by clicking on the Activate link, because if the add-on is installed without being activated, a new notification will be displayed that includes, in this case, a link for activation.

Example 2: Embed a plugin from an external source with a WordPress theme
If we want to recommend downloading a plugin from an external party with a WordPress template, for example the User Registration plugin, in this case we must pass the plugin link into the source parameter of the plugin array as follows:
We can add this matrix after the addition matrix that we added in the previous example as follows:
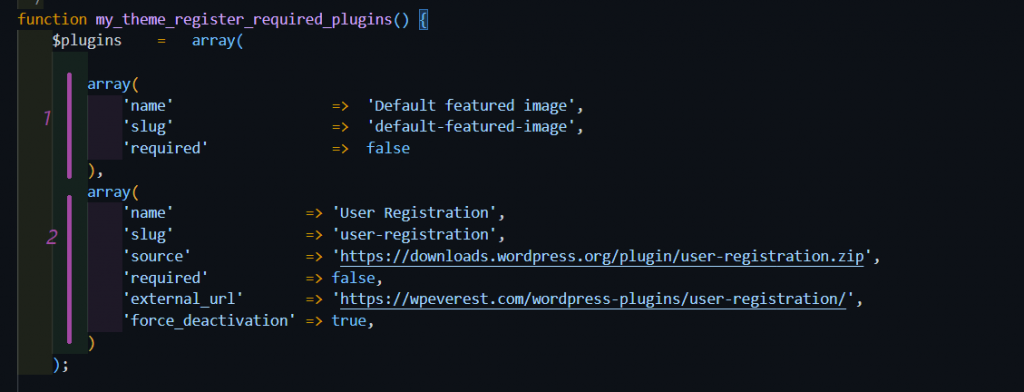
In this case, we will be instructed to install both add-ons once the template is activated as follows:

Example 3: Embed a custom plugin from within your WordPress theme folder
If you develop a custom plugin with your theme, you can include it in the template folder in a specific path, such as /lib/plugins/my-custom-plugin.zip, and pass it within the plugins array as follows:
As you can see from the examples above, the TGM library enables you to install and activate any type of WordPress plugin, regardless of its source. It also enables you to install more than one plugin with one click.
For example, if you set the is_automatic parameter of the $config variable to true, you can easily select all add-ons at once and install them collectively, and they will also be activated automatically once they are installed.
Conclusion
In today’s article, we learned how to take advantage of the power of WordPress plugins and how to recommend and include these plugins with the themes we develop through the TGM Plug-in library, which allows you to easily request or recommend plugins for your WordPress themes. It allows users to install, update, and activate plugins automatically in a way Individual or grouped.
As you can see, the installation and activation interface integrates flexibly and easily with the site admin control panel and enables you to manage the necessary add-ons to download with the template with ease and flexibility and recommend them through notifications displayed within the site control panel once the template is activated.
What do you think of this library? Have you ever used it to include plugins with your WordPress theme? Share your experience on this topic with us in the comments section below the article.


Leave a Reply