n this article, we will talk about how to download WordPress from the official website, and we will also show you two ways to install WordPress on hosting.
Method 1: Install WordPress manually via FTP.
Second method: Install WordPress yourself through the hosting control panel. (It is the fastest and easiest way to install WordPress )
Download WordPress from the official website
First, you will need to download WordPress from the official website: – You can easily go to the WordPress download page and download a compressed file in zip format.
After downloading WordPress, unzip the file (Extract) as shown in the image:
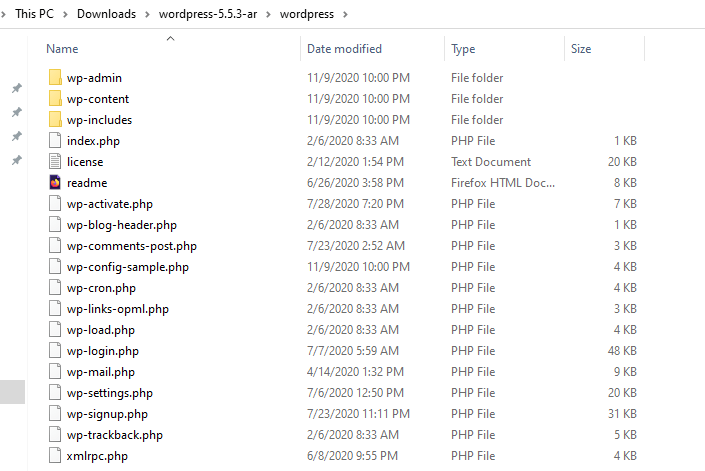
Then you need to install WordPress files on your website hosting using manual methods, through the file manager. Or through FTP. We will review together the two methods, and then we will show you how to install WordPress after uploading the WordPress file to the hosting.
Then let’s start with the first method, which is to install WordPress manually
Method 1: Manually install WordPress through File Manager
To install WordPress through the file manager, follow the following steps. Please note that the steps are fixed for most hosting service providers:-
1- Through the hosting control panel, choose file manager, as in the picture.
2 – After clicking on file manager, a page will appear that shows the file explorer as shown in the following image:

3 – Go to the (Public_html) folder
4 – Upload a file as shown in the following image.

5 – Choose the WordPress zip file that you downloaded in the previous step.

6- After uploading the file, go back to the file manager and go to the file, then right-click on the file and choose extract as shown in the pictures.
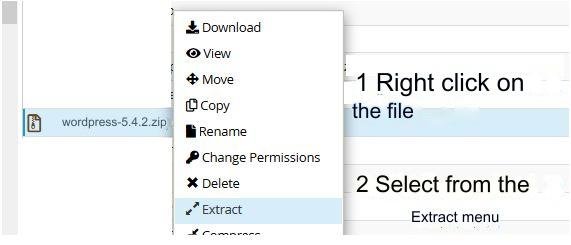
You can also upload a WordPress file using the FTP method, as shown below. (You can skip the FTP method if you have already uploaded the file through the file manager and are continuing to install WordPress.)
Method 2: Install WordPress manually via FTP
Requirements for installing WordPress manually via FTP:-
1. A file transfer program to the server (FTP) such as FileZilla. Click here to download it
2. How do I obtain server login data through FTP? It is sent to you on the email through which you registered the hosting, and if you are unable to access this email; You can create new FTP account data through your hosting control panel.
Steps to install WordPress manually via FTP:
1- Go to the hosting control panel, then choose FTP Accounts as shown in the image.

2- Enter the required data and then click on create account as in the picture:-

After creating the account, you will receive a message informing you that the account creation was successful.
The next step is to connect to the server through the FTP account data that was created in the previous step.
After successfully creating the account, you will find at the bottom of the page the word (FTP Account Configuration). Click on it to obtain the contact information. As it is shown in the picture:
3 – Open FileZilla and make the connection; It requires transferring data – copying and pasting – through hosting, as shown in the previous image.

After connecting successfully; You can upload WordPress by right-clicking on the files that you decompressed as shown in the following image, then clicking Upload (this step is done from within the File Zilla program and not from Windows itself).
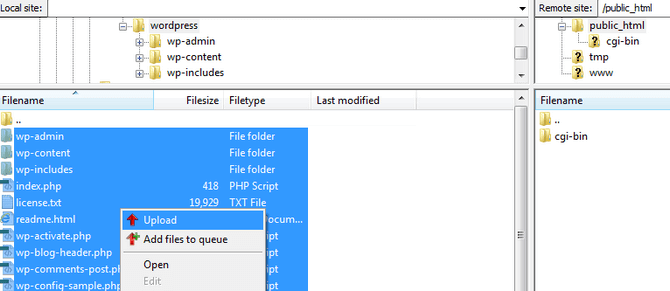
The next step: is to visit your site link through any internet browser and then choose the language for the new WordPress site.
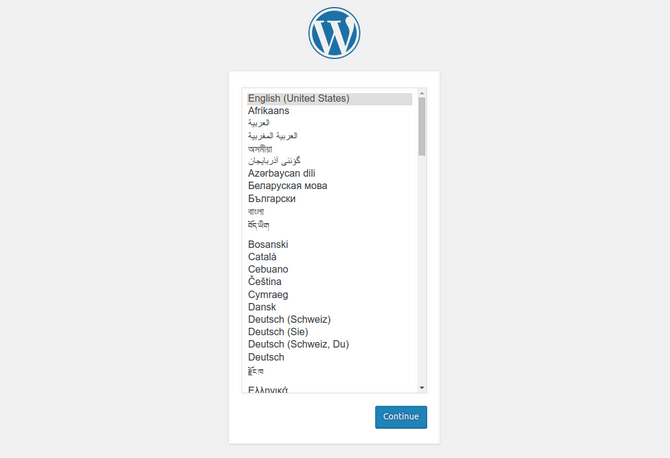
Once you get to the installation page, you will get a message saying that there is no configuration file. No problem, you did not make any mistake, just the warning message is displayed because there is not already a configuration file for the platform and it is normal for it to be displayed taking into account the fact that this is a new installation and it is not completed yet, so it is necessary to create a database for the site and connect it to WordPress.
Create a MySQL database
WordPress is built on the PHP programming language and MySQL database. To create a database, you must access your hosting control panel, and follow the following steps to create a database.

After clicking on MySQL Database Wizard
1 – Type the name of the database (preferably a name that indicates the name of the site and not a strange name)
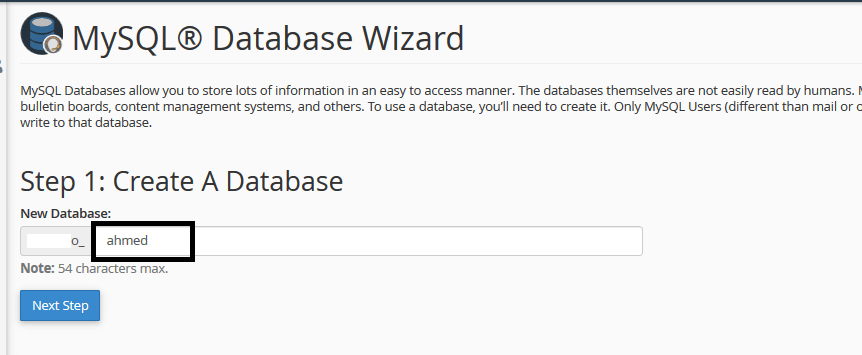
2 – The user name and password that controls the database (please save this data).
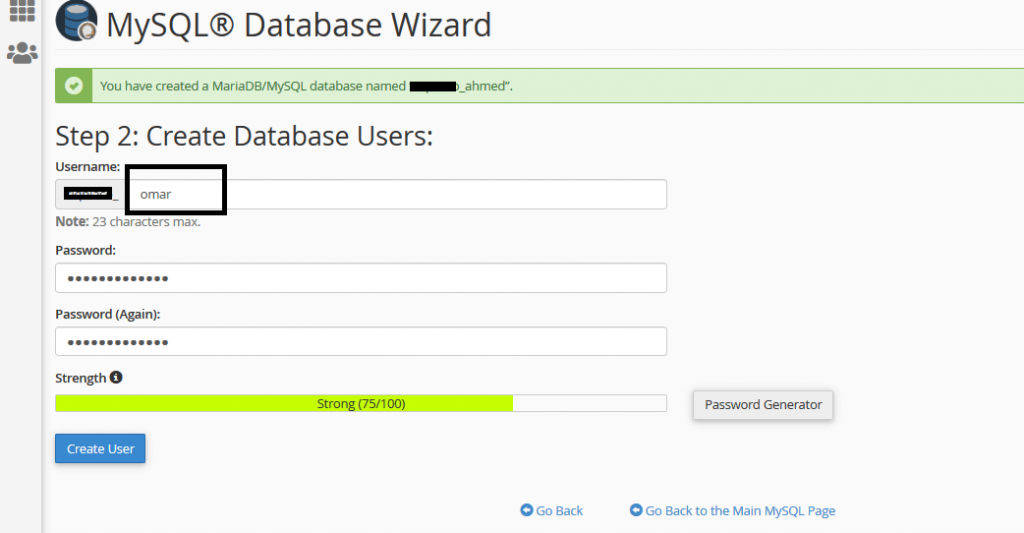
3 – Connect the user and give permissions to control the database.

Now go to your website link and click (Let’s go).
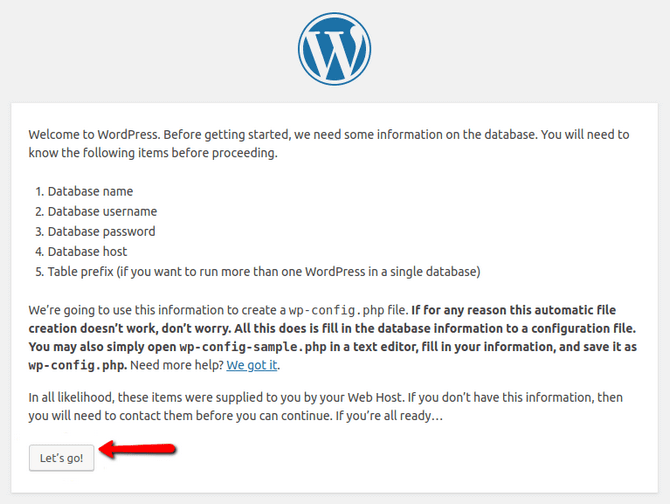
Enter the information we created in the previous database:- Move the data, copy and paste.
Once you have entered all the required information, please press the “Submit” button for the installation process to continue.
The next step: is the process of installing WordPress and connecting it to the database.
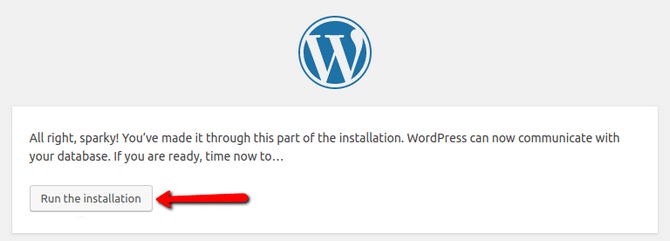
As you can see, the next step is to inform you that the data you entered related to your database is correct, the installation process continues, and please press the completion button as shown in the following image.
Create an administrator account for the new WordPress site.
- Site address : This is the address of your site on WordPress.
- Username : The username to log in to the WordPress control panel.
- Password : The password used to log in to the WordPress control panel. Note that you have to enter the password twice for verification purpose.
- Your email : The email account that the system uses to send you reports and other settings.
- Search engine visibility : If you choose this option, you are telling search engines not to include your site in their archive (leave it as it is without modification).
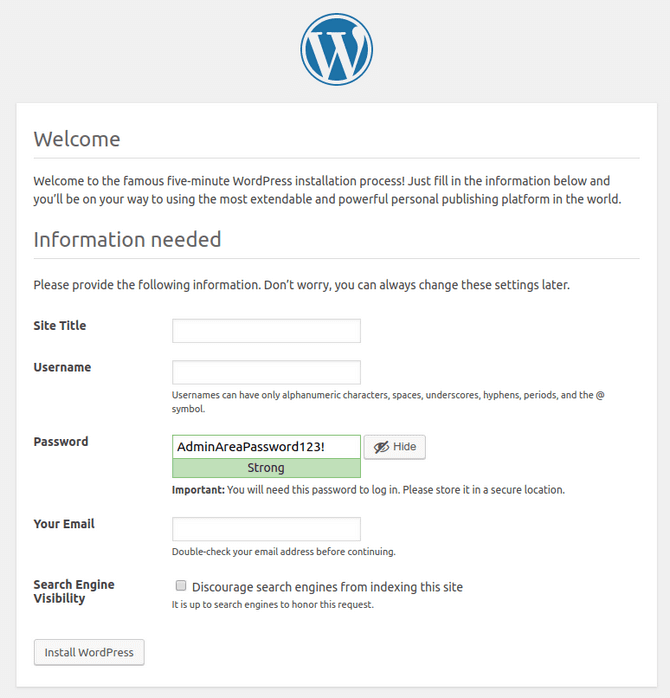
Then click on Install WordPress.
You will now be directed to the WordPress dashboard login page.
Log in to WordPress:
Type the email address (or user name) that you created in the previous step, and write the password.
You have now manually installed WordPress on your hosting.
Second method: Install WordPress yourself through a one-click installation service.
Most hosting companies now provide one-click installation; It saves a lot of time and effort, and is also easy for anyone.
One of the biggest advantages of one-click installation is that everything is done automatically… from sending WordPress files to the hosting; To install and connect the database automatically, the one-click installation method is the fastest and easiest way to install WordPress, and you can share with us in the comments about any problem or difficulty that you may have encountered.
1- Go to your hosting control panel and choose (one-click installation) as shown in the image.
A page containing other management systems will open, such as: Joomla, and you will find WordPress at the first of the list.
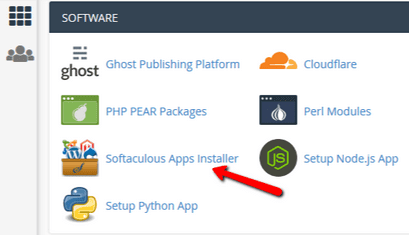
2- Click on WordPress and the following page will open as shown in the image.
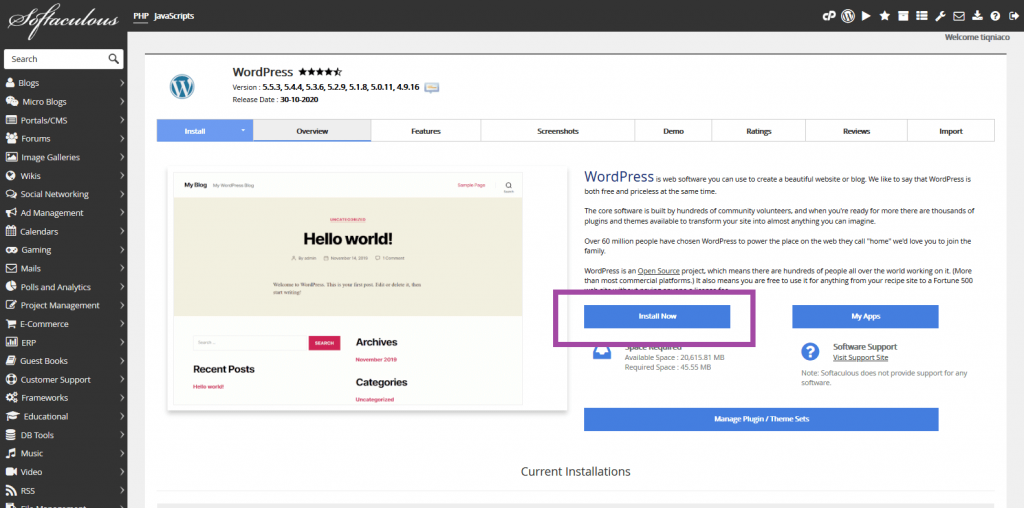
From the previous image, click on Install now
Another page will open as shown in the image below, and you will be asked for site data so that the installation can be done correctly.
1. Choose the domain and choose the site link format. Will it have https or not?!
2. Choose a subfolder if you want to install WordPress in a sublink of the site.
3. Leave this field empty if you want to install WordPress on the main domain.
4. Write the site name, site description…
5. In the next step, write your username for the site administrator, your password, and your email to log in to the control panel.
6. Choose the language for the new WordPress site.
7. During the installation of WordPress, some plugins are automatically provided, which saves you time later. Mark the plugins you want to install if you wish.
At the bottom of the page, you are asked to send an email address to send the installation data to it (optional).
8. After entering all the data and verifying it, click on Install now. You must now have realized why one-click installation is the easiest and fastest option for installing WordPress
Congratulations now! I installed WordPress on the domain that I chose in the settings.


Leave a Reply