WordPress admin control panel, or what is known as the dashboard, is the first page that appears to the user after logging in to the WordPress site. Through its side menu, which has several tabs, you can move to many pages designed to customize all aspects of the site, such as appearance, plugins, members, settings, etc.
In today’s article, we will learn how you, as a WordPress developer, can customize the admin control panel for the site and add a dedicated admin page to it, in order to provide through this page forms or panels through which the site owner can customize the template or add-on that you are developing in a custom manner, and provide important information and links about it to the user through Settings API , instead of going to the customization page built into the WordPress system (WordPress Customizer).
Why do you need to customize your WordPress admin control panel?
If you are a plugin developer or WordPress template developer , you may need to add dedicated pages to the control panel, so that these pages display the settings for this plugin, or various options for customizing the template and direct the user to them after activating this template or plugin.
You may also need to add new menu items to the control panel and display a page that shows information about the template or add-on, or a page to show the status of your site or other information. Here comes the necessity of learning how to create and customize a page in the control panel to display this information and new options to the site administrator.
There are many methods and options available to create custom pages in the admin control panel of a WordPress site, but in today’s article we will create a new page in the WordPress site’s control panel to customize our template that we built in the course on learning to develop a WordPress template through the Settings API , and we will add to this page Some simple options to learn how we can customize our template through them instead of the template customization page.
Read also: Customize a WordPress template programmatically through the Theme Customization API
If you would like to see information about customizing the WordPress control panel and increasing it with different customization options, I recommend reading the following article from the official WordPress developers website.
Steps to customize the WordPress admin control panel
To add a custom admin page in WordPress, we need two basic things: creating the required page and filling it with content. This is usually done by writing a custom function within which we need to call a group of ready-made functions in the settings programming interface, as we will explain in detail in our following paragraphs.
We also need to create a menu item within the control panel that will take us to this custom page through the add_menu_page function .
Step1. Adding a menu item in the control panel will take us to the custom page
First, let’s add a new menu item to the admin control panel to access the custom page. We can do this, as we just mentioned, by using the ready-made function add_menu_page , which is used to add a new menu item to the control panel, which has the following general form:
Here is the meaning of each of these parameters
- page_title$ This parameter is mandatory, and is a text string representing the text that will be displayed in the title tag of the page that will appear when this menu is selected. You must pass this parameter a title that expresses the content of the page, such as (customizing the template). It is preferable that this title be translatable by wrapping it in one of the translation functions .
- menu_title$ This parameter is mandatory. It is a string representing the text that will appear as the title of the menu item and can be passed the same value as the page_title$ parameter .
- $capability : A mandatory parameter, which is a text string that expresses the permission that the user must have in order for this menu to appear on the control panel. For example, we can pass here the value manage_option .
- $menu_slug: Mandatory parameter which is a text string representing the name or URL that points to the custom page that appears to us when we click on this menu. This string must be unique to the listing page and include only lowercase letters, dashes, and underscores.
- $callback: An optional parameter representing the function to be called to show the page content associated with the list. For example, the following code could be written to show a heading with a welcome phrase at the top of the page
- $icon_url : An optional parameter that represents the URL of the icon to be used for this menu. Here it is worth noting that you can use your own icon image file and pass the URL for this image. You can also use one of the ready-made WordPress icons. In this case, all you have to do is pass the appropriate icon symbol as a parameter for the URL. You can also use an SVG file encoded in base64 format.
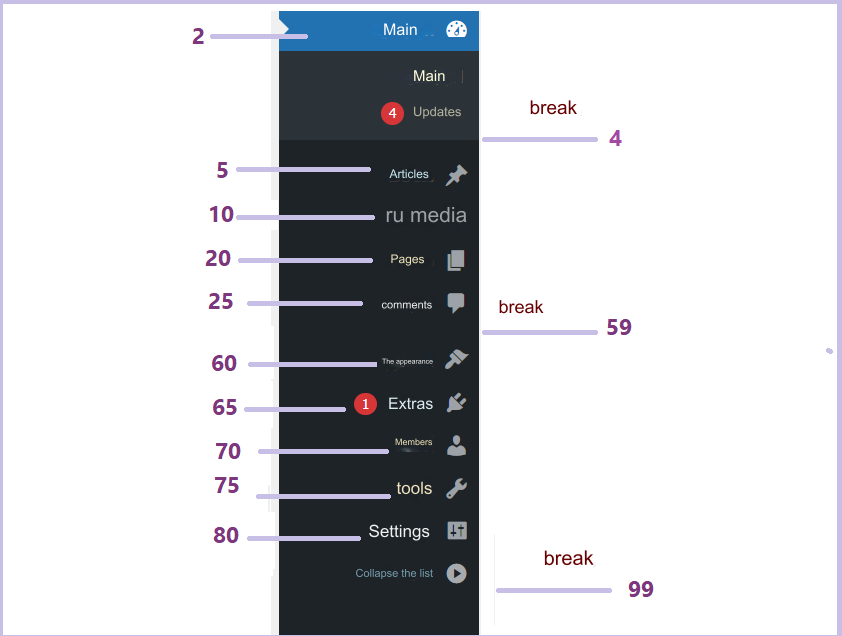
- $position: An optional parameter through which you can pass a number that expresses the position in which the menu item appears in the control panel. The following image shows the order of the virtual lists, such that the lower number has a higher order of appearance.

For example, if you want your menu item to appear after the Appearance tab and before the Add-ons tab, you should give it a priority number between 61 and 64.
Where is the code for adding a menu item to the control panel written?
You may be wondering where is the appropriate place to call the add_menu_page function and here is the answer.
You can add the custom menu item metacode either in the theme’s functions file, functions.php , or add it in a separate file with any appropriate name, such as ola-theme-options.php, and call it in the theme’s functions file using require(), need_once(), or other function. Appropriate functions.
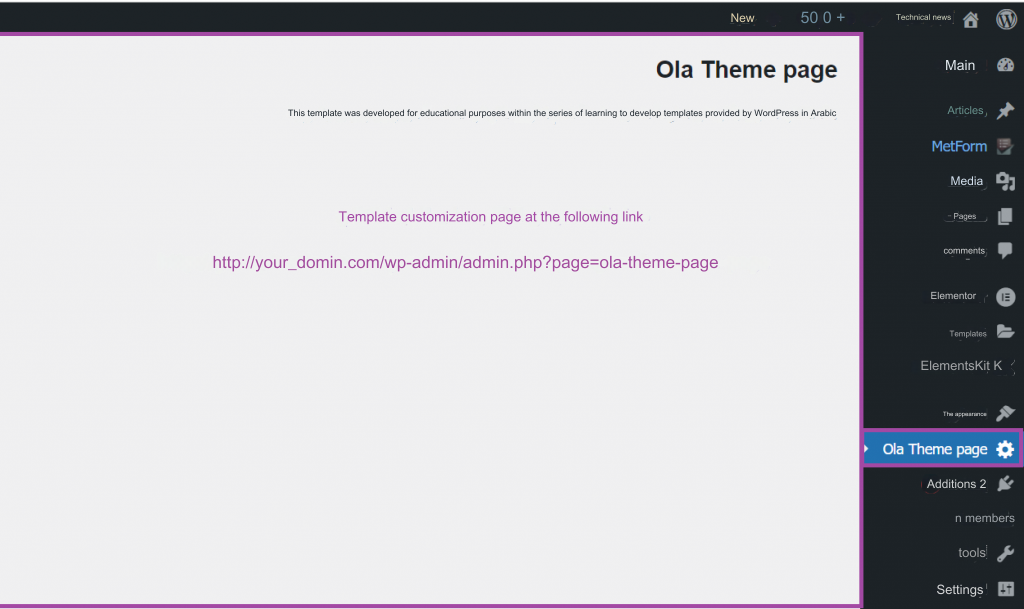
For example, in our custom template, we will add a menu item called Ola Theme page that will take us to a dedicated page to customize your WordPress template. We specify the location where it will appear immediately after the Appearance tab, as follows. We currently add simple content to it, which is a main title and a subtitle, through the custom function my_admin_page_contents, as follows.
note:
Instead of adding a separate menu item, you can add a submenu to one of the menus already present in the admin control panel through one of the ready-made WordPress functions that are used in the same manner as the add_submenu_page function , such as:
- The add_posts_page function adds a submenu under the list of articles,
- add_pages_page function that adds a submenu under the page list
- The add_media_page function adds a submenu under the media list
- The add_comments_page function that adds a submenu under the comments list
- And so on..
Now when you save the changes to this file, you will notice that a new menu item appears in the control panel called Ola Theme Page, as you can see in the following image. When you click on it, it will take you to the page dedicated to customizing the template within the control panel of your WordPress site.

Step2. Add the required content to the custom template customization page.
As you can see, the custom page that we added to the control panel currently includes only simple text content, and of course we need to add form elements to it in order to customize the template through it.
To achieve this, we will rely on the WordPress Settings API , which provides developers with a set of functions and settings that enable them to modify and customize their themes and plugins quickly and flexibly.
In this paragraph, we will work to customize the site’s logo through this page, so we will modify the code of the my_admin_page_contents() function that we knew in the previous code and call the following set of functions:
function register_setting
The register_setting function enables us to register our new logo option in the database and has the following general form
As you can see, this function accepts three parameters as follows:
- $option_group: A mandatory parameter that represents a text string that expresses the group of options to be registered.
- $option_name : A mandatory parameter that represents a text string that expresses the name of the option
- $args An optional array through which we can pass additional parameters to describe the options to be registered.
Function add_settings_section
We also need to use the add_settings_section function which allows us to create sections with groups of similar items on our options page. This function is useful if we want to organize the information displayed on the options page.
You can of course create multiple partitions as you need and this function has the following general form:
This function accepts five parameters as follows:
- $id: A mandatory parameter that represents a unique identifier for the partition
- $title: A mandatory parameter that represents the title that will be displayed above the fields on the page
- $callback: A mandatory parameter representing a function that can handle partition creation.
- $page: A mandatory parameter that specifies the slug-name of the settings page where we want to display this section.
- $args: An optional parameter representing an array of parameters used to create and describe the settings section.
Function add_settings_field
On the custom template setting page, you need to add a form or form and add a set of fields to this form for each of your options. This is done by calling the add_settings_field function , which has the following general form:
This function takes six parameters as follows:
- $id: A mandatory parameter that represents a unique identifier for the template
- $title: A mandatory parameter representing the title or name of the element or field.
- $callback: An arbitrary parameter that represents a callback function that handles the creation of form elements by writing the necessary HTML codes.
- $page: A mandatory parameter representing the settings page to which this section should be applied
- $section: An optional parameter that represents the name of the section to which this field relates
- $args: An optional array to pass any additional parameters to the function.
There are two important functions that can also be used on the template customization page for more security for your site:
function settings_fields
This function displays all hidden fields, which increases the security of the code for the customization page. This function receives one parameter, which is the name option_group, which is the same parameter that is passed to the register_setting function.
Function do_settings_sections
This function loops through all of the fields you’ve created on your custom page and displays the values entered in those fields. It also accepts a single parameter, the id of your options page.
Therefore, let us review how to call all of these functions through the following code, which enables the user or site owner to customize the site’s logo:
note:
We have linked the callback function that registers our template options to the admin_init hook that occurs when navigating to the site’s control panel.
Read more: Explanation of WordPress Hooks and their importance for theme and plugin developers
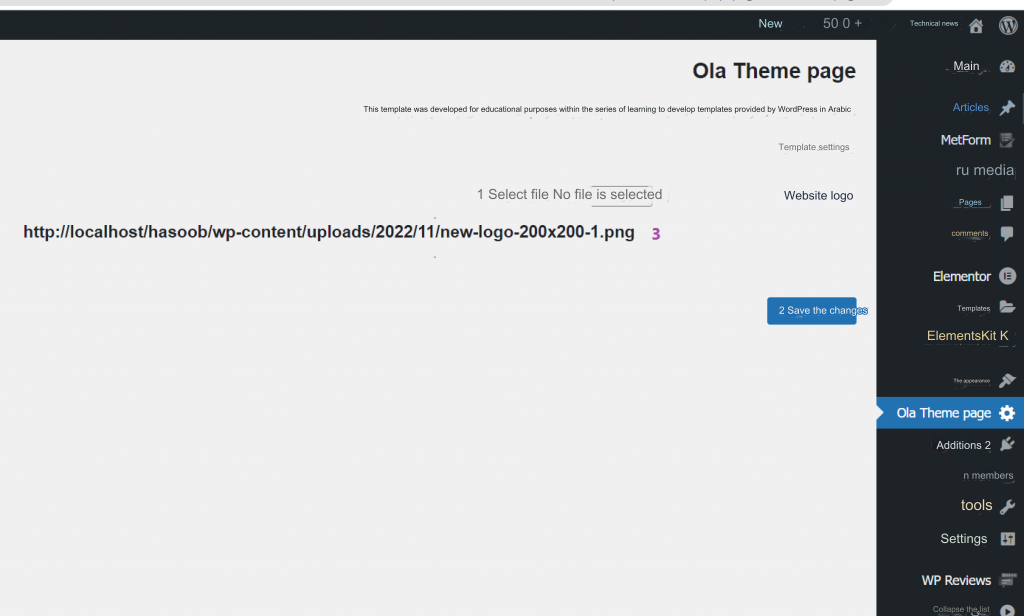
After saving the changes to the template functions.php code, you will see the theme customization page as follows:

Once you choose a file and click the Save Changes button and refresh the page, the option value will be saved within the database (in the wp_options table ), and it will also be saved within the options.php file , which includes all the options stored in this table.
You can type the following address in the address bar (example.com/wp-admin/options.php) to see an alphabetical list of all the options stored in your site’s database, among which is the custom logo option that we created in the previous code and whose value you can get by calling the function get_option After passing the name of the option whose value you want to retrieve as a parameter to the function.

Step 3: Process the customization form for the template customization page.
After we added a simple form to the page to customize the site’s logo, we need at this stage to process the inputs of the form that we added to the page.
As we explained in the previous paragraph, once the user enters the value of the logo image in this form, we can get it using the ready-made function get_option . Which you can call from within any template file in which you need to display the value of this option.
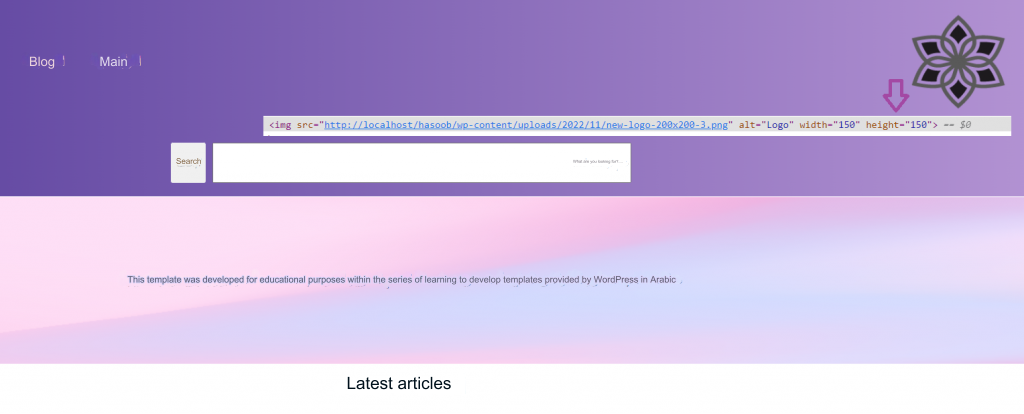
For example, to display this logo on the front end of our WordPress site, specifically in the site header, we edit the site header template file header.php, which previously displayed the logo uploaded from the template editor built into WordPress, and we replace it with the logo display that we uploaded on our page dedicated to setting the template. By writing the following code:
Now, when the site is displayed in the browser, the logo that we specified appears through this page and not through the appearance customization page. This can be verified by viewing the source code of the web page in the browser as shown in the following image.

Step 4: Format the custom page for the control panel.
If you want to format any custom page that you added to the site’s control panel in the way you want, you can write custom formatting codes for this page in a separate file called admin-style.css, for example, and save it in a folder called CSS within the template folder.
Then you must write a custom function in the template functions file that calls this file and links it to an appropriate hook, such as the admin_enqueue_scripts action hook , which is used to include scripts in the queue for all admin pages.
The above code will load only the admin-styles.css file in the page we created ola-theme-page. The if condition in the above code is important because we do not want the formats that we add in our file to affect all pages of the control panel and cause unwanted changes to all pages of the control panel.
Conclusion
Here we have reached the end of our article in which we explained the most important steps necessary to build a page to customize the template within the admin control panel in WordPress, through which we were able to customize the site logo through the Settings API, which provides the WordPress developer with many features to customize or add his template easily. And flexibility.
Of course, in professional templates, you must provide a more advanced settings page than the one we built in this article, in order to enable the user to control many of the template’s options and formats, such as social media icons, text and title colors, home page layouts, etc.
In conclusion Remember that providing a special page for setting up your template will help website owners easily change the appearance of the site without the need to write any programming code, and will make your template look more distinct and professional.


Leave a Reply