

In order for your site’s pages to be indexed in Google properly, you need to create a sitemap for your site and submit this page to Google for indexing of your site’s pages, whether they are articles (as is the case in news sites and blogs), or they are products (as is the case in online stores). .
In this article, we will learn about the explanation of a Sitemap and how to add it to your site so that your site is indexed correctly and is ready to appear in search results.
What is a sitemap?
A sitemap is an XML file that contains all links to pages, images, videos of the site, and any other files, and organizes them in a way that is easy to understand for any search engine such as Google, where the search engine reads the file and accesses all pages of your site based on the information in this file.
XML files, in general, are designed to transfer and store data. They are files similar to the HTML files that display your pages on the browser, but the difference between
Therefore, the XML files show the same contents of the site, but in an organized form to search engines.
The maximum number of links that a single sitemap file can contain is 50 thousand links. To know the shape of the links within the sitemap file for our site, for example, see the following figure. Here it should be noted that there can be more than one sitemap file because only 50 thousand links are allowed in the file. One person is deceived and creates more than one file.
If you preview the source file of an XML file by clicking the right mouse button, and then clicking View Page source
You will find that the source file for the sitemap looks like this
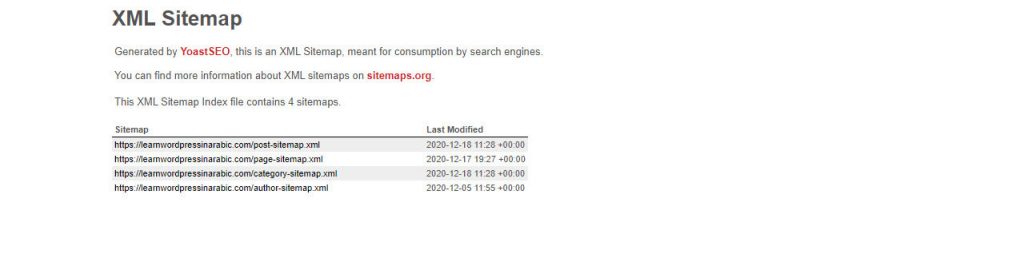
Note that because the maximum number of links that can be found in one site map file cannot exceed fifty thousand links, the site map is divided into several files. See the following figure as an example of dividing files on our site.
Explanation of the robots.txt file
In order for your site pages to be indexed by the search engine, web spiders (bot, robot, or spider) are sent to access the sites to find out their content and index them in their databases so that they appear to us when we search the engine for any topic.
The robots.txt file helps to do this task, as it is used to indicate to search engines which pages should be crawled and which pages do not need to be indexed by the search engine, in other words, which pages are allowed for Google to index and which are prohibited from indexing.
Each search engine has its own spiders. Google has its own spiders, Bing has its own spiders, and the same applies to analysis and indexing tools (Alexa, for example), as they also have their own spiders.
Sometimes you may need to block crawling and indexing spiders for some sites in order to increase the security of your site from being analyzed by competitors, or to prevent access to some pages that you do not want to be indexed in the search engine.
Special codes are written inside the robots.txt file, as the following example, which is a code that prevents any crawling of the site and indexing of what is in it.
To stop crawling of a specific folder, write the following code
How to create a sitemap for your site
If your site depends on WordPress, you can easily create a sitemap through some plugins such as Google XML Sitemaps or the SEO by Yoast plugin .
We will explain this task through the yoast add-on that you often use to improve your site’s SEO . With the same add-on, you can create a site map in an easy and direct manner.
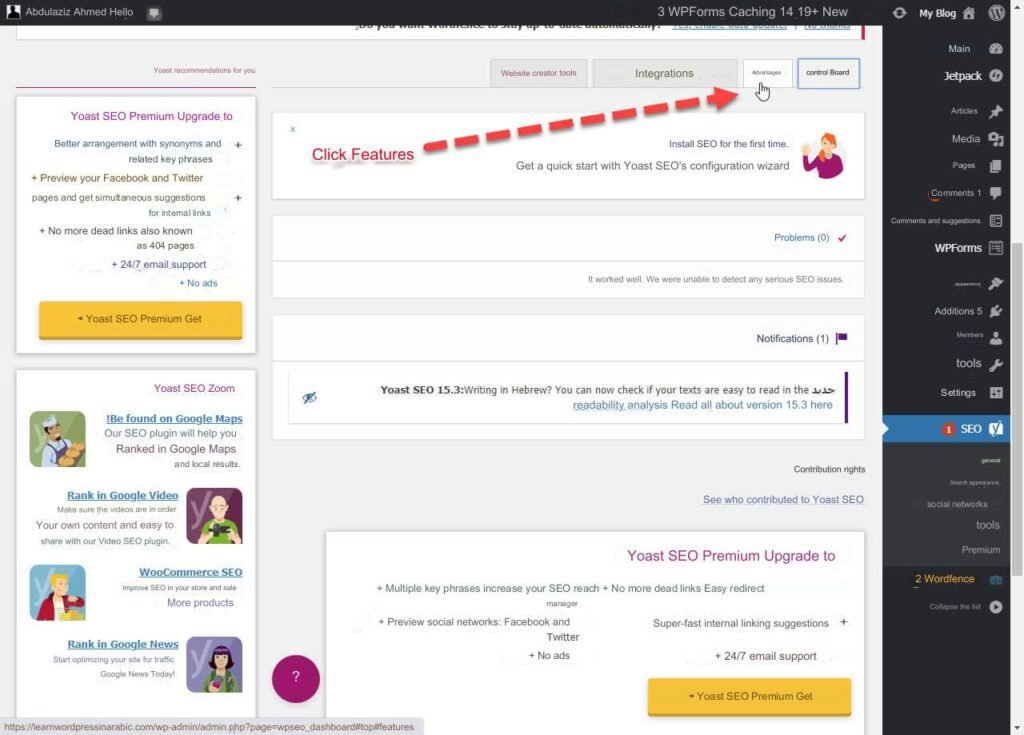
After installing and activating the add-on on your site , you will go to the side menu of the admin control panel, then click on the SEO add-on tab , then choose General as follows:

You will see several tabs from which we can choose the Features tab , as shown below
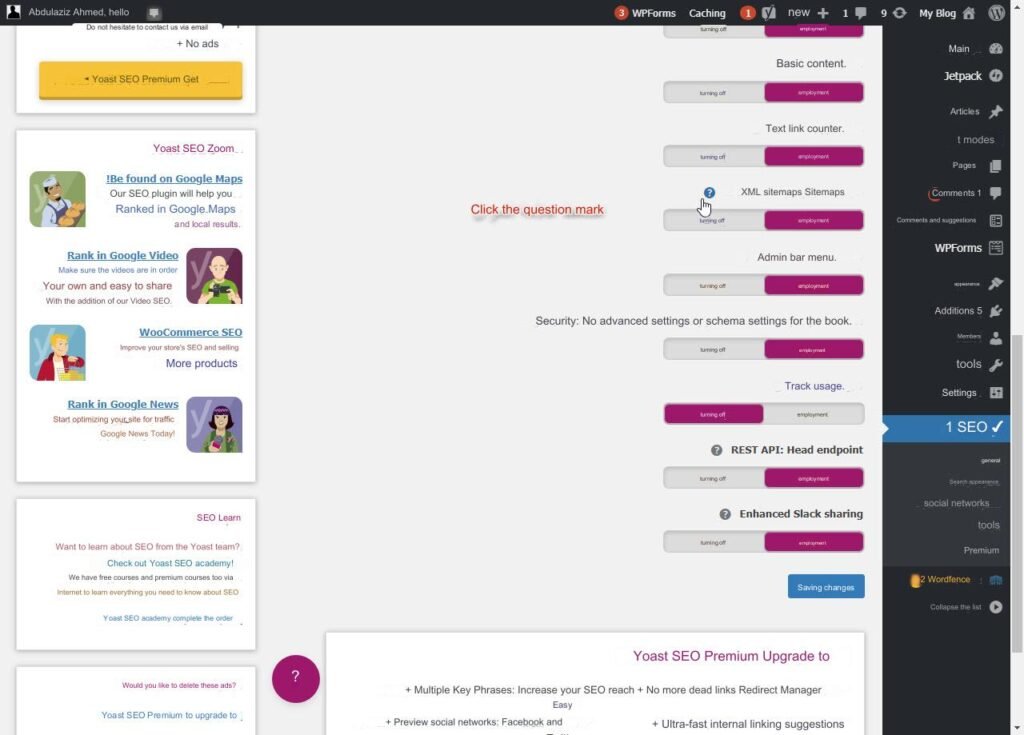
Several buttons will appear. Select Run sitemaps to activate them as follows

To find out what sitemaps have been created, click the question mark next to the phrase XML Sitemaps
A link to see the complete site maps appears as follows
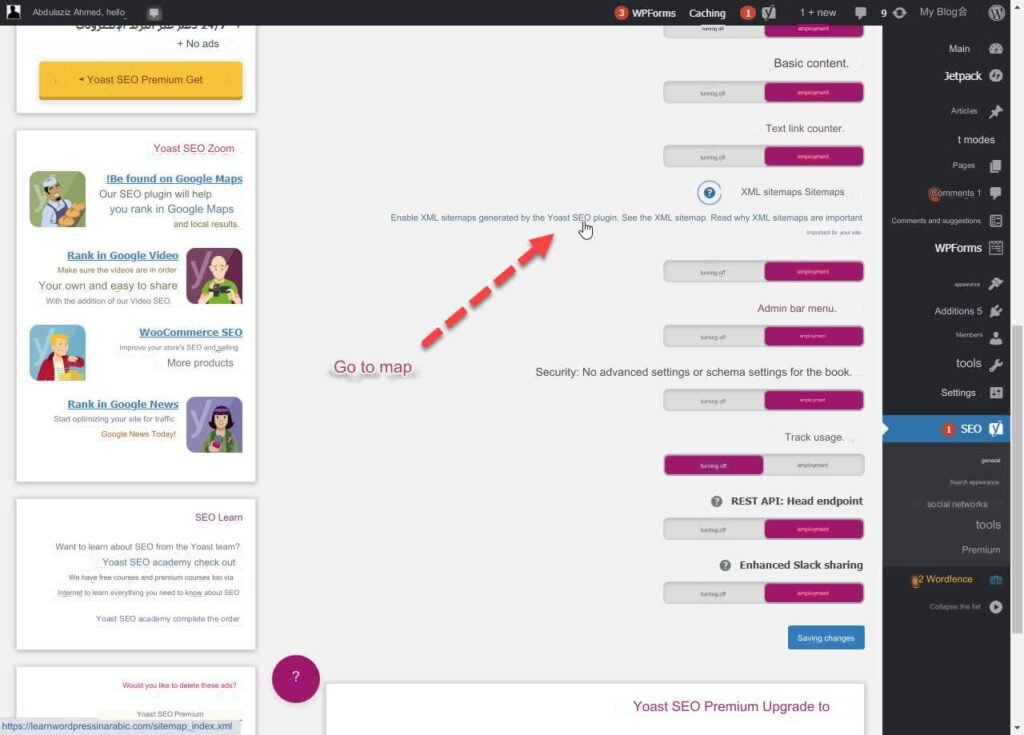
Click on this link to see the complete files on your browser
Thus, you have easily created a sitemap for your site by adding YOAST
How to create a robots.txt file for your site
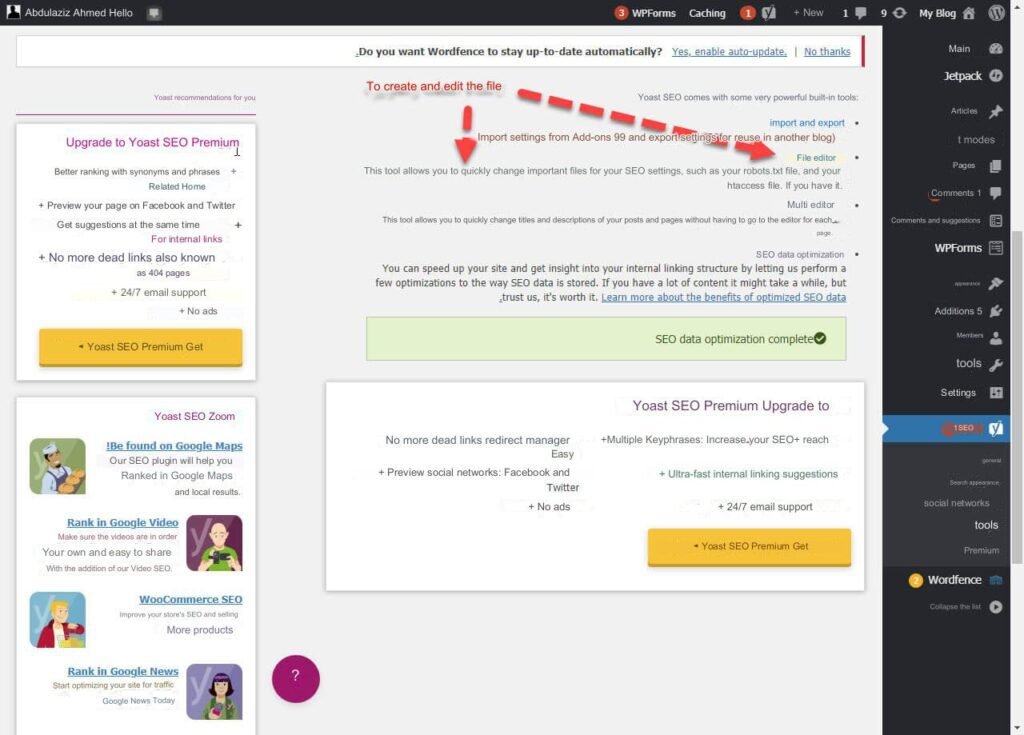
We have talked about the importance of this file and its uses. You can also create the file by using the Virtual Robots.txt add-on or the SEO by yoast add-on. We will also explain to you the method using the yoast add-on itself. After activating the add-on, go to the side menu of the control panel and choose SEO , then choose Tools as well. It is shown in the following figure
The following screen will appear and contain a link called the file editor . Click on it.
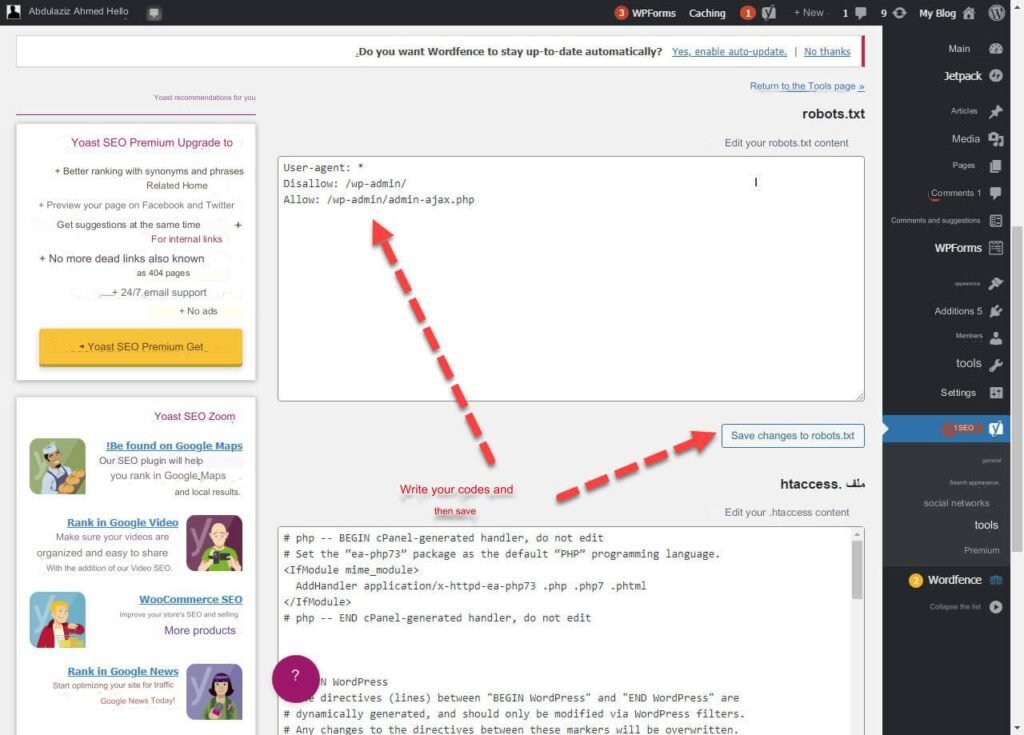
Now click on the Create robots.txt file button

The editor will appear, and from it you can add the codes you want, then click the Save changes to robots.txt button
Note : Do not use more than one add-on that enables the XML site map for your site, because this may cause a conflict between these add-ons, or your site may have more than one map, which confuses search engines in understanding your site.
Link the sitemap to Google
To archive the site in the correct way, the site is added through the webmaster tools (Google Search Console) in an easy way.
Go to Google Search Console, then the welcome screen will appear, from which you can click Get Started Now
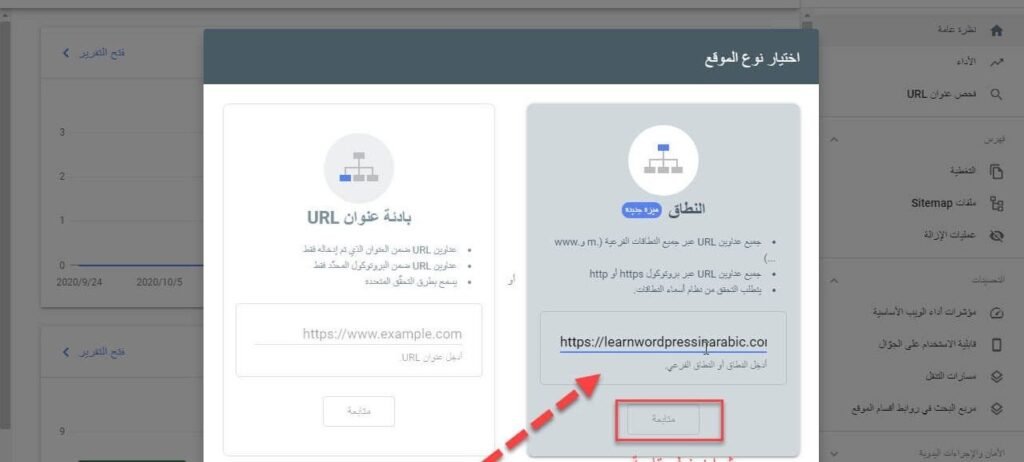
Google Webmaster Tools appears as follows: Create an add-on to your site so you can link it to the site map
The domain linking screen will appear (your full site name). Enter the site name, then click Continue
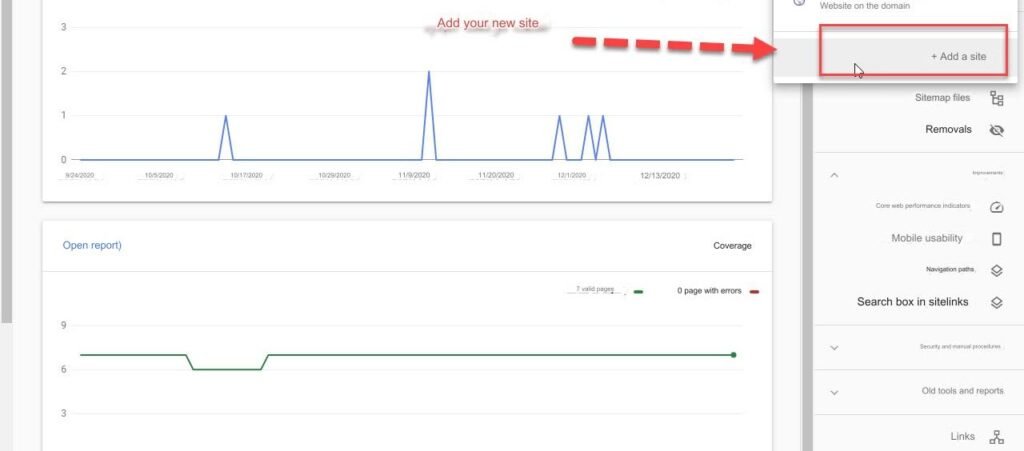
From the sidebar, choose sitemaps as follows
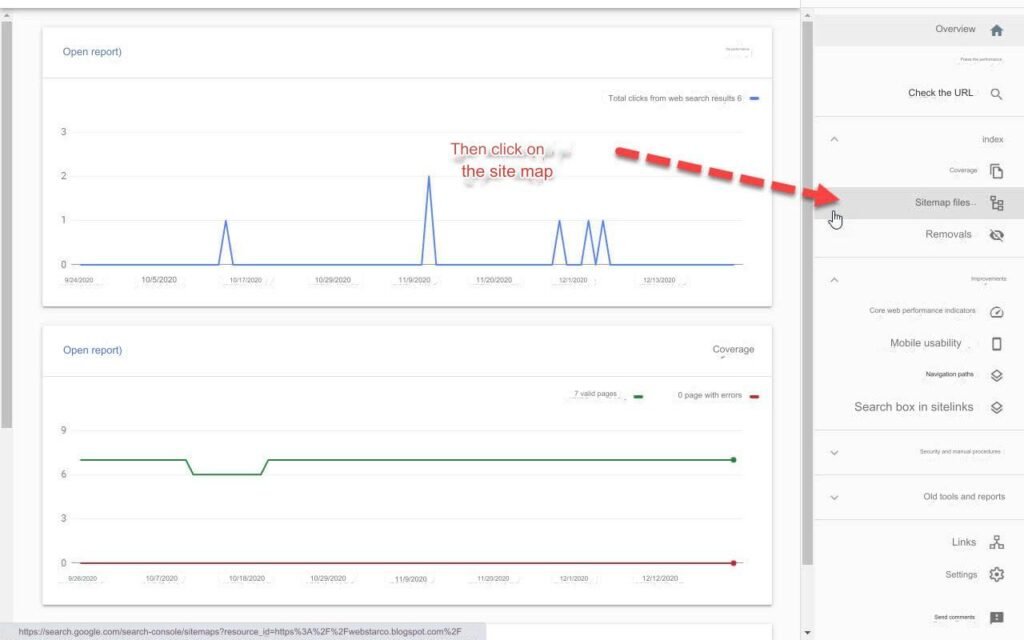
A screen will appear for you to enter the map name and send it to Google until the link is completed
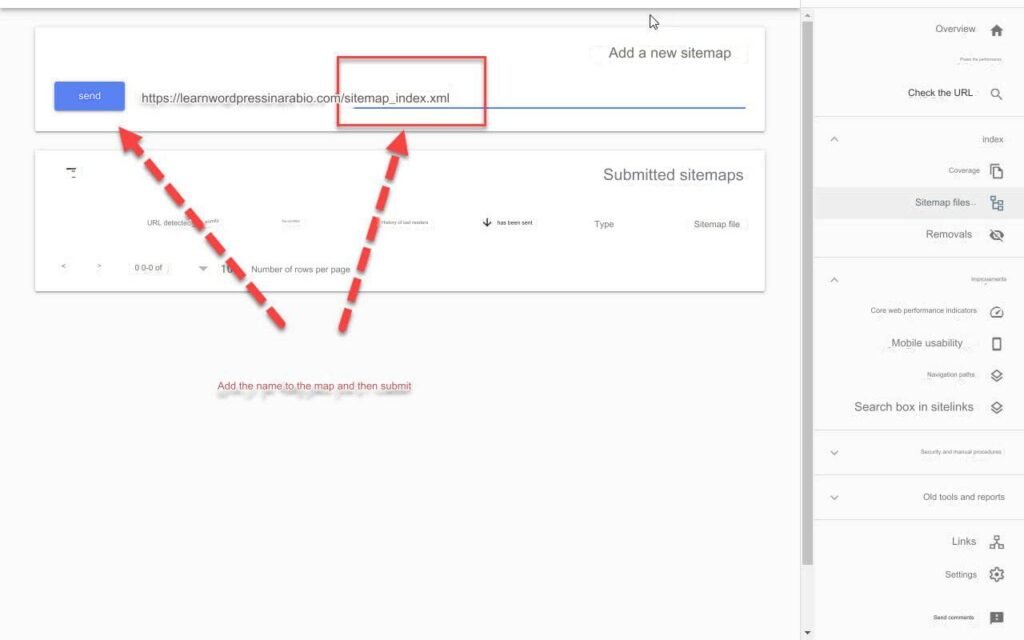
Google can now crawl your site and know all the pages that it should archive (remember that when you add a new page, such as a new article or a new product, you must enter it manually from Google Search Console to speed up its archiving and not wait for Google’s spiders to know what is new on your site).
common questions
Can I make a sitemap manually?
This can be done, but this will take you more time and effort depending on the size of your site. If you rely on WordPress, it is preferable to use ready-made plugins, as we have given some examples (Google xml sitemap or Yoast).
Where can I put the robots.txt file?
The file is usually placed inside the main public_html folder on the server (this is done by going to the site’s control panel (cpanel), then to the File Manager, then uploading the file into the public_html folder). If you use an add-on, it will be added automatically in the mentioned location.
Does the robots.txt file prevent anyone from accessing files and folders?
No, it only prevents archiving it, and to prevent access to any file or folder, another file called .htaccess is used
In conclusion, we invite you to participate with us in the dialogue on the Arab WordPress Forum: Do you add a sitemap file manually or using plugins? If you have any questions about this file, do not hesitate to write it in the comments section below the article