There are several aspects regarding the protection mechanism on the WordPress website, and the most important aspect and what we will specifically mention in our article is encrypting the content with a password, where you can choose a specific person to whom we give access to this information so that he can control, view and modify the content that you want.
If you own a website on WordPress and have valuable content that you want to make available to a group of individuals only, you can encrypt that content with a password that can use it to access the designated content. In this article, we will learn how to protect content with a password, step by step.
Why do I protect the content on my WordPress site with a password?
In fact, there are several reasons and motives that make you resort to using a password for protection, and we list the most prominent of them as follows:
- Grant users and members roles with specific permissions
If we want to provide access to the contents of the site to specific users, we will need to give these users the right to access these contents, and this will be through a password for each user that is unique to him. That is, if our site is a blog and we have several writers and bloggers, we will need to give them access to certain pages and not all of them. Parts of the site, and here comes the role of password protection, as we can assign each section of the site with a specific authority and a password to obtain that authority.
- Paid subscriptions
On many sites there are paid subscriptions that give subscribers additional benefits over the basic benefits for the average visitor, such as: periodic newsletters, featured articles, five-star services, support services, etc. It is common to use password protection for this purpose on sites that are interested in selling training courses and education via the Internet, so that The subscriber who subscribes to a paid subscription to your site will receive a password that allows him to access certain pages of the site and benefit from the exclusive content therein.
- Private and sensitive content
If you have a blog and publish sensitive content or information for a specific category of visitors, or if you own an online store and have a long list of customer accounts and their financial balances, you can password-protect the content you want, and give the password to these categories you want. To give them the right and ability to access and view the content.
Steps to protect your site content
The obvious first step is to create member accounts on the site. Of course, you can classify them according to specific categories, and each category has specific access powers to parts of the site, and this step in itself is an additional means of protection to prevent site contributors and visitors alike from accessing other site settings. For example: the rank of writer differs from the rank of editor, as well as from The rank of the manager on the site, each of them has his own job and powers.
Protect an article, post, or entire page
You can encrypt the entire page with its contents (article or post) and not provide access to it except by entering a password. You can do this through the WordPress settings through the page settings itself as follows:
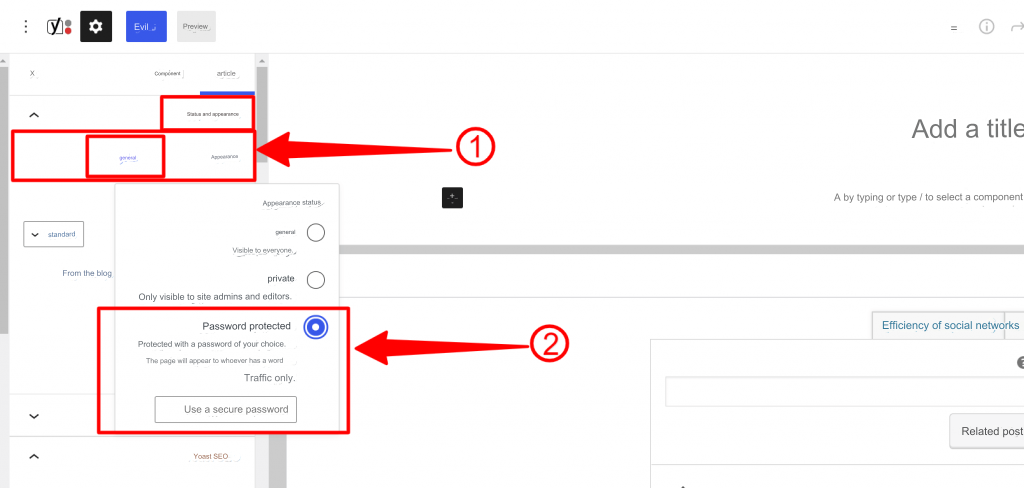
This simple task can be accomplished by changing the appearance status setting, located in the “ Status and Appearance ” tab, from the “ General ” option to “ Password Protected ” and then entering the password you want, thus your article or page becomes password protected.
Complete site protection
If necessary, you can protect the site completely instead of protecting categories or pages themselves, through some add-ons that perform this task with high efficiency and security. The most prominent examples of these add-ons are the “ Password Protected ” add-on .
In this explanation, we will use the “ Password Protected ” add-on, by installing and activating the add-on as we mentioned in the previous add-ons, then we will go to Settings and then choose “Password Protected” or “Password Protected”.
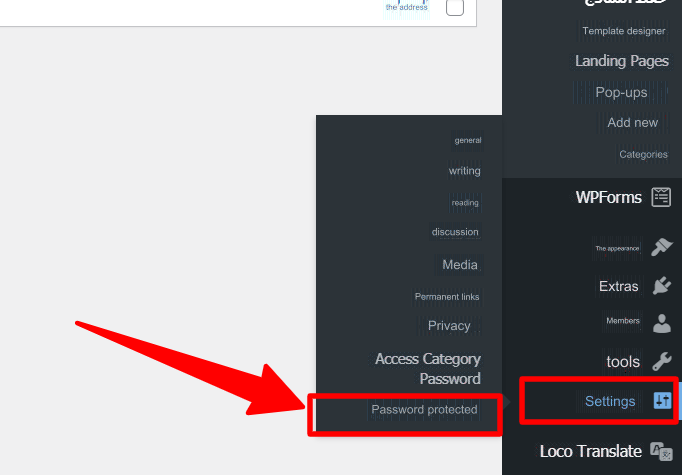
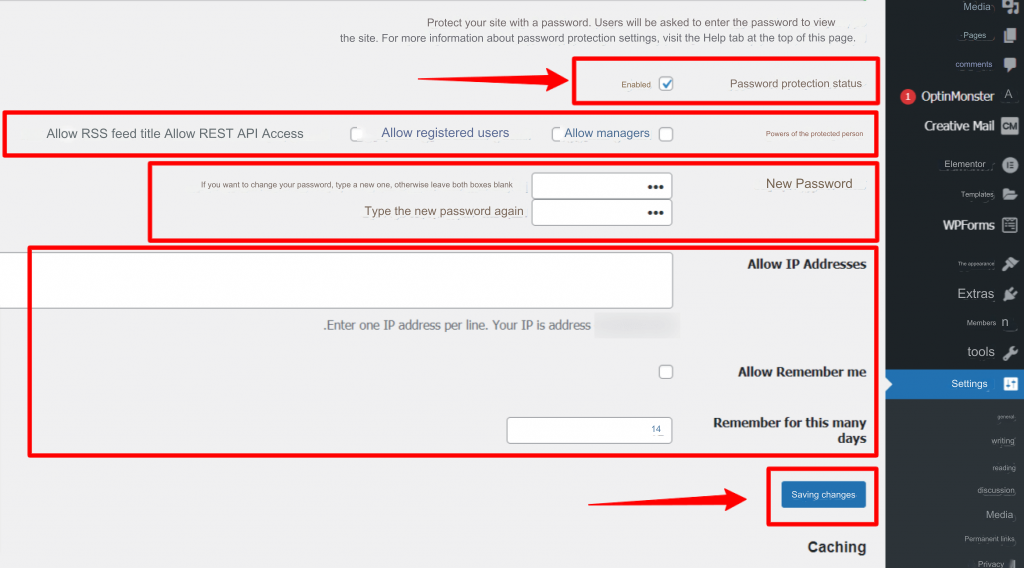
You will see the page shown above, which includes the settings for the addition. What you have to do now is activate the password protection option, and choose the people who have access permissions and set the password to obtain those permissions. Through this page, you can also grant access through the IP address of the device used. After selecting these options, click “ Save changes .”
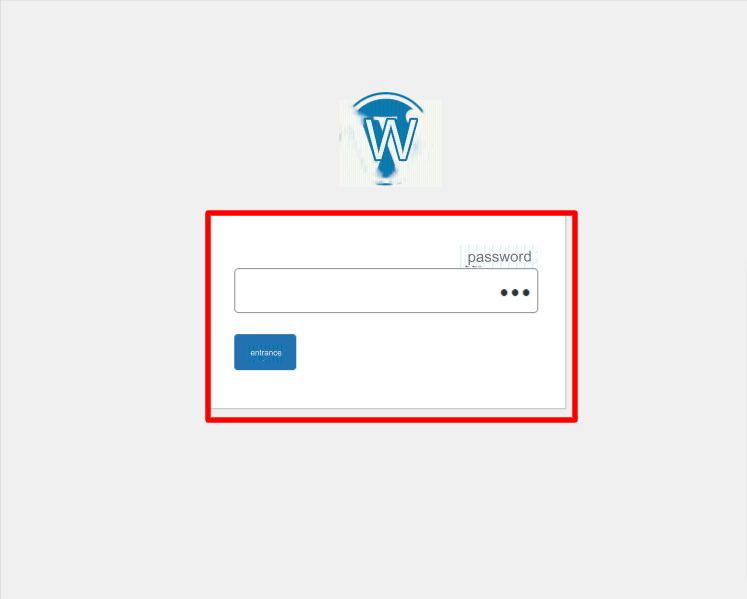
The image above shows what the site will look like when a browser tries to access it, as the visitor will be asked to enter the password to view the contents within the site.
Read also: Building a page (wait for us soon) – (under maintenance) using custom plugins
This was a simple explanation of how to encrypt content on a WordPress website in simple steps, to determine the accessibility of the site’s content to some users and not others. Always be sure to investigate various means and strategies that increase the level of security on your site


Leave a Reply