Adding code is an important and common thing on WordPress sites . Site owners may want to add some features to their sites, and this can only be done by inserting new codes into the site. However, the task of inserting new codes can be difficult and complex, and may cause problems with the site if it is not done correctly.
For this reason, the WPCode add-on was developed, which makes adding code to the site simple and easy, and anyone with simple technical experience can add code without causing any problems to the site, even if it is done incorrectly.
In this article, we will introduce you to the WPCode plugin and its most important features. We will also explain to you in detail the correct way to use it so that you can work on it and add codes to your site in a smooth and simple way.
What is the WPCode plugin and why is it used?
The WPCode plugin is one of the most important WordPress plugins, formerly known as (Insert Headers and Footers), and its primary function is to help you add simple code to your WordPress site without modifying the template’s Functions.php file.
By adding WPCode, you can insert many types of code into your site, such as HTML and CSS codes through which you can insert headers and footers on the site, in addition to code codes in the languages PHP , JavaScript , and others.
You can also use the WPCode add-on for purposes other than adding codes, such as examining code and identifying errors in them, if any, while proposing appropriate solutions to them, as well as saving the codes on the site so that they are not lost when changing or updating the template.
The most important characteristics and features of the WPCode add-on
The WPCode plugin has many features and features that make managing the site and adding code simple and organized. Below, we will highlight the most important features of the add-on and explain them in a simplified way.
1. Add code easily and securely
Before creating the WPCode add-on, adding code to the site was difficult, because it might cause problems and errors on the site, because the codes were added within the template’s Functions.php file, and any small error in this file could cause the site to crash.
But after the WPCode add-on was developed, you can now insert code into your site without risking errors or problems, as it is added without modifying the template’s Functions.php file, and this is done from the control panel very easily.
2. Includes a code library
The WPCode plugin includes a library containing many common code snippets in WordPress, such as (PHP codes to disable XML-RPC – disable comments – allow SVG files to be uploaded – add the classic editor , and other codes).
Through this library, you can save yourself the hassle of installing a lot of WordPress plugins, as you can simply activate one of these codes in the library that does the same job as adding the other, and any of the library codes is activated with a few clicks and without any trouble.
3. Save the code you add
When you add code to your site by adding WPCode, the add-on saves these codes, meaning you will not lose them when you change your site template.
In addition, you can activate these codes on any template that you activate on your site, or you can share them and transfer them to other sites.
4. Examine code and provide possible solutions to errors
When you enter code into the box designated for it in the WPCode add-on, the add-on checks the entered codes for any potential errors, and when errors are found, the WPCode add-on offers suggestions to solve them and repair the entered code to ensure that it works properly.
5. Smart conditional logic feature
This feature enables you to make the code work according to certain conditions, meaning that the code you added will not be executed unless conditions that you specify are met. For example, you can add code in order to include a specific feature in the header or footer of a specific page of the site, or add code For registered users on the site only and other conditional codes.
How to use the WPCode plugin
The way to use the WPCode add-on is not difficult, and after reading this paragraph in which we will explain in detail how to use the add-on, you will be able to use it and take advantage of all its important features to achieve what you want.
First: Install and activate the WPCode add-on
To use the WPCode plugin, you must first install it on your WordPress site. If you do not know how to install and activate plugins on a WordPress site, you can read our article ( How to install a WordPress plugin and activate it on your site correctly ), in which we explained everything related to installing and activating plugins.
Second: Access to add-on options
After you install and activate the add-on, you will see a button named ( Code Snippets ) in the control panel. When you hover your mouse over it, a drop-down menu containing add-on options will appear. Click ( Add Snippet ) to go to the adding codes page.

On this page, you will see a list containing ready-made WPCode add-on snippets. You can activate any snippet from it by clicking on ( Use Snippet ) in the section for the snippet you want to activate, which appears when you pass the mouse cursor over it.
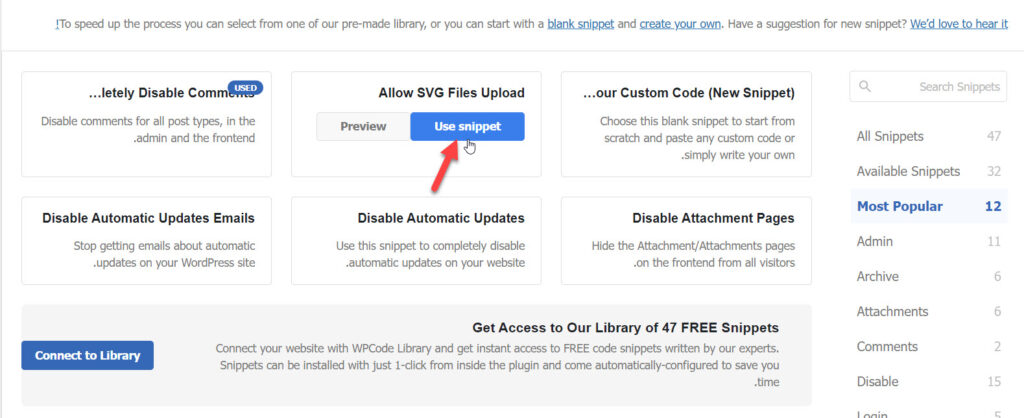
If you want to preview the snippet’s code before activating it, you can do so by clicking ( Preview ) in the snippet window.
Third: Add a new custom code
If you want to add a new code to do a specific thing, click on ( Use Snippet ) in the New snippet section on the page.
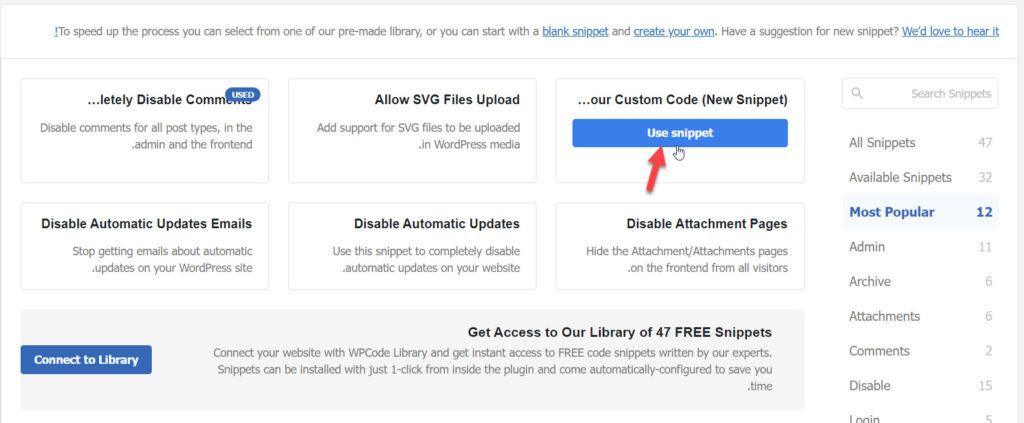
A new page will appear with many options. First, write a title for the code you want to insert into the (Add title for snippet) field so that you can easily find it and modify or disable it after it is added.
After that, choose the language or type of added code from the (Code Type) drop-down list, then add the new code in the (Code preview) text box designated for that.

You must now specify where the code will be added through the (Insertion) section. Select ( Auto Insert ) to have the code automatically inserted into a place on the site that you specify through the same section options.
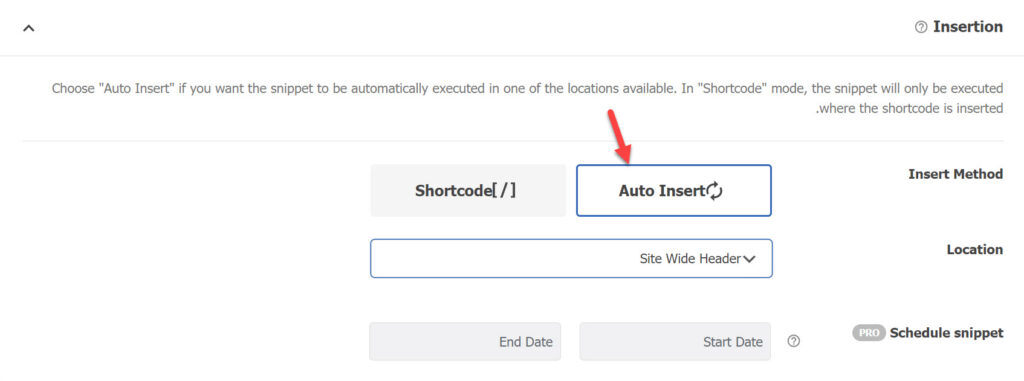
Note: If you do not want the code to be added automatically, you can select the (Shortcode) option and follow the same steps, but in this case the WPCode plugin will give you a short code for the code you added after you adjust and save the other settings. You have to copy and paste this code wherever you want the code to work on your site by using the appropriate component.
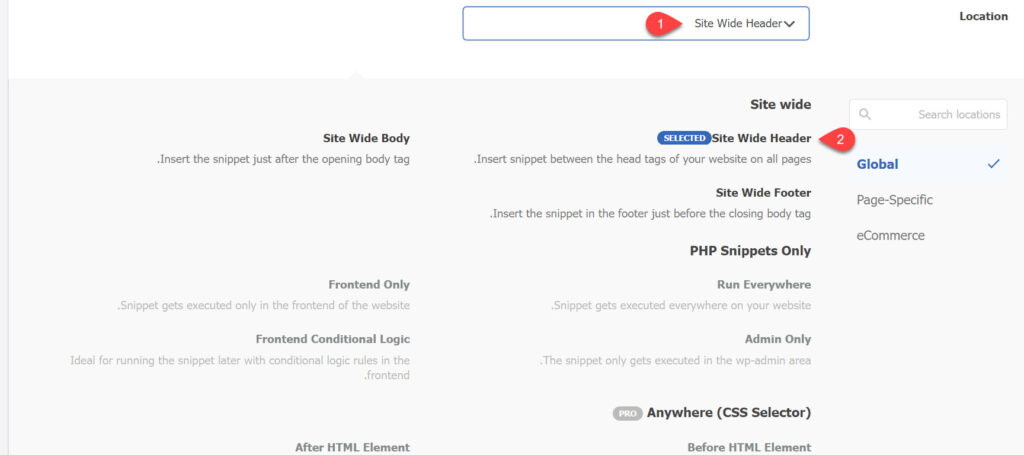
After that, choose the place where you want the code to run by clicking on the drop-down menu ( Location ) and choosing where to insert the code from the options that appear to you. You’ll notice that each of the options is described below its title.
If you want and you have the paid version of the WPCode add-on, you can schedule the code (specify when the code will start and end) through the (Schedule snippet) option that appears below the code location option.
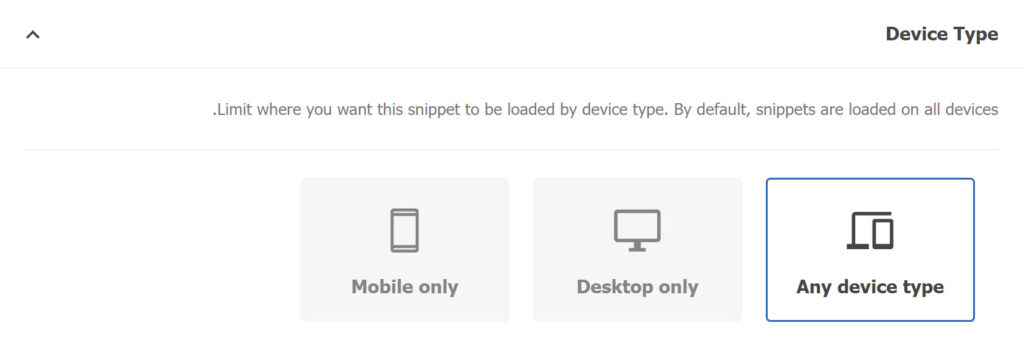
After that, through the (Device Type) section, you can specify the types of devices that the code will work on. You can specify that it be added to smartphones only (Mobile only), or to computers only (Desktop only), or to all devices (Any device type). ).
You can now, if you wish, use the Smart Conditional Logic feature, in order to make the code work under certain conditions and circumstances that you specify. You can not use this feature if you do not need it and publish the code immediately, but if you need to use it, activate the ( Enable Logic ) option.

A group of additional options will appear to you, which is a drop-down list asking you to choose either (Show) or (Hide). If you choose the first, the code will be executed and added if the condition or conditions that you specify are met. If you choose the second, the code will not be executed and added if the condition or conditions that you specify are met. The conditions you will select (starting from here we will assume that you have chosen Show).
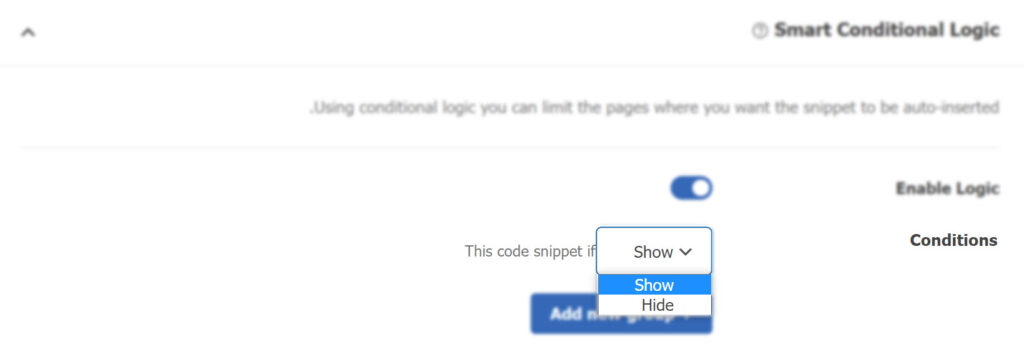
You will also see the (Add new group) button that allows you to add a set of conditions. When you click on it, a new section appears that allows you to add a set of conditions that govern the execution of the code. More than one set of conditions can be added by clicking on the button more than once.

Each set of conditions can consist of one or more conditions, and the code is executed if the conditions of at least one of the sets are met, that is, not all sets of conditions must be met for the code to be executed, but all conditions within the set must be met for the code to be executed.
To add a condition, select the condition from the first drop-down list (right in the previous image), then specify from the middle drop-down list whether or not the code will be executed if the result of the condition is equal or not equal to the result that you will specify in the third drop-down list (left In the previous picture).
For example, in the following image, we chose from the first drop-down list the post type (Post type), in the second drop-down list we chose (Is), and in the third drop-down list we chose (Articles). This means that the code will be added in posts of the Article type only.

If you want to add a second condition within the group, you can click on the ( And ) button. In this case, the code is executed if both conditions are met, and it is not executed if at least one condition is not met. For example, in the following image there are two conditions within the group. If verified, the code will be added.

After you finish setting the conditions as you want, you can adjust the tags, priority, and notes of the code that you add through the Basic info section.
Tags are useful in grouping similar codes together, and Priority determines the priority of code execution, as it helps the WordPress site determine the order in which codes are executed if you have added more than one code (the lower the number, the higher the execution priority), while Note allows Add a custom note about the code.

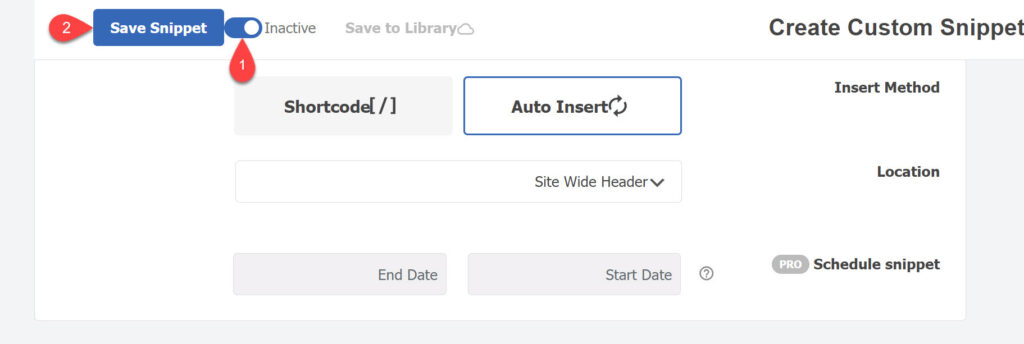
After that, you can activate the code directly to be added according to the conditions you specified by clicking on the activation key next to (Inactive), then save the code and modifications by clicking on the ( Save Snippet ) button, and thus you have finished adding the code to the site using the WPCode extension. .
Fourth: Display the added codes
It is worth noting that you can view the codes added through the WPCode add-on by clicking on the (Code Snippets) button in the WordPress control panel , and you can also modify, delete, or deactivate them from this page.

We would also like to draw attention to the fact that the plugin provides the ability to add codes to the WordPress website in a simpler way and without many options through the (Global Header and Footer) section, which can be accessed by clicking on the (Header & Footer) option within the (Code Snippets) tab.
Here we finish explaining the WPCode add-on, which specializes in adding code to the WordPress website. In conclusion, we would like to point out the importance of using this add-on instead of other methods of adding codes, because it makes the ability to add codes easier and safer.


Leave a Reply