WordPress is the most famous content management system in the world for managing and operating websites and e-stores in an easy way, as it saves a lot of time in programming and development work to launch websites.
Despite the power of WordPress and its ability to launch websites online in record time, the default options it provides are often not sufficient for many website owners.
You may have previously browsed some websites powered by WordPress, and found options and formats that are not available by default in the settings for WordPress. The owners of those sites apply some tricks and changes to the site to make it appear unique and distinct from the rest of the sites powered by WordPress.
In this article, we will go over many of the default options and settings that WordPress provides you, and we will talk about the most important tips, procedures, and tricks that you can do in order to apply many changes to the website to improve the users’ browsing experience.
1. Improving the speed of opening the site to visitors
When you enter a site on the Internet that is characterized by quick opening of pages and ease of navigation in a way that you find that it is your goal to improve the speed of your site in this way, then you need to work on improving the speed of opening your site to visitors, as this matter is important in improving the visitors’ experience and increasing the rate of successful conversions from visitors. the site.
We offer you the best tips for increasing the speed of opening your site to visitors in order to improve the visitors’ experience and thus increase their confidence in the content you provide, which contributes to the site’s greater success.
One of the easiest ways through which you can double the speed of opening your WordPress site is to use one of the plugins specialized in this matter, for example the most wonderful WP-rocket plugin , which works to apply a large number of improvements to your site files such as images and media, as well as template files and plugins. It compresses its size and thus reduces the time it takes for your site pages to appear in front of visitors.
One of the most important measures to increase the speed of your WordPress website is to choose a strong and highly efficient web host to support the appearance of your site in less time.
Also make sure to provide a distinctive browsing experience for site visitors from mobile phones. For example, you can create a light version of AMP pages that helps mobile phone visitors browse the site at double speed.
2. Publish pages with a different design than the default template designs
By default, anyone can create and publish new pages within WordPress through the Page Creation tab in the navigation menu of the site’s control panel:
But in this case, the new pages that are created will retain the same design and appearance of the template installed on the site.
You can go beyond the default design of new pages that you create within WordPress, by designing and creating custom pages with code, or even purchasing pages written in different programming languages and having an attractive design that is completely different from the design of the default template.
Note : The custom page must be written in a programming language that supports the web, so it requires a programming specialist to achieve the design you want.
After you obtain the custom page with the desired design, you can now upload that page into the site’s file manager, specifically into the folder that contains the template files installed on the site:

After uploading the page to the active template folder on the site, you can go to the WordPress control panel, then go to the ( Pages ) tab, create a new page, and go to the ( Form ) tab, in which you will notice the appearance of a new form called Custom Design, and of course this name depends on the name you used. The page developer wrote it:
3. Change the default WordPress login page
By default, WordPress provides a page ready to receive site members and administrators through which you can log in. But in many popular sites that use WordPress, we do not notice such a default design for them on the login page.
WordPress provides many options through which you can customize the look and feel of the default WordPress login page, as there are many plugins as well as other methods in the code through which you can get the design and appearance that you want to apply to that page, whatever it is.
You can review the article on customizing the look and feel of the WordPress login page to learn about the plugins and tricks used to apply a different and distinctive look to the default login page.
You can also use one of the plugins to secure the WordPress site from vulnerabilities that specifically target the login page, as this page is considered the primary gateway to accessing the entire site’s control, making it the page that most needs high and sufficient security layers to repel potential attacks on the site.
4. Pay attention to the SEO of images within your site to appear in Google search results
WordPress provides many plugins to adjust SEO settings and archive content within various search engines, which helps the site appear in search results on searches related to the content found within the site.
You can improve image SEO within the WordPress site by installing one of the useful plugins in this regard, including, for example, the YOAST plugin and other plugins that you find available for free on the WordPress plugin store.
You can also start providing images for your site in the famous WebP format , as it has the ability to improve the performance of images within the site, which contributes to improving the visitors’ experience on your site, which is reflected positively in the way you appear in search results in various search engines.
WordPress also provides editing of images and customizing their formatting and display methods within the site through a wide range of image formatting plugins that help you display and format images within your site like a professional.
5. Change the thumbnail of site members with custom images
By default, WordPress shows a thumbnail image to members registered on the site through the Gravatar service, which provides a virtual image based on the email address of the member registered on the site.
But in order for the matter to appear acceptable to visitors and browsers of the site, this virtual image of the members must be changed to other real images that are more expressive of the writer or member:
As you have noticed, changing the member’s default gravatar image to other images that express the member is one of the things that helps provide an honest browsing experience for visitors and users of the website.
6. Replaced sidebar design
The sidebar of a WordPress site by default contains some simple elements such as login links, a search box, and some elements that differ from one template to another:
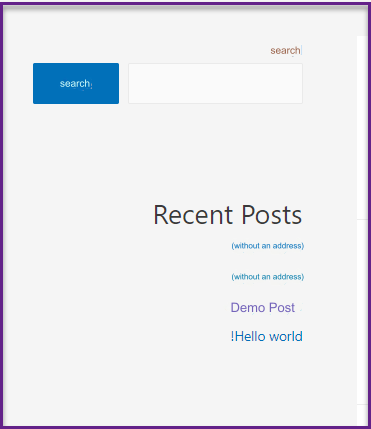
Before that, it was difficult to change the default design of the look and feel of the site’s sidebar, as WordPress provided a simple set of widgets that could be added within the sidebar, and the number and functions of the widgets varied from one template to another.
In the recent WordPress updates, it has become possible to change the design of the sidebar appearance of the WordPress site more easily, and the matter is not limited to adding widgets only, but now you can add any element that you want to appear within the sidebar.
The following image is of the list of widgets inside the control panel of a WordPress website that uses WordPress version You will notice that the list of widgets is no longer limited to normal elements such as links, the search box, texts, and images. Rather, the matter has become completely different, as you can add dozens and perhaps hundreds of elements within the sidebar of your site. WordPress to look professional away from the old default design:
7. Place icons in the main menu of the site
One of the distinctive layouts that website owners do is the icons that are attached next to each main navigation menu item on the site. It adds a distinctive aesthetic appearance to the menu items and makes them more likely to attract visitors’ attention, thus increasing the chances of clicking on them, which helps increase the visitor’s stay on the site, which is something every site owner searches for.
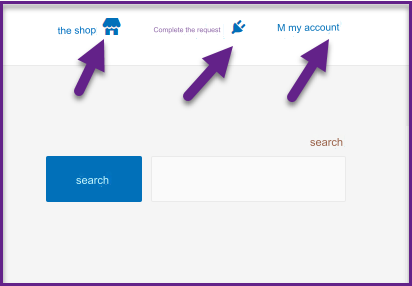
There are different ways to add custom icons next to the site’s main menu items, and the easiest way is to install a WordPress plugin that does this without the need to write code or hire a professional to do it.
Adding Menu icons is one of the best additions that helps you attach icons next to the main menu items within your site.
After installing and activating the WordPress plugin on the site, you can go to the (Lists) tab within the WordPress control panel to open the Lists page on the site in front of you. When you open the options box for any item within the list, you will notice the Add Icon button:

Once you click on the Add Icon button, a page will open for you containing dozens of icons from which you can choose the most appropriate icon. You can also search on the page for the icons that you would like to display alongside the menu items:
8. Open site menu links in a new window
By default, WordPress allows you to add any items you want to menus on your site:
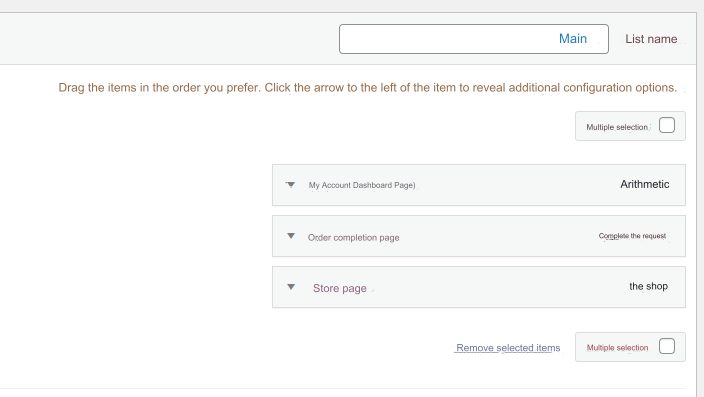
By default, these items appear within the site’s navigation menu, and when the visitor clicks on any of them, the link opens within the same current tab.
WordPress provides a simple trick, but it can be very useful, whereby links can be opened in a new tab in the browser instead of the current tab.
When you enter the site menu management page, you will find the ( Screen Options ) button at the top of the page, which contains a set of options and tools that you can activate to appear in front of you on the screen:
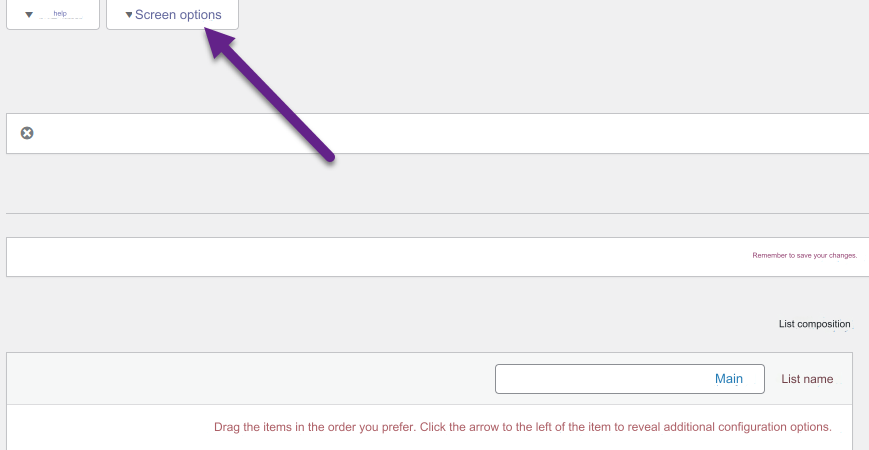
When you click on the screen options, a window opens for you containing many options that, when clicked, are activated within the screen and can be used to apply any required change within the site. We activate the option ( where does the link open ):

Immediately after activating this option, go to one of your site’s menus and open the edit box for any item within the list to notice the appearance of a small tab ( Open the link in a new tab ), which you can activate on one or more of the menu so that the link opens in a new window when you click on it instead. than open it in the current tab.
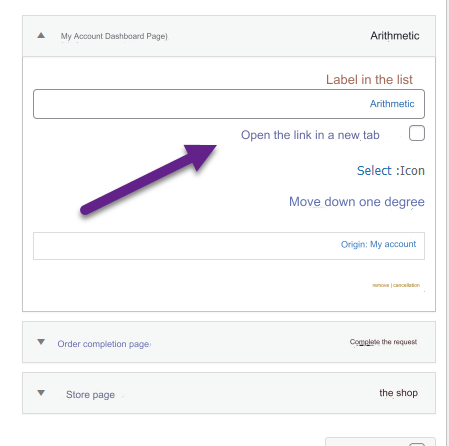
WordPress certainly provides many options for modifying the main and submenus elements of the site. You can create huge menus if your site contains a large and complex number of items to be displayed within the menu.
Here is a comprehensive guide to modifying and customizing navigation menus within a WordPress website.
9. Enable assigning the same article to multiple writers
By default, WordPress assigns one author’s name to each article published on the site, and the writer’s name appears below the article or in the section specified by the template installed on your site.
But one of the smart tricks that helps owners of websites specializing in articles or newsletters is to assign more than one writer or editor to the same article, which provides the opportunity for more than one writer to edit one article, as the site administrator can add and assign any number of writers to the same article.
Adding Co-authors is one of the additions that provides the feature of multiple writers or editors on the site.
After installing and activating the WordPress plugin on your site, you can go to the edit page for one of the current articles or publish a new article on the site to try adding more than one editor to the same article:
Within the article editing page, specifically in the toolbar on the side of the page, you will find a new tab that has appeared titled ( Authors ), inside of which you will find a search box for writers or editors already registered on the site. Simply put, you can write the name of the editor you wish to add to that article and designate her as an additional writer for it:
10. Assign categories to pages just like articles
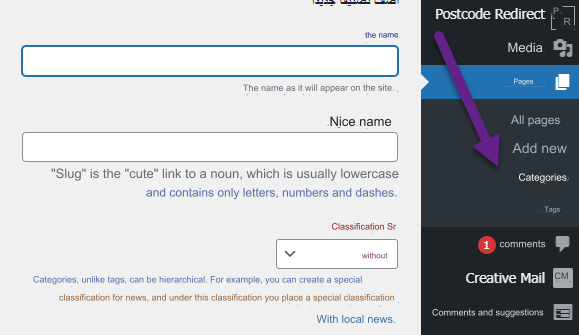
By default, WordPress makes classifications and tags available only to articles within the site, but in the case of pages, you can only add a new page within the site, and it is not possible to assign a classification or tags to those pages.
But with the following simple code, which is added inside the Functions.php file of the template installed on the site, you can easily display categories and tags for pages, just like articles.
Now notice that the categories and tags that were only available for articles are now available for pages along with articles on the site, and you can classify pages according to the tags or classifications that you set yourself.
11. Allowing comments to be liked within your WordPress site
WordPress provides many options for managing and controlling the comments that members and visitors post within the site, but by default WordPress does not allow visitors to like or unlike comments.
Adding like and dislike is one of the additions through which we can provide visitors with the opportunity not only to view visitors’ comments and ratings, but also to like or dislike them, which contributes to providing a distinctive and useful user experience for website visitors or online store customers.
Immediately after installing and activating the add-on on the site, you can access its settings tab from within the control panel and activate it by clicking on the ( Status ) tab.

After activating the add-on from within the control panel, you can go to your site to notice the like and dislike buttons appearing as well on all comments and ratings that members and visitors have published on the site’s content:

12. Hide comments on old articles on the site
Sometimes you browse some articles on someone’s website and are surprised that comments are not available on articles that are more than a month old, even though they are available on all recent articles.
In WordPress, you can hide comments that have passed a period of time that you specify according to your desire, through the default settings on the site.
To hide comments that have passed a certain period of time, you can enter the (Discussion) tab within the Settings tab in the WordPress control panel, and activate the option to hide comments that have passed a certain period of time, which you can specify as you wish:

Conclusion
In the end, WordPress provides many advanced tools and options to achieve the desired website, look or feel, and it depends largely on your own experience, as whenever you search within the options and settings of WordPress, you can easily find additional options and tools that help you move your site to the next stage.
Also, make sure to update WordPress constantly to ensure that you get the modern options that WordPress provides with every update that is announced, in addition to that updates help increase the security of the site and protect it from vulnerabilities or unacceptable attacks.


Leave a Reply