

The feature of displaying a warning message to the customer on WordPress sites, or what is known as the Site Notifications feature, is an important feature that you may need as a site owner to deliver important information to your visitors and users of your site and draw their attention to it.
You can display warning messages to your customers in several ways, the most prominent of which is displaying them in the form of a message or alert on the notification bar at the top of the site, or displaying them in the form of a pop-up window, or you can send them in the form of a message to the customer’s e-mail, or other methods..
In this article, we will show how to show a warning message to the customer by displaying it in the notification bar on the WordPress site in several ways, through ready-made plugins, or manually through code.
Concept of warning message
A warning message is a message that is displayed to the customer to inform him of the occurrence of an event, to alert him to the occurrence of a specific problem on the site, or to request additional data related to him in the event that he logs in to the site or attempts to purchase from the store with incomplete data, or for other uses.
The warning message could be about updating data, weak passwords for the visitor or customer, or someone trying to log in to their personal account using other passwords. Thus, the importance of warning messages is highlighted here.
There are also many other reasons and situations that require you, as a web developer, to send warning messages to the client. For example, this feature is used to display an alert message (Please update your personal data and verify your identity!) to a customer from a WordPress site if that customer does not fill out all of his profile data when registering on the site, or to display security warnings on the site or for other uses. The other..
The difference between warning messages and notifications
Both aim to alert the user to information. But most often, warning messages express a security-related defect on the site.
While notifications would inform site users of any new event or information, whether an article was published, deleted, or modified, or a new customer login, or a new user registered, or confirming a change in the user’s email, changing the user’s role, responding to a comment, or to alert your store’s customers and attract their attention when there is a New products in store etc..
Practical ways to display a warning message to the customer in WordPress
In the following paragraphs, we will explain more than one way to display a warning message in WordPress through ready-made plugins or code, and you can choose the method that suits you.
1- Show warning messages through additions
You can also show warning messages through ready-made plugins without the need to write code, as the WordPress platform contains many plugins that can help you integrate alerts into your website. Below we will review how to do this using the HashBar plugin
This plugin enables you to display a notification bar on your WordPress site, customize its content to suit your needs easily and simply, and notify your customers of the information or messages you want. It contains options to add colors and background images to make the notification bar look more professional.
This add-on is available in a free and paid version that offers advanced features to display alerts and notifications in any way you want. It is lightweight and will not slow down your website.
This add-on also enables you to add an email subscription form by entering the title of the message you want and the registration URL. In the next paragraph, we will explain the steps for using this plugin to display warning messages to the user in the notification bar of the WordPress website.
Steps to display a warning message to the user through the HashBar add-on
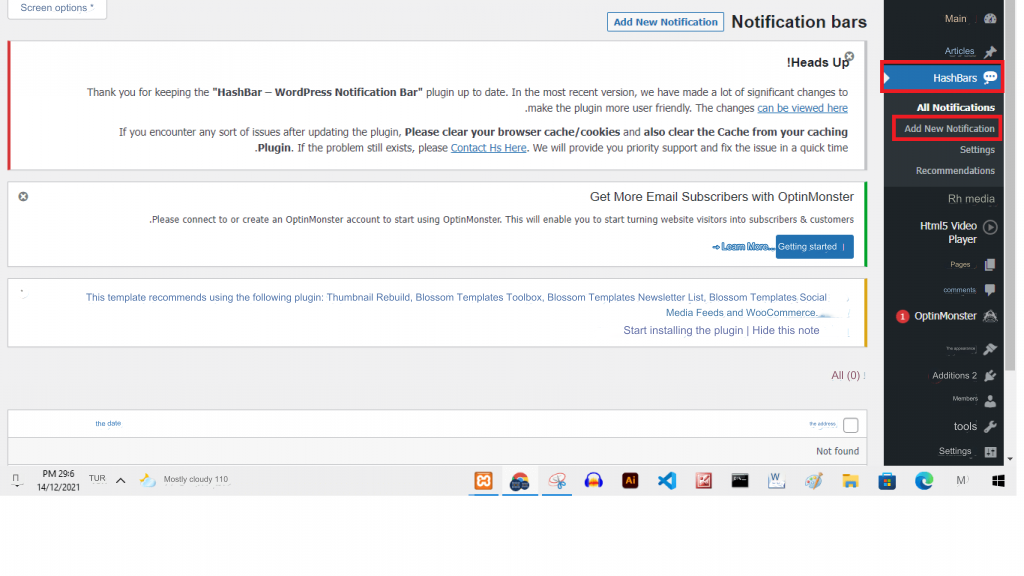
1 – To start creating a notification bar for your site users, you first need to install the Hashbar add-on by going to the Add-ons page in your WordPress website control panel, searching for the name of the add-on in the search bar, and installing and activating it on your site.

Once the add-on is activated, a tab with its name will appear on the control panel. Click on the Hashbars add-on tab . A drop-down list will appear with several options. Through the Hashbar Options option, you can access its main settings – but all of these settings are specific to the paid version of HashBar Pro Global Options. So we won’t care about these settings currently since we are using the free version of the extension.
2 – In order to add a notification through the extension, click again on the name of the extension Hashbars < and choose the command add New Notification to add a new notification
3 – You will notice that your site’s WordPress editor will open and the process of adding a notification will appear in the same way as adding a new article or page. Add a title for your notice, then customize your notice or message the way you want it to appear on the site. You can customize through 3 tabs as shown in the following image:
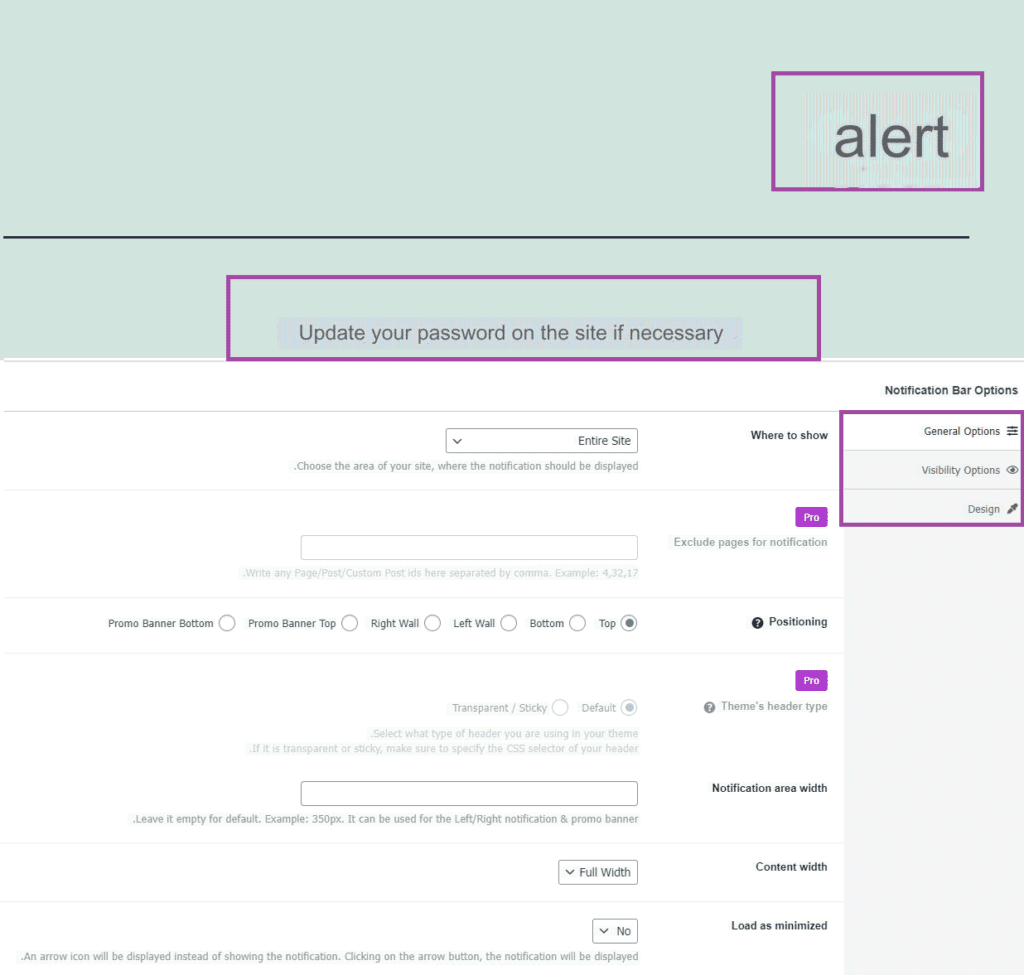
The first tab, General Options : enables you to customize the general options for the notification, such as: the location and position of displaying the notification, showing the close button on the button, and other settings..
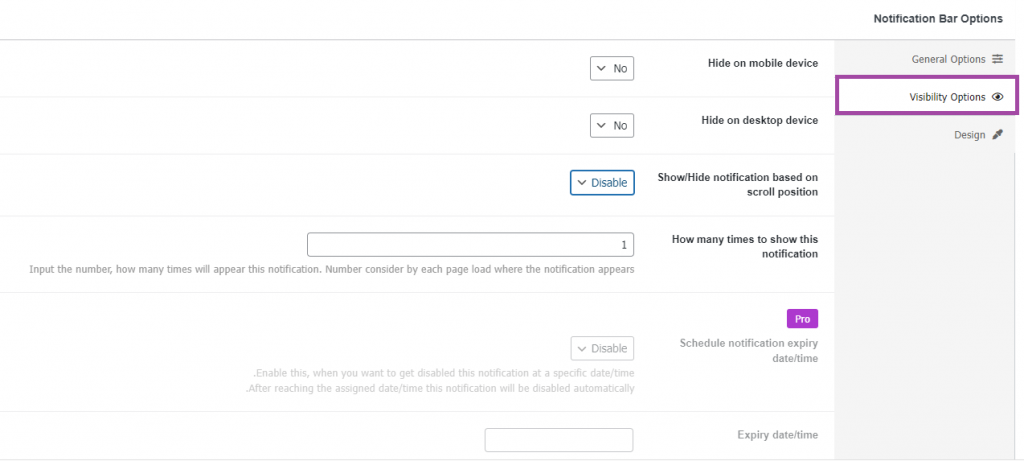
The second tab, Visibility Options : enables you to customize the way the notification appears on mobile devices.
As for the third tab, Design , you can design the notification the way you want, such as specifying the background color, text color, etc.

After you finish customizing all the notification options, click on the Publish button to publish the notification on your site. You will get a result similar to the following image:
2-Show a warning message to the customer via the code
You can show the Alert Bar in the Header of your site and display a warning message to the customer with the code. You can also format this message as you like and in the way you want, and you can put it in the preferred place from your point of view and then write the content of the notice or warning message.
In order to accomplish these two steps, you must have some experience in writing CSS and HTML codes , then follow the following steps:
1- Go to your WordPress site’s control panel, then click on Appearance > Customize .
2- After clicking on the Customize your site button, the window for customizing the appearance of your site will open. Choose ( Additional CSS formats ) at the bottom.

Click on it until a text space opens for you to write the formats for the bar that you want to display and in which you want to show the warning message. Add the following CSS code, then click on the ( Publish ) button.

3-You now need to add the HTML code for the warning message and its content. Suppose we want to send a warning message to the customer to inform him about updating his password and making it strong. Favorite place and we want to display this message in the site header.
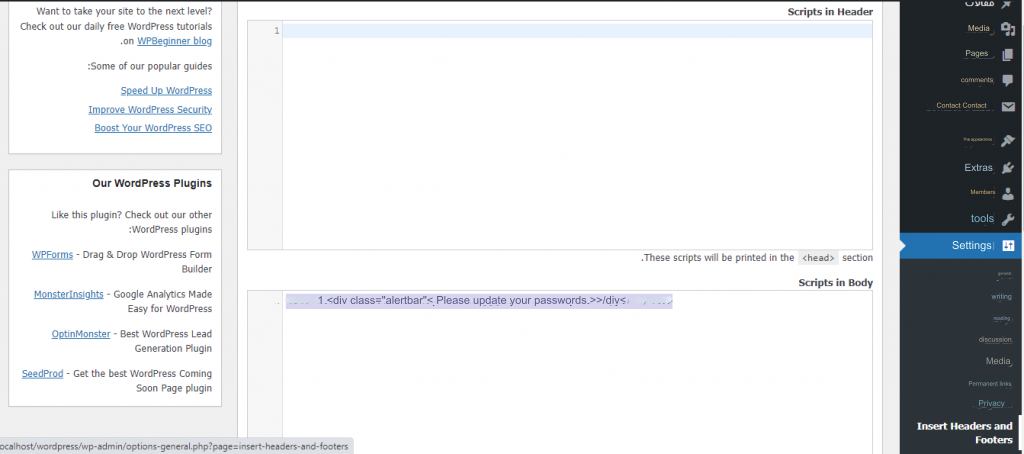
The easiest way to do this is by using the Insert Headers and Footers plugin so install and activate it on your site
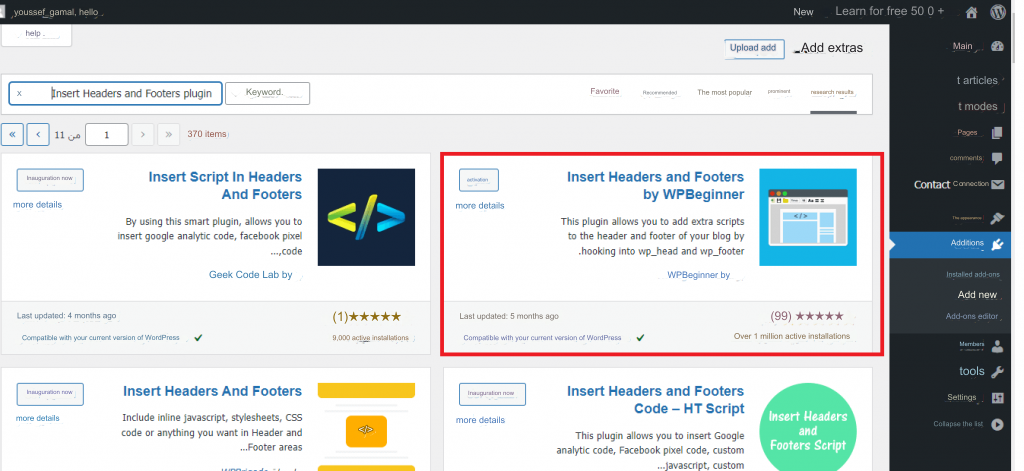
4- After activating the add-on, now go to Settings in the control panel and you will notice the name of the new add-on appearing, Insert Headers and Footers. Click on it to go to its settings.
5- Here, write the HTML code for the message, mentioning the name of the class that you added in the previous CSS code, using the div tags as follows:
Then save the changes as shown in the following image
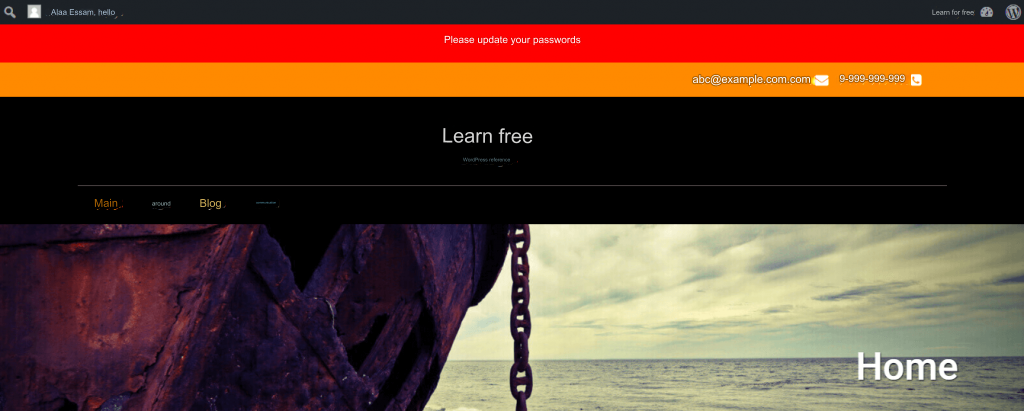
Now, when any user browses the site, a warning message of his own will appear in front of him informing him of the need to update his password so that he in turn can take the necessary measures, and the following image explains the meaning.
Summary
And here, dear reader, we have finished our article in which we explained many practical methods that enable you to display warning messages or notifications to users and visitors of your site in an easy and professional manner on your WordPress site to communicate with subscribers and increase traffic on the website.
But beware: Showing too many messages, warnings and promotions in an annoying way can have the opposite effect so be wise in using them. Share with us in the comments what is your favorite way to display messages and notifications to your audience.