The real estate website helps real estate office owners and real estate brokers reduce the effort and time required to complete their tasks. Instead of speaking on the phone with potential clients and explaining the details of available properties, they can send links to those properties on the site, and instead of sending pictures of properties via social media, they can create photo galleries. Professionalism on site.
The real estate website also helps promote real estate through the use of SEO, advertising campaigns, etc., which makes it an effective tool in the field of real estate. Therefore, in this article, we will explain how to create an integrated and professional real estate website through which real estate listings, details, and photo galleries can be displayed.
What is meant by real estate website?
A real estate website is a website that allows anyone who wants to promote real estate for sale or rent to do so, and enables visitors or potential customers to browse the properties displayed on the site and filter them based on certain criteria that make it easier for them to find the appropriate property for them.
The real estate website can be a real estate market in which anyone who wants can display their properties after the site administration approves it, or it can be a website belonging to a specific entity, such as a real estate office or a real estate broker, and only that entity can display properties on the site.
Steps to create a real estate website
A real estate website must include a set of features that are not included in other traditional websites. Therefore, although the process of creating a real estate website is similar in some steps to the process of creating any website, there are many differences in some steps, and therefore we explain below the steps for creating A comprehensive real estate website.
1. Choose how to create a real estate website
There are several ways to create a real estate website, but there are two basic methods. The first method is to program the website from scratch, and the second method is to adopt a content management system ( CMS ).
Programming the website from scratch requires high programming experience and a large amount of time and effort, or you need to rely on a professional web developer and pay a large amount of money, while the other method is easier and faster, and costs a smaller amount of money, and therefore it is the most appropriate in most cases.
There are many systems that provide the ability to create a real estate website, but the best of them is WordPress because it provides great customization options that allow the site to be designed the way you want, so we will rely on it to explain how to create a real estate website, but the general steps remain almost the same regardless of the system you choose.
2. Obtain the requirements
Building any website requires obtaining a domain name and web hosting , so in order to create a real estate website, you must obtain these two basic elements.
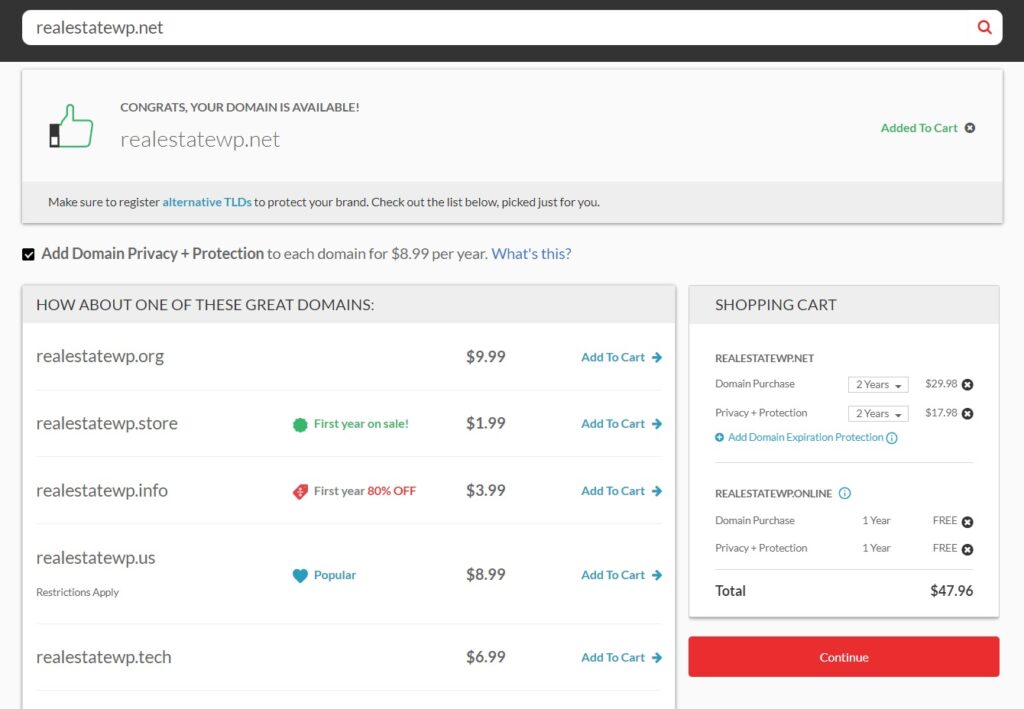
You can obtain a domain name for your real estate website from companies that sell domain names, the best of which are GoDaddy , NameCheap , and Domain.com , where you can go to the website of one of them and enter the domain you want to obtain and purchase.

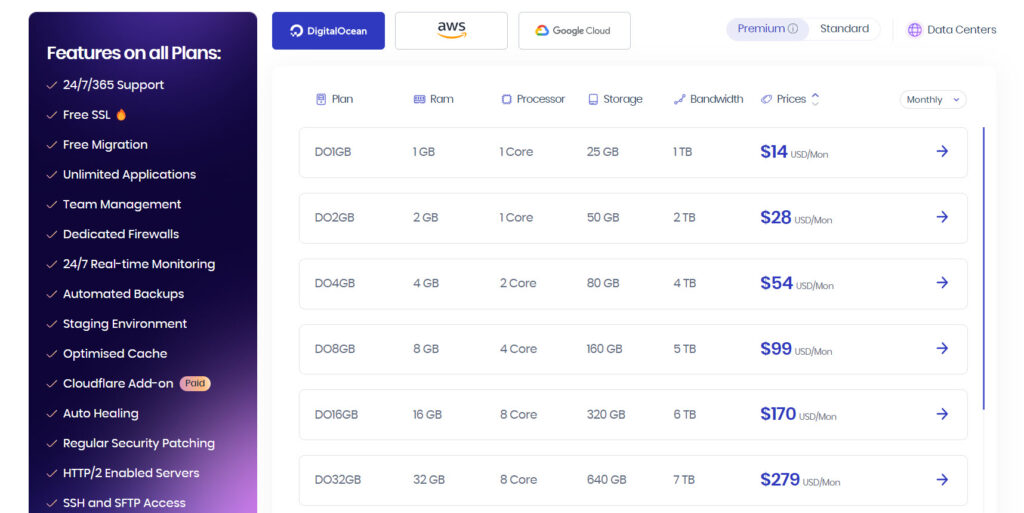
Regarding hosting, there are many types that can be used to create a real estate website, but cloud hosting that charges you for consumption is the best in terms of performance and cost, and therefore we advise you to obtain cloud hosting, and stay away from other types of hosting, especially shared hosting .
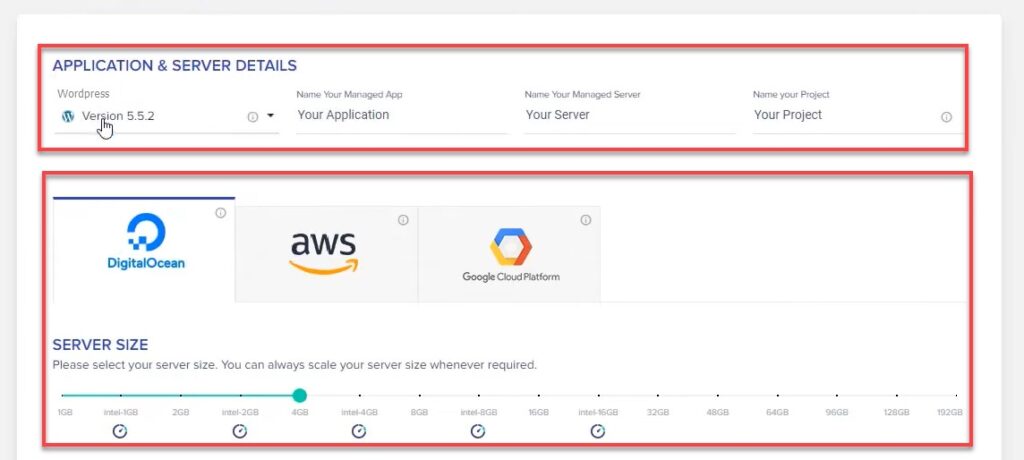
Cloud hosting can be purchased from web hosting service providers that provide high-quality hosting, such as Cloudways or DigitalOcean , where you choose the appropriate hosting plan for your site, then register an account and pay the cost of the plan to obtain hosting and then begin installing WordPress on it.

We have explained in detail the steps for obtaining a domain in the article ( How to Reserve a Professional Domain for a Website ), and we have also explained how to obtain cloud hosting from Cloudways in the article ( What is Cloudways Hosting and how to install WordPress on it ).
It is worth noting that in order to create a professional real estate website, you will also need a reservation or communication system that enables the potential customer to communicate with you or the property owner to book an appointment to inspect the real estate unit in order to buy or rent it, and this can be provided by using a custom real estate website template or a custom add-on. For real estate websites, as we will explain later.
3. Install WordPress
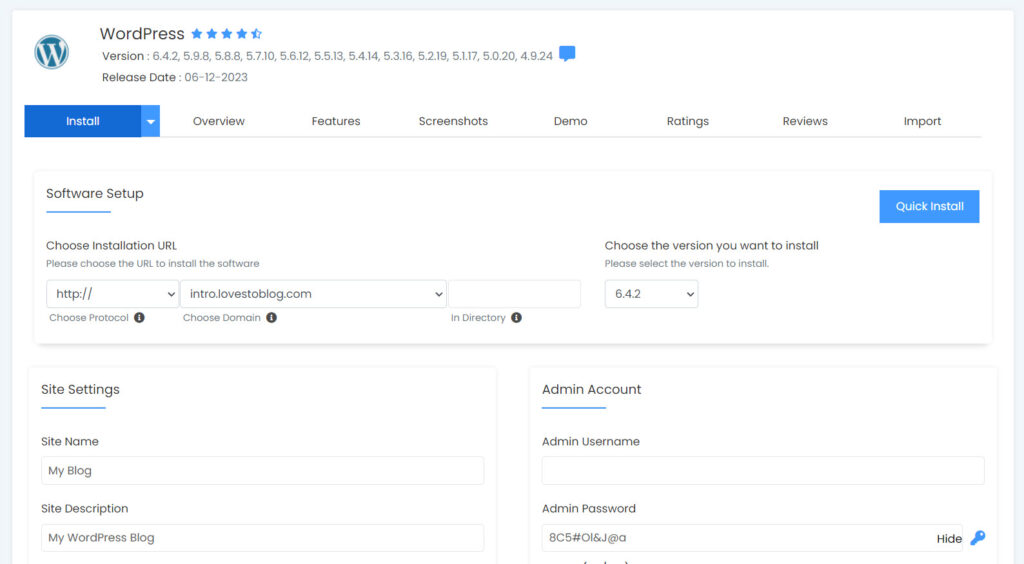
After obtaining the requirements, you will need to install WordPress to create the real estate website based on it. The steps to perform this task may vary depending on the hosting company you choose.
Many hosting companies provide the ability to install WordPress very easily, as the technical support team can install the program after purchasing the hosting, setting up the account, and choosing the application that will be worked on within the setup process (WordPress).

Some companies allow the installation of WordPress by adopting an easy-to-use automatic installation tool that can be accessed through the hosting control panel.

We have explained how to install WordPress on hosting in more than one way, in detail and with pictures, in a separate article entitled ( Explaining how to install WordPress easily by reviewing 3 practical examples ).
You can adopt the method provided by the hosting company of your choice, and if there is more than one method you can adopt the method you want. What is important is that at the end of this step you have WordPress installed on hosting, and that you can access the WordPress control panel .

4. Choose the appropriate template and install it
The WordPress template determines the appearance of the website and how the elements are displayed to the visitor on the front end, and because the real estate website must provide options for visitors that differ from the options provided by other sites, it is better to rely on a WordPress template dedicated to real estate websites, or a multi-purpose WordPress template that has custom templates. For real estate websites.
There are many free and paid templates dedicated to real estate websites, and they differ in the features and options they provide, but all high-quality templates that allow the creation of real estate websites provide the basic features and options that these sites need, such as the ability to display properties in lists or cards, in addition to the ability to search within Properties by entering a keyword phrase and through filtering based on properties.
You can search for the most suitable template for your site in Arab and foreign template stores, such as the official WordPress store , where you can use the search engines provided by those stores to find a suitable WordPress template.
The best WordPress templates for real estate websites
In general, the following list of templates is one of the best templates based on which an integrated, professional real estate website can be created. However, this list is not comprehensive, of course, as you can find other high-quality real estate website templates:
- RealHomes : It is considered one of the best WordPress templates for real estate websites, as it turns the site into an integrated real estate website management system by providing all the necessary tools, such as an advanced search system and real estate listings. It supports the Arabic language well, and provides a number of pre-made professional designs, one of which can be imported and a real estate website created based on it. It also features many customization options.
- Houzez : One of the high-quality WordPress templates, designed specifically for real estate websites. It supports the Arabic language well, and provides all the features required to create a professional real estate website, such as an advanced search system and a real estate listing system.
- WP Residence : A professional WordPress template for creating a real estate website and displaying properties through it. It features the ability to insert maps with a pinned site indicating the location of the property, in addition to an advanced, customizable search feature, with the ability to filter searches based on AJAX technology, and includes more than 35 ready-made designs. To be used on the site to get started quickly, it also provides you with the ability to allow visitors to display their properties for a fee or for free.
- Real Home : A template dedicated to real estate websites. It has two versions, one free and one paid. The free version can be used if your budget does not allow for a paid template, as it provides the basic options for creating a real estate website, but it lacks many advanced options that allow customizing the real estate website. Professionally, as for the paid version, it is not recommended to use it because there are other better paid templates.
- Estate Engine : A powerful WordPress template that turns WordPress into a customized real estate website management system by providing many tools that help create and manage a real estate website, including Google Maps, galleries, etc. It also includes an advanced search bar tool, and allows visitors to ask you to list properties for them. On your site for a fee paid online.
- Oikia : One of the powerful WordPress templates dedicated to helping you create a real estate website easily. It features integration with popular WordPress plugins that you may need on your real estate website, such as WPForms and Yoast SEO , and of course it has an effective search bar, listing pages, and pages dedicated to real estate.
After selecting the appropriate template, you must install and activate it on your WordPress system using one of the appropriate methods that we explained in the article ( How to install a WordPress template correctly ).
Note: As an alternative to choosing a WordPress template dedicated to real estate or that provides the features that real estate websites need, you can choose any WordPress template that you deem appropriate, and then add the features and options that real estate websites need by using a custom plugin to create a real estate website, such as the plugins that we will highlight in the paragraph suffix.
5. Customize and design the real estate website and adjust the settings
After you choose the most appropriate WordPress template and install and activate it on your site, you must customize the site and adjust its settings to make it appear the way you want.
Different WordPress themes provide different ways of customization and design. The template can provide the ability to customize through the customization tool, through the full site editor, or through its own settings.
Regardless of the customization method provided by the template, in this step you must design the site in an appropriate way to launch it as an effective real estate website. Here we will explain how to customize the site based on a template that provides the possibility of customization based on the customization tool, which is the RealHomes template intended for real estate websites.
Many WordPress templates for real estate websites provide several designs, so you can rely on one of them, and this of course includes the RealHomes template. After installing the template, you will be asked to install some of the plugins necessary to make it work, and then after that you can choose and import the design you want (the demo) from the prepared designs. pre.
To do this, you must go to the “ Import Demo ” tab located under the “Real Homes” tab in the control panel, where you can click on the “ Import Demo ” button for the demo you liked to import it.

After the demo design you want has finished importing, you will notice that your site has been displayed with demo content on the front end.

You can modify this content (as well as the layout if you wish), or remove parts of it and add other parts that suit you through the customization methods provided by the template, and we will explain how to do that later, as you must first adjust the basic settings of the site.
To do this, go to the real estate program settings by clicking on ( Settings ) located under the ( Real Estate Program Management ) tab, then adjust all the settings as suits you in all the tabs that the page displays, including the following:
- The currency of real estate prices that will be displayed on the site.

- How to build real estate links and classifications.

- How to make maps on the site and how to specify addresses.

After adjusting the basic settings in these tabs, you can modify the site design to become as you want, through the customization settings provided by the template within the customization tool.
Therefore, in order to customize the site, click on the ( Customize ) option located under the ( Appearance ) tab. This will open the customization tool, and you will notice that it consists of two sections, one on the right side that includes tabs containing the customization options provided by the template, and the second on the left side that displays a live preview showing how the site will appear on the front end.

In order to customize the template properly, you must check all the customization options in the customization tool and adjust them according to what suits you, and this includes style options, real estate search features, header and footer, home page settings, and the rest of the options.
This process is easy, as most changes will be explained in the live preview window, and you can open the relevant page with the settings you adjust to preview the changes if they do not appear on the main page. If you are modifying the properties of the property details page, you go to a property page through the live preview window. Then you adjust the settings and view them directly, and the same goes for the rest of the options and settings.

After you have finished adjusting all the properties and options of the template according to what you want, you can add real estate information to the site to display it on it.
6. Inserting real estate information on the real estate website
Real estate templates usually add a new post type called Real Estate or another name similar to it. You can include real estate on your real estate site by adding a new post in this type, where you add a post for each property you want to add.
The post type dedicated to real estate is similar to articles or pages in WordPress, but it includes options dedicated to real estate, such as the price of the property, its location, area, number, number of rooms in it, and other properties related to real estate, such as the type of property (apartment, villa, or shop). Its features (sea view, for example) and more.
We will continue explaining how to add real estate information based on the RealHomes template, which we explained how to customize the site based on in the previous paragraph.
In your WordPress control panel, click on the ( Real Estate ) option located under the ( Real Estate Program Management ) tab. All properties added to the site will appear on the page that opens to you, and you will find a group of added properties even though you have not added any property information yet. These added properties are part of the demo you imported, and you can remove them before you start adding your own properties.
In order to add a new property, you can click on the ( Add New ) button on the properties page.
The editing page will open for you, from which you can add property information. You add a title to the property page, then insert a description that explains all its details in the two spaces designated for that.
After that, you must scroll down to the property information section, then fill in as many fields as possible in the tabs that appear. The ( Basic Information ) tab is one of the most important tabs whose fields must be filled out because it includes basic information about the property.
It is also important to determine the location of the property on the map through the ( location on map ) tab.
It is also useful to add a photo gallery of the property, because photos are important in the real estate field, as they better explain the properties and features of the property than descriptions and textual information.
You must also add contact information ( agent information ) that the visitor will be able to use to communicate with you or someone who owns the property to book an appointment to view the property in person.
Note that the Agent Information tab allows you to view the writer’s information or the agent’s information, and you can only choose the agent from the agents added to the site, and therefore you must add your information or the agent’s information before you can view contact information with him, through the ( Agents ) section within ( Real estate program management ) tab .
You must add all the properties that you want to add in the same way as we explained above, each one individually, and after you finish adding the properties, they will appear on the front end of the visitor according to the design, characteristics, and information that you specified while adjusting the template properties.

Thus, you have finished creating an integrated real estate website, and you can start promoting it to obtain visits.
7. Install the necessary add-ons
This step is not always necessary in order to create a real estate website, as the chosen real estate WordPress theme can provide all the necessary options and functionality for the site.
But you may need to install plugins if the template lacks some of the features you need, or if you want to perform actions in a different way than the template provides, or if you are using a template that is not intended for real estate websites.
The most prominent WordPress plugins that you may need for your real estate website are the following:
- Estatik : A plugin that helps create an integrated real estate website, as it adds all the functions that a real estate website might need, and it is not necessary to use it with a WordPress template dedicated to real estate, as through it one can create real estate lists, add the advanced search feature, image galleries, and other features. Advantages.
- Easy Property Listings : It is similar to the previous add-on, as it is possible to create a professional real estate website without the need to use a WordPress template dedicated to real estate. It supports the creation of real estate listings easily, and other important features for real estate websites.
- Draw Attention : This add-on can be used with one of the previous two add-ons, or with a WordPress template dedicated to real estate websites. It allows you to create attractive interactive graphics and charts for the properties displayed on your site, and this can improve the user’s experience and familiarize him with the properties better.
- dsIDXpress : This add-on allows you to import real estate listings from public real estate listings, which helps you populate your site with real estate details, thus getting more visits that help you market your own properties.
You may also need to use other plugins on your site, such as the plugins we talked about in the article ( 15 of the most important basic WordPress plugins when creating a new website ).
8. Promoting the real estate website
After creating the real estate website, adjusting its appearance, customizing it, including real estate details on it, and installing the necessary additions, you will need to promote and market it in order to gain visits, and thus increase the possibility of communicating with you in order to rent or buy the displayed properties. You can do this by relying on SEO, as well as through advertisements. Search results or in other ways.
Using SEO to promote the real estate website helps to obtain high-quality visits, because people who search for properties using search engines have the intention to buy or rent, and Google can also give Google search results for properties geographically close to the searcher’s location priority over other search results. Which brings you visits from people close to you.
To start using SEO to promote your real estate website, you can review our comprehensive guide that helps you prepare your website for search engines and provides you with tips to raise your website pages to the top of the results pages ( SEO explanation for beginners ).
Read also: Your comprehensive guide to electronic marketing
And here, dear reader, we finish explaining how to create an integrated real estate website step by step, starting with choosing the method of work, passing through obtaining the requirements, and ending with customizing the website and adding real estate and promotion details. We would like to point out in conclusion that if you encounter any challenge or problem while creating the website, You can post it in the WordPress Forum to receive responses from expert people who are always ready to help.


Leave a Reply