

Activating the member registration system on the WordPress site is one of the things that confuses many beginners in dealing with the WordPress system, as the member registered on the site can be a responsible member of the site management and can access the site’s control panel, while the contributing member can only create an account. On the site and log in to his account, but without the ability to access the WordPress control panel.
In this article, you will learn how to activate the site’s new member registration system with the ability to control all members, manage their accounts, modify them, and perhaps delete them completely.
You will also learn how to design a new membership registration form for the site, and also design a login form for registered members of the site, through which the visitor can log into his account on the site without accessing the main WordPress control panel, and all of this will be done using free methods and plugins.
At the end of the article, we will also point out ways to control the membership registration system in WooCommerce stores powered by WordPress and manage customer accounts within the online store.
The default member registration system within WordPress
WordPress has a ready-made system that allows members to register on the site, whether registering members who are allowed to manage and control the site, or members who are only allowed to browse the site and interact with the content, such as posting comments using their account registered on the site. We will talk about both methods in the following paragraphs, and then we will move to a completely different method. To design a professional member registration system using a WordPress plugin.
How to register members in WordPress from within the control panel
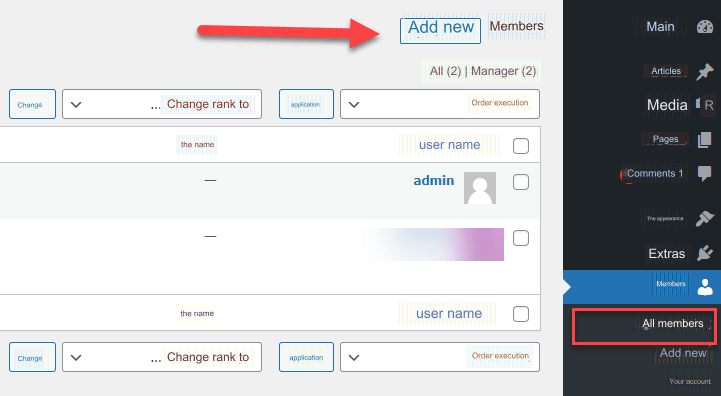
The first method available within the WordPress control panel to register new members on the site is by entering the ( Members ) tab from within the control panel, to open before you a page containing the data of all members registered on the site, through which you can click on the ( Add New ) button to register a new member. On site:
After clicking on ( Add New ), a page will open in front of you to enter the data of the new member you want to register. On this page, you must enter the user name of the new member, his email, and many other data. One of the most important data that you enter on the page to create a new member is the rank of the new member.
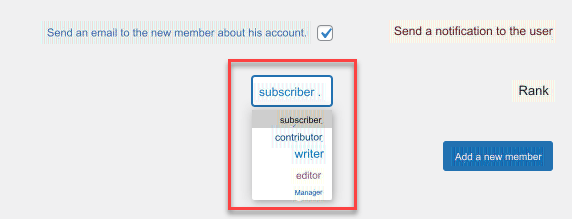
As you can see in the image above, a drop-down list dedicated to choosing ( rank ) will appear , where you will find five ranks to choose from. These ranks enable you to assign the required powers to the new member who wants to register on the site. Here is an explanation of the powers that each of these ranks has:
- Subscriber: The subscriber rank does not give the member any powers to access the site’s control panel options or add content to it. However, the member will only be able to control his registered account and change his account information such as user name, password, and photo. He can also post comments within the site’s articles and pages under the registered membership name.
- Contributor: The rank of contributor allows the member to add new articles within the site, but they are not published directly, but rather they are sent for review by the site managers to approve or reject the publication of those articles. The contributor cannot access the advanced control panel options and settings.
- Writer: The rank of writer gives the member the authority to add new articles to the site with the ability to control and delete those articles, but the writer cannot control articles that he did not write, nor access advanced control panel options such as ( settings, additions, templates ) and the rest of the advanced options in control Board.
- Editor: The rank of editor gives the member the authority to control and manage the content of the site, such as controlling the articles and comments published on the site and adding and modifying other articles, whether he wrote them, or they were written by another member of the site.
- Manager: You must be very careful when assigning the rank of manager to a new member who wants to register on the site, because that rank gives the member full powers to control the site’s content, templates, and additions. He also has the power to add other members to the site, in addition to controlling the data of current members. He can also delete other administrators on the site.
After completing the data for the new member you want to add, click on the ( Add New Member ) button and the member will be added and registered on the site successfully, and the member can log into his account through the login link to the WordPress control panel, which is as follows:
example.com/wp-admin.Register members with WordPress through the front end of the site
As you noticed in the first method of registering members in WordPress, every time a new member is registered, the site administrator is the one who enters the Members tab in the WordPress control panel and adds new members. But what if we want the visitor or member to log in himself and register his account on the site?
You can provide the ability for members to log in themselves within the WordPress site. To do this, first enter the WordPress control panel, then go to: Settings > General , then activate the ( Allow registration ) option located next to the membership setting.
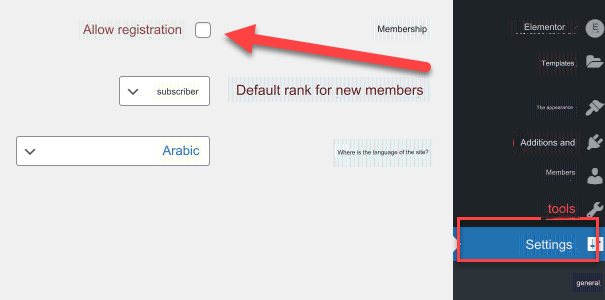
As the image above shows, make sure that the default rank for new members is ( subscriber ), and of course you can later enter the ( Members ) tab in the control panel and change the rank of any of the members registered on the site.
After you activated the option to allow visitors to register on the site, now you can show the login link to your site visitors so that they can log in to the site and create their own accounts through it.
To show the login link to site visitors, go to the WordPress control panel, then go to: Appearance << Widgets, and then drag the widget ( Miscellaneous ) into the footer bar of your site or drag it into any other part where you want to show it:

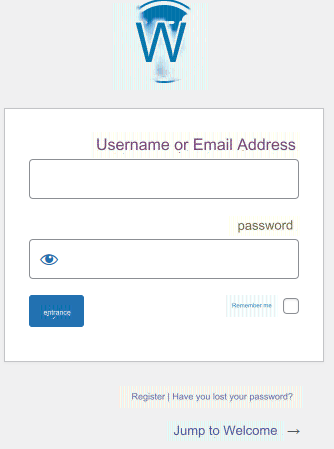
Once you drag the widget ( Miscellaneous ) and place it inside any part of your site – here, for example, we added it in the footer part of the site – then go to the front end of the site to notice that a link appears with the login title:

Thus, the visitor can click on the ( Log in ) link to open the default WordPress login panel through which he can log in to his current account or create a new account on the site.
Certainly, the previous methods are useful ways to register members and visitors on the site, but they do not provide you with all the features, especially if you want to create a separate member registration system that does not allow members to access the site’s control panel.
In the following paragraphs, we will talk about how to create a professional member registration system, while controlling its appearance and design the way we want, using one of the free WordPress plugins.
Create a member registration system with higher characteristics
There are many WordPress plugins that provide the ability to create and design a professional and integrated membership registration form, such as the WP Forms plugin for creating multi-functional forms, but they do not provide the creation of membership registration forms for free, as you must upgrade to the paid version in order to be able to use the membership creation system.
If you want a free option, you can rely on the User Registration add-on , which provides us with the options of creating and designing new membership registration forms and logging in previously registered memberships in a completely free way.

Immediately after installing and activating the plugin on your site, you will notice that a special tab called User Registration appears on the WordPress control panel.
Go to that tab and then click on the ( add new ) button to open the page for creating a custom member registration form on the site:
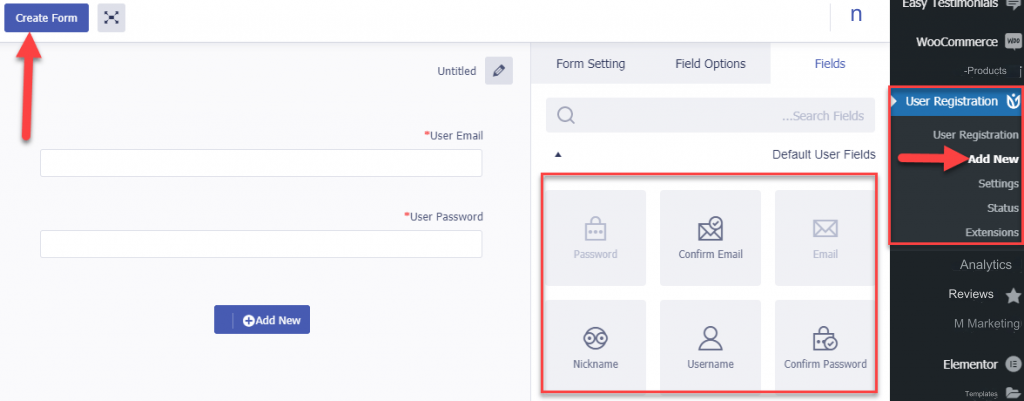
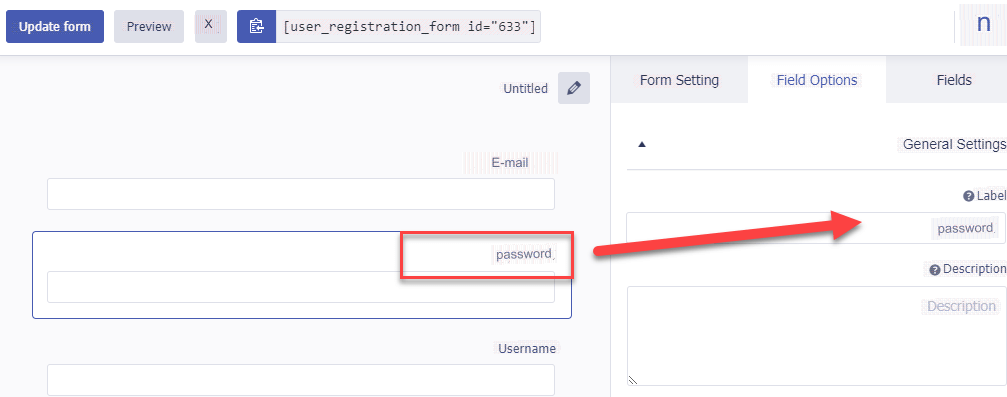
As you can see in the image above, the addition allows you to design the registration form using the method of dragging and dropping fields and elements easily. After you have finished designing the registration form and adding the basic fields to it (such as the email field, password field, user name, and any other fields you want to add), click the button ( Create Form ) above to create the required form for you.
After completing the design of the registration form on the site, you will notice that the short code for the registration form appears:
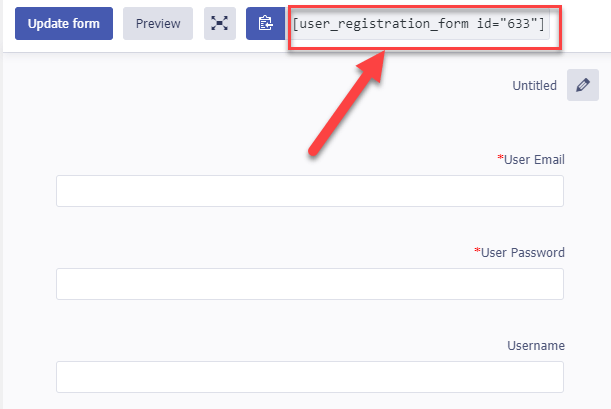
Copy this special short code, then create a new page from within the WordPress control panel and give it an appropriate title such as ( New Membership ), then add the short code component and paste the code inside it:
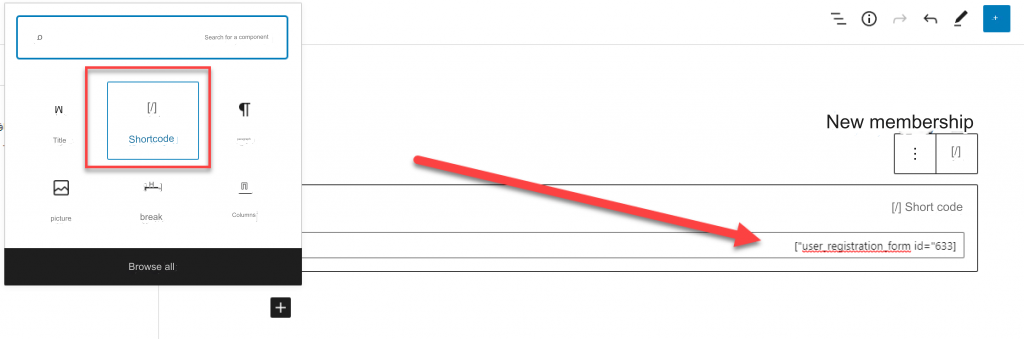
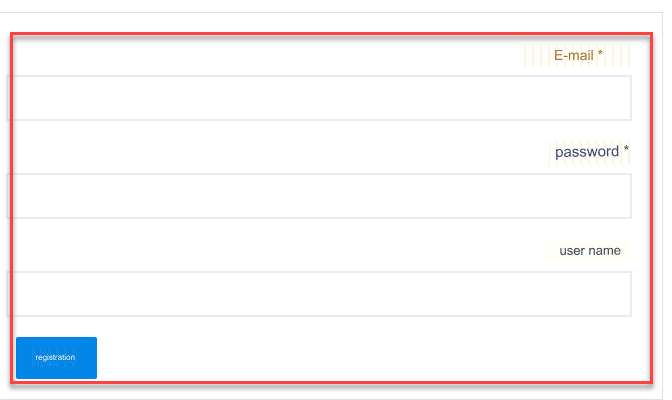
Now that you have created the required page and pasted the code on it, publish this page, then open it in the browser and you will notice that a new membership registration form appears inside it:
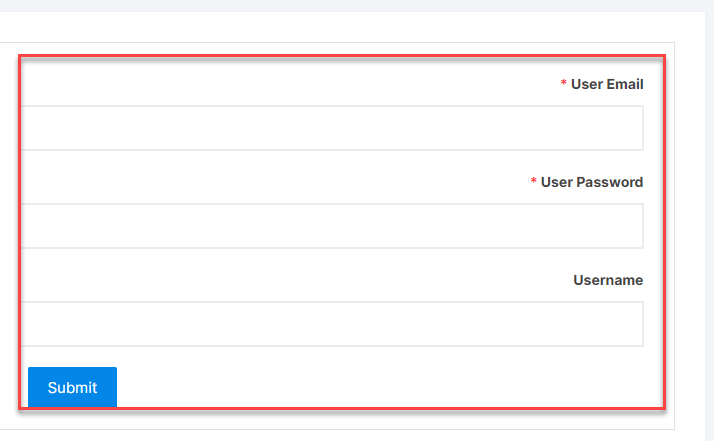
Now you can copy the link to this page and add it to the main navigation menu on your site to give visitors the opportunity to easily access it and create a new membership on the site themselves.
As you can see in the image, the field labels will appear by default in the English registration form, and you can change them to the Arabic language instead. You can return again to the form creation page inside the User registration add-on and click on each of the fields, where you will see the possibility of writing the field labels in Arabic instead. from English:
Now refresh the page after translating the texts on it to appear as follows:
Thus, we have finished designing a new membership registration form for the site that allows all visitors to easily register a new membership on the site with their data without the need to access the site administrator’s WordPress control panel.
You can also add a login page in the same way. You can create a new page on the site from within the WordPress control panel, add the shortcode component, and paste the following code into it in the same way that we explained previously:
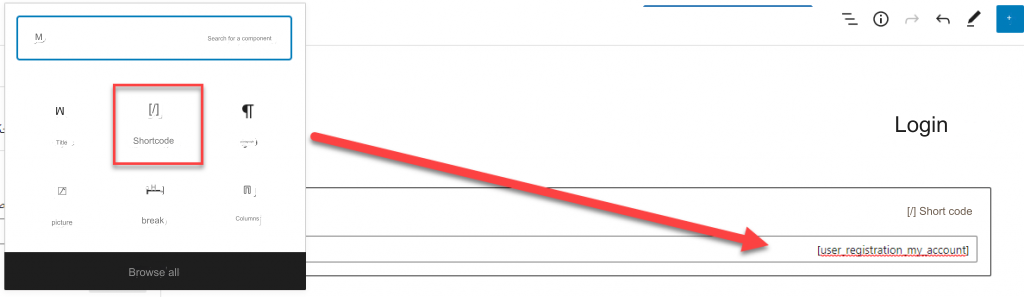
After pasting the previous code on the page and publishing it, now go to the link to this page and you will notice that a login box appears for members already registered on the site:
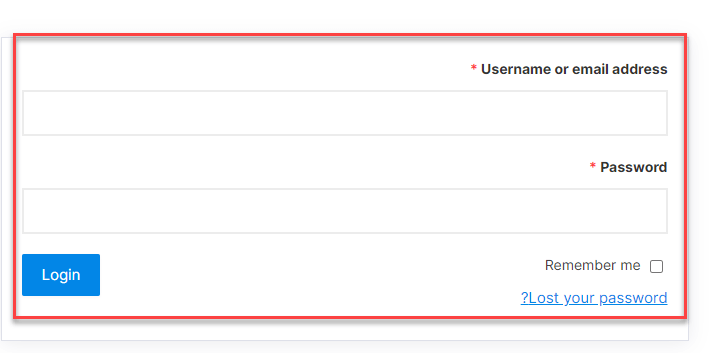
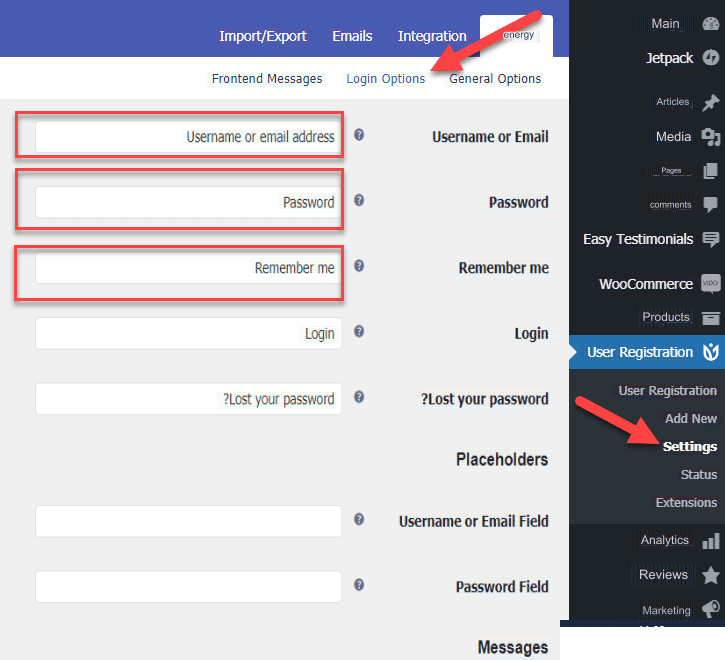
As you can see in the image above, the labels of the login fields also appear here in English, and you can change them and translate them into the Arabic texts you prefer by entering the add-on control panel, by going to the (Settings) tab , and inside it you will find the ( login options ) tab, which contains Field labels where you can change them to Arabic labels easily:
So you have a completely different login page than the default WordPress login page which is for the site administrator only.
Now you can access the ( Menus ) tab within the WordPress control panel and add membership registration and login pages within the site navigation menus so that the visitor can access them easily:

Go to the front end of the site to find that the pages have appeared within the main navigation menu of the site:
Activate membership registration in WooCommerce stores
If you are the owner of a WordPress store powered by woocommerce, you can easily activate the option to create accounts for customers within your store, as you can enter the settings tab of your woocommerce add-on and activate the account creation options within the store as shown in the following image:

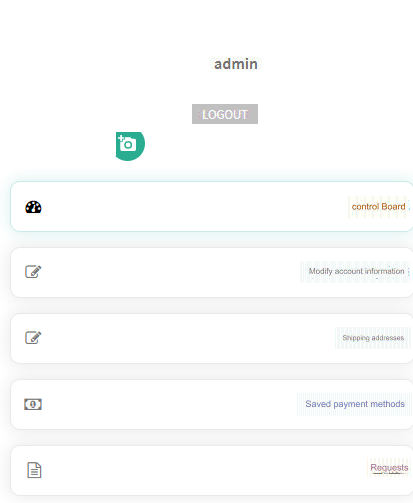
After activating the account creation options for your store customers, they will have the ability to log in to their account in the store, control the account and its data, and view the history of orders they made within the store, saved payment methods, and other settings similar to the following image:
Conclusion
Providing membership registration on WordPress sites is an important and greatly beneficial matter for the site owner, as registering members within the site gives you the opportunity to have good data about the users and visitors of your site or online store, and thus you can easily communicate with them for commercial or marketing purposes.
Finally, we recommend that when you create a new membership registration form or login form, you do not add a lot of fields and data required to be filled out by the member so that he does not get bored with the registration process. Just ask for basic data such as e-mail, username, password, and some other basic data, so that the matter will be It is easy for him during the registration process on the site.