By default, all links on websites powered by the WordPress content management system appear in the same color as the WordPress theme running on the site, but sometimes you may want to change link colors for some purpose related to color consistency with your brand, improved visibility, or Other than that.
This is why the WordPress system provides you with the ability to change the colors of website page links in several ways that achieve similar and different goals according to what you want. In this article, we will explain to you many of these methods so that you can choose the appropriate method for you. We will also explain the method of changing the color of a specific link on one of the website pages.
Change link colors by adding custom CSS code
Since CSS is the primary formatting language used in coding WordPress, it can be used to easily change the formats and appearances of elements on your website by entering custom code written in it into the field designated for that in the system.
To change the colors of all the links on your WordPress site by adding custom CSS code, you must first get the Hex code for the color you want to use as the link color. You can do this through one of the color selection tools, such as the w3schools Color Picker tool , which works through the browser without downloading. After choosing the color and its shade, its symbols will appear to you according to many systems, including the Hex system, in which the color symbol is similar to this symbol ( 0000ff#).
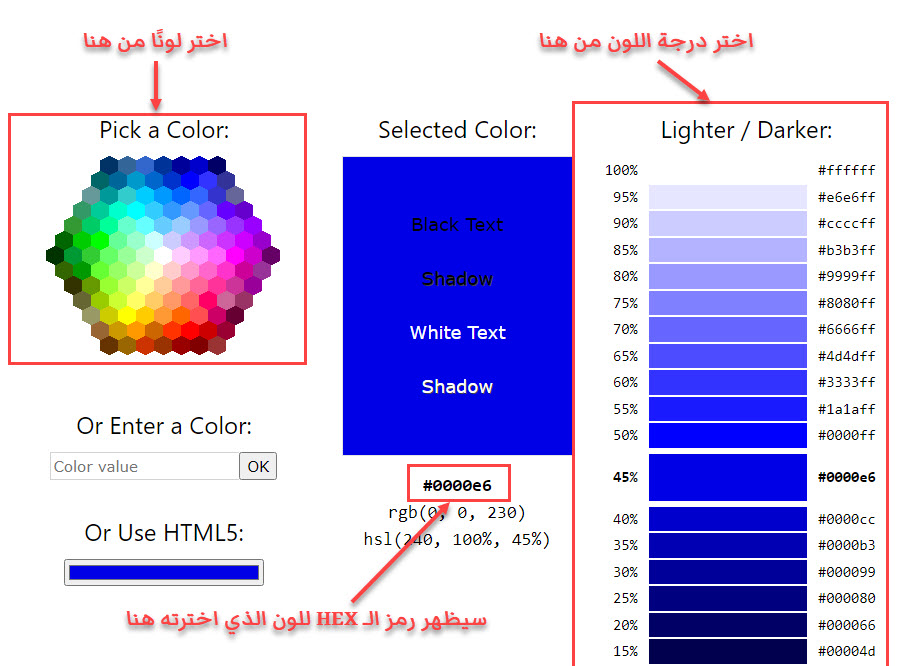
After obtaining the Hex code for the color you want to use for the links on your site, go to the site customization tool by placing the mouse cursor on the (Appearance) option in the side menu of your WordPress control panel, then clicking on the (Customize) option in the drop-down menu that appears. Appear.

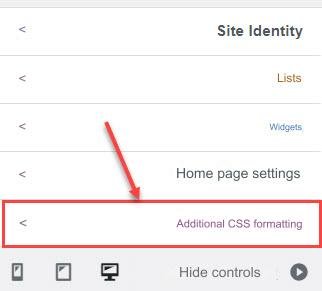
On the customization page that the browser takes you to after clicking on the (Customize) option, you will find in the right section of it a tab titled (Additional CSS Formatting). Click on the title (you may have to scroll down to find it).
A tab will appear that includes a field in which you can enter text, and you can enter here any correct CSS code to be implemented and applied to all pages of the site.
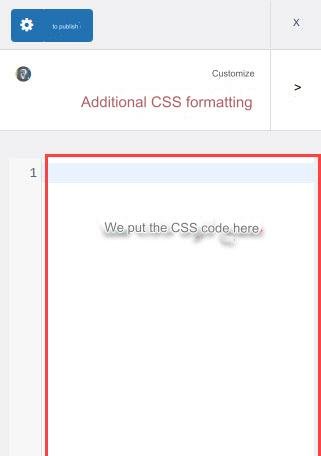
To change the colors of all links on your site, enter the following code in the field designated for entering custom CSS code, but be sure to replace the word (Hex) with the code you obtained through the w3schools Color Picker, or any other similar tool.
After that, click on the (Publish) button to apply the code to all links on all pages of the site.
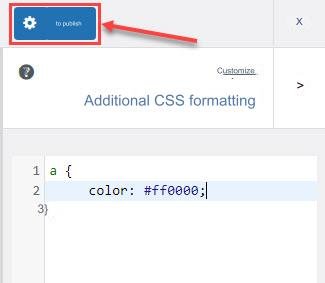
The colors of the links on your site will be immediately changed to the color you specified in the CSS code, but the change will not only include the links in the article, but also the links in the navigation menu, sidebar, footer, and all other sections of the site.
Change the color of the link when you hover the mouse over it
Sometimes you may want to change the color of a link when the mouse cursor is placed on it to a specific color instead of changing its color in the normal state when the mouse cursor is not on it. You can do this by applying the same steps as in the previous paragraph, but using this code instead of the code In that paragraph, replace the word (Hex) with the color code you want.
Note that the previous code differs from the code in the previous paragraph by the presence of two dots on top of each other, followed by the word (hover) after the letter a, which indicates links on the site. This combination tells the browser to apply the formatting between the following parentheses (in this case, change the link color) when The mouse cursor hovers over the link.
Change link colors from customization options
Many WordPress templates allow changing the colors of links through the options on the customization page, where you will find an option that allows you to choose the color you want to change the colors of your site links to without the need to use any other tools, or write any codes.
The place or tab in which you will find the option that changes the colors of links varies, because the template developer determines its location, and he can place it in any tab he wants and with any name he chooses, but in many cases you will find the option under the colors tab, which in turn may be content within another tab.
If you are using the Astra template, for example, you can change the colors of your WordPress site links from the options on the customization page by clicking on the (Global) tab title, then clicking on the (Colors) tab title from the tabs that appear, then choosing the color you want from Through the window that appears when you click in the designated space next to the phrase (Link Color).
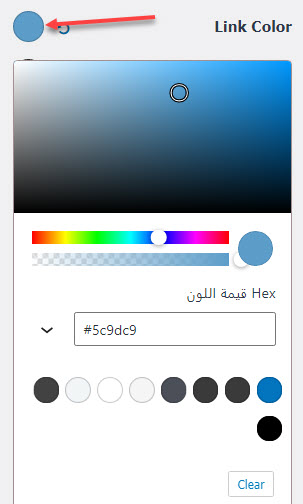
It is also worth noting that you may find other options related to link colors within the customization options of some WordPress themes, including the option to color the link when the mouse cursor is hovered over it, and so on.
Change the color of a specific link in WordPress
It is usually necessary for the colors of your site to be consistent with each other, and this includes the colors of the links on the site pages being the same color, but it is possible that you may sometimes need to change the color of a specific link to distinguish it in one of the articles or pages that you are editing, and we will explain how to do this. That’s in this paragraph.
To change the color of a specific link in one of the posts or pages of your WordPress site, go to the editing page of the post or page in which you want to change the color of a link. You can do this by clicking on the word (Edit) that appears below the title of the post or page on the page that lists the posts (the All Posts or Pages page).
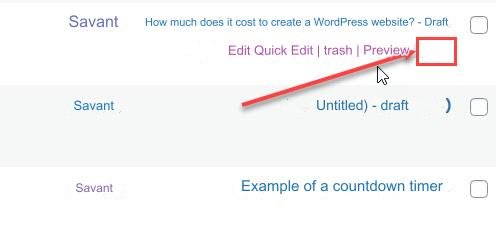
On the article editing page, select the link text whose color you want to change alone and not from the rest of the website links, then click on the arrow next to the Add a link to text icon, then click on the (Text Color) option from the drop-down list that appears.

A small window will appear for you that includes some colors that match the colors of the template, and you can choose the color you want from it, but if you want to choose a specific, custom color, you can do so by clicking on the phrase (custom color), where a window will appear that enables you to choose Any color you want.
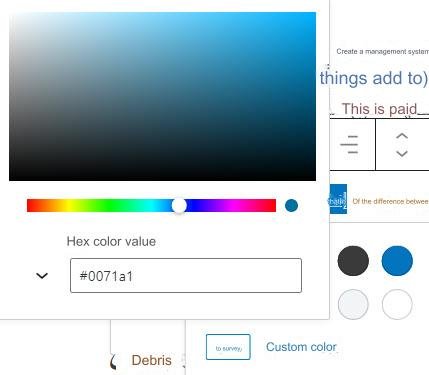
After choosing the color you want, the color of the link text will be directly changed within the editing page, and after saving the changes by clicking the (Update) button, the link will appear to all visitors in the color you specified.
It is worth noting that you can color specific groups of links on your website with the colors you want by using CSS codes. For example, you can make the colors of navigation menu links blue, the colors of links in the article text red, the colors of footer links black, and the colors of sidebar links. Purple, as the CSS language provides great flexibility in specifying the links to which formatting will be applied.
If you want to know more about the CSS language and the formatting options that it provides for links or the rest of the website elements, you can review our article ( explaining HTML and CSS and how to use them and modify their codes completely ), in which we talked about many aspects of the language and its capabilities.
And here, dear reader, we have finished explaining many practical methods that allow you to change the colors of links on your website that runs on the WordPress system, and we point out in conclusion that there are other effective methods that can be used to change the colors of links, but we have listed here the best and easiest ways to perform This task, and you can use the method that you deem appropriate and does not cause you problems on the site.


Leave a Reply