

you are looking for an electronic blogging platform where you want to publish your content or your business activity, you can create a WordPress blog in a few minutes and in the easiest ways.
Creating an electronic blog in the past required you to learn some programming languages through which you could create a blog, such as HTML – CSS – PHP and others..
But recently, with the development of the WordPress system, it has become possible to create an electronic blog in simple steps and without the need to learn any programming languages.
All you need is to have some basic skills in dealing with computers and websites in order to be able to create a professional blog equipped to publish articles, bulletins, and textual and video news within it.
The difference between a blog and a website
A website is an electronic platform that anyone anywhere in the world can access and browse the content published within it. The website often consists of pages and sections that the visitor can browse and move between.
The website may also contain the possibility of purchasing products or services online, and in this case the website is an (electronic store) for selling products and services online.
While a blog is an electronic platform that is often used to publish news and information articles and daily events in general, the goal is often to publish useful content for a segment of the audience so that the blog receives a lot of visits from which the blog owner can earn money in different ways that we will discuss in our article that We will focus on the easiest ways to create a WordPress blog for beginners.
Steps to create a WordPress blog
WordPress is a content management system that is famous and trusted worldwide, as millions of people use the WordPress platform to launch websites or blogs. We first summarize the steps for creating a professional WordPress blog in the following steps, which we will discuss in detail:
- Preparing web hosting and domain (URL)
- Install WordPress on your web hosting correctly and configure the basic settings of the blog.
- Working on designing the blog and improving its appearance for visitors, or what is known as (installing a WordPress template).
- Preparing the blog to appear in search engines for visitors.
- Earn money from your WordPress blog after launching it.
Preparing web hosting and domain (URL)
If you have not heard of the term (web hosting), we advise you to read the article that explains the concept of website hosting or web hosting in full detail.
In short, web hosting is the storage space that exists on the Internet, and within it, websites can be created to be available to anyone online to visit them and browse the content within them.
Obtaining web hosting means that you enter the website of one of the companies specialized in selling and renting web hosting, and one of the famous companies in selling and renting web hosting is Digitalocean, for example.

There are two types of hosting companies. The first type provides various hosting plans and each plan has a fixed price that you pay every month or every year depending on the package you choose.
The second type provides you with hosting with the highest levels of security and protection and all control options, but not at a fixed price, as the cost of the resources you consume is calculated only from the hosting, and this is what Digital Ocean provides, as it will not make you pay until you fully build the website and launch it. After that, the costs of the resources that your site consumed during each month are calculated.
When you purchase web hosting from any of the website hosting companies, you will be asked to choose a domain (domain name), which means the link that leads to the blog, and anyone anywhere in the world can access the link and view the content of the blog after it is prepared.
Website hosting companies give you the freedom to choose the domain name you want to create for the blog, but if there is a website or blog that already exists online, you cannot use the same domain as its domain, for example when searching for a WordPress domain in Arabic www.wordpress-1409476-5242918.cloudwaysapps.com in any The web hosting company will tell you that you cannot buy this domain because it is already reserved for another site:
Therefore, choose a new domain name that is easy to save later for your visitors to be linked directly to the hosting if you are purchasing the domain and hosting from the same company.
If you are purchasing the domain from a different company than the company you are purchasing hosting from, you can see the article on how to connect a domain to hosting to get the complete guide to doing so.
The step of purchasing web hosting and a domain is the easiest step in the steps of creating a professional WordPress blog. All you have to do is choose one of the companies specialized in selling web hosting, then choose the hosting and domain you want to buy, then pay the amount to the company, and immediately after that you will receive an email containing On your own link to enter the hosting control panel.
After you purchase and prepare the web hosting and domain, you will be ready to enter the next step, which is installing WordPress on the web hosting.
Installing WordPress on web hosting
After we purchased the hosting and domain in the previous step, you should now have a link to access the hosting control panel, which you received from the company you purchased the hosting from.
The current step is to install WordPress on the hosting that we purchased and link it to the chosen domain.
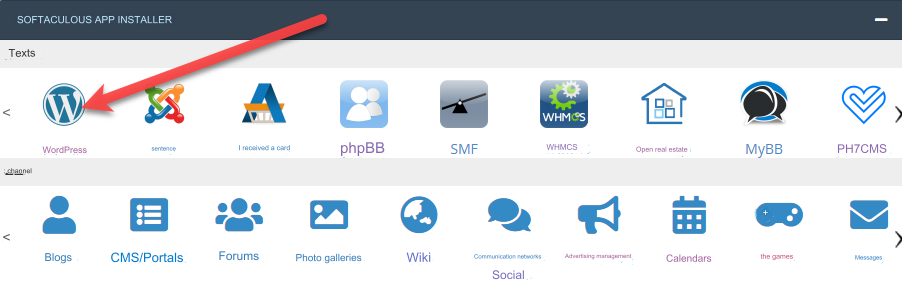
You can install WordPress in the easiest way. We can access the hosting control panel directly. We will notice that there are many ready-made applications that were installed automatically from the hosting company, and among these applications there is the WordPress application through which we can install WordPress on the hosting:
When you access the WordPress application icon, it will open for you an interface for installing WordPress, which is a process that takes place automatically without your intervention. All you have to do in this interface is to enter the following data in order to begin the process of installing WordPress on the hosting:

- Site name: In this field, you enter the name of the site or electronic blog, where you can write a title that will appear on all pages of the blog later, and it must express your blog, its activity, and the value it provides.
- Site description: In this field, you provide a description line that describes the activity of your blog and the benefit it provides to visitors, as the description and title are data that appears to visitors and helps them remember your blog later to visit it again.
- Username: Here you enter a username where your administrator account will be created to access the WordPress control panel to manage and control the blog that we will create.
- Password: It is the equivalent of the previous username, as you will later be able to enter the WordPress control panel to manage the blog using the username and password that you will enter.
After completing the previous data entry and starting the installation, the automatic program within the hosting will install WordPress on the hosting, which may take only a few minutes.
After that, the WordPress control panel is the place from where you can start creating your blog, controlling its appearance, the content published in it, and everything.
If the domain for the blog that you purchased from the hosting company, for example, is in the following form: www.Example.com , then you can access the WordPress control panel by adding the word wp-admin/ directly after the domain to become: www.Example.com/wp- admin
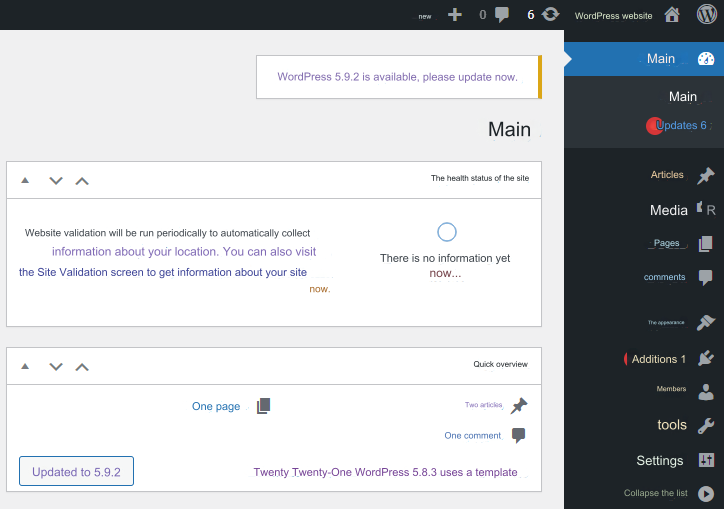
When you access the WordPress control panel link in the image we showed, you will be directed to the WordPress control panel screen in a manner similar to the following image:
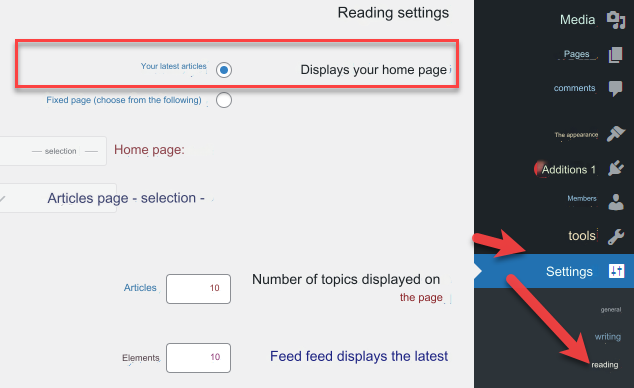
Then when you enter the ( Settings ) tab from the control panel interface shown in the previous image, then enter the ( Reading ) tab, you will find that now the main page of the site displays the latest articles that will be published on the blog, and in this way you have an electronic blog ready to write blog posts and articles. And publish news and then share its links with your visitors anywhere in the world:
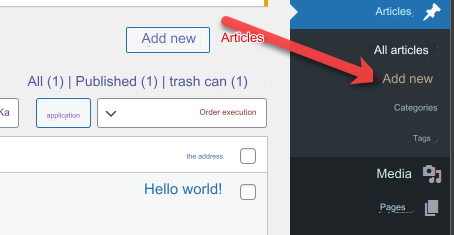
To start publishing articles within the blog, you can go to the ( Articles ) tab, then ( All Articles ). A screen will appear in front of you that shows you all the articles published in the blog. In this case, you will notice the presence of articles titled (Hello World!), which is an article that WordPress automatically publishes as a test, and you can Easily delete them, modify them, or create completely new articles.
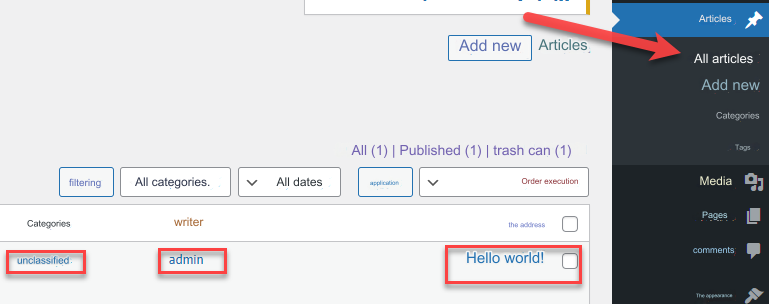
You can also notice from the previous image that next to the name of the article appears the name of the user (admin) who published the article, as well as the classification of the article, which is (Uncategorized), as you can create classifications or main sections and subsections for blog articles, as we will explain in the following steps.
Installing a WordPress template
To start publishing your first article on the blog, you can go to the ( Articles ) tab and then click on the ( Add New ) button:
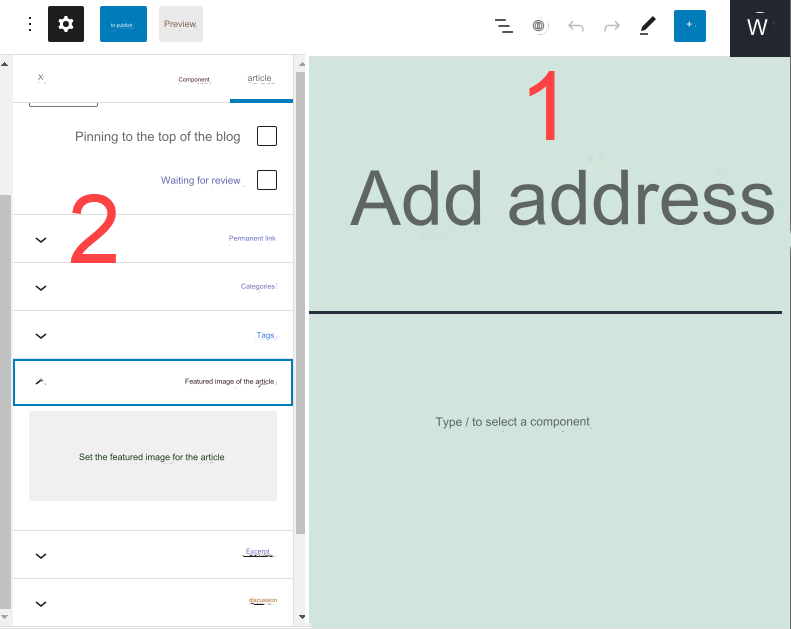
When you enter the Add New tab for adding a new article to the blog, the screen for adding a new article within the blog will directly open to you, which consists of two main sections:
- The first section (1) : In it, you write the title of the article you wish to publish, as well as the entire content of the article directly below the title.
- Second Section (02) : There are many options that help you publish your article in a professional manner, such as the (Categories) tab, within which you can assign a classification to the article if you want to create main and subcategories for blog articles, as well as the ( Set Featured Image) tab. ) through which you can upload an image so that it appears at the top of the article on the blog for visitors.
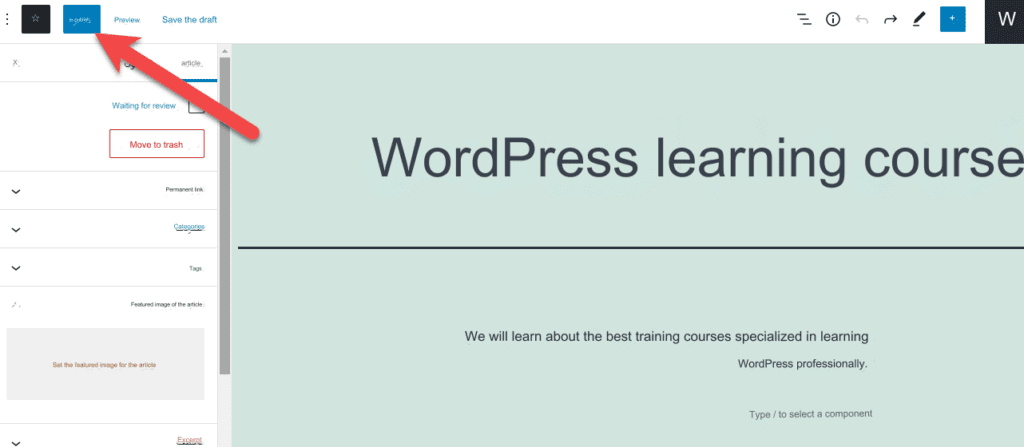
Now you can write the title, content, classification, and prominent image of the article, and after you finish adding the article data with the image shown, you can publish it within the blog easily by clicking the publish button on the same page as adding the article:
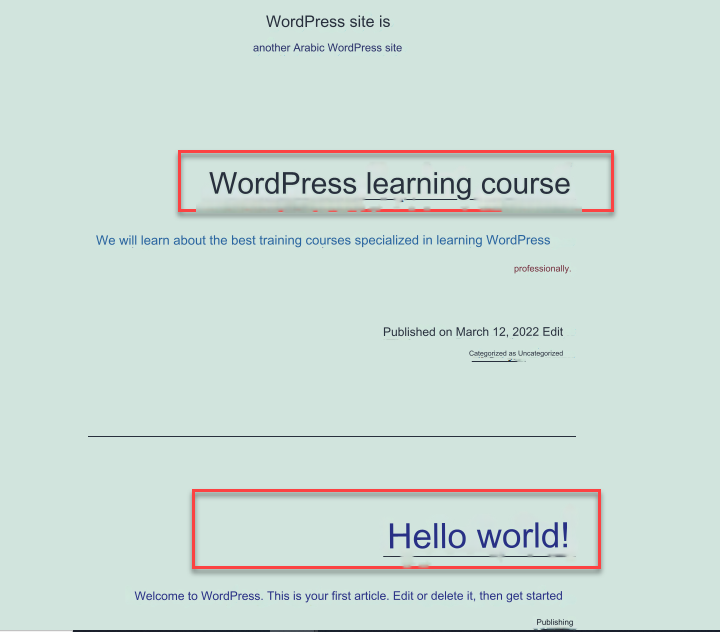
After publishing your first article, you can now go to the blog’s home page by entering the blog’s link or domain, for example: www.myblog.com. You will find that the articles that were published appeared directly on the blog’s home page, where each article’s title and brief description appear. Its content, and you can click on the title of any article to access its full content:
One good idea that helps you manage your blog easily and publish articles within it in a professional and organized manner is to create general classifications for the articles you plan to publish, so that when you publish any new article you can choose the appropriate classification for it.
To create classifications for your articles, you can go to the ( Articles ) tab, then the ( Categories ) tab, inside which you will find a panel for adding classifications, which also shows the current classifications in the blog. If the blog is new, you will find a classification called (Uncategorized), which is the default classification of WordPress. It is assigned to articles for which you do not assign an appropriate rating.
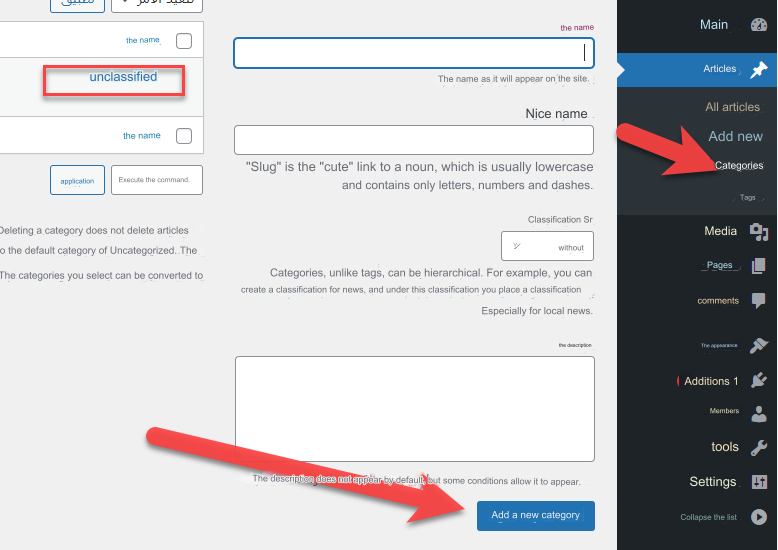
As shown in the previous image, there is a ( Name ) field in which you can write the name of the category you want to create and then click on the ( Add a new category ) button. Likewise, you create the number of categories you want to create for your site’s articles, as these categories will appear as main sections of the blog that the visitor can navigate. Between them for easy browsing of the blog content. For example, if you are creating a blog specializing in diets, you can create sections, for example (healthy meals – strict diet meals – quick-prepared meals…) and so on…
Improving the blog’s appearance and external design
The WordPress system supports ready-made design templates that can be installed on your site or blog to change the appearance of the external design for visitors, and each template has its own specifications for the design and the way the content is displayed within it.
Let’s change the current template for the blog, as WordPress installs a simple default template in order to customize the site and nothing more.
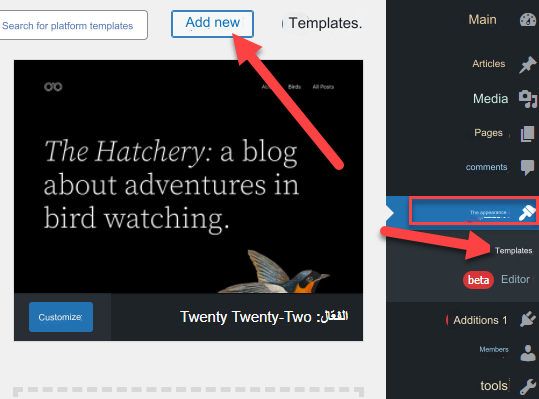
To change the template, we can go to the ( Appearance ) tab, then the ( Templates ) tab from within the WordPress control panel, to open an interface for us with an ( Add New ) button, which you can click on to begin installing a new template on the blog to change its default design:
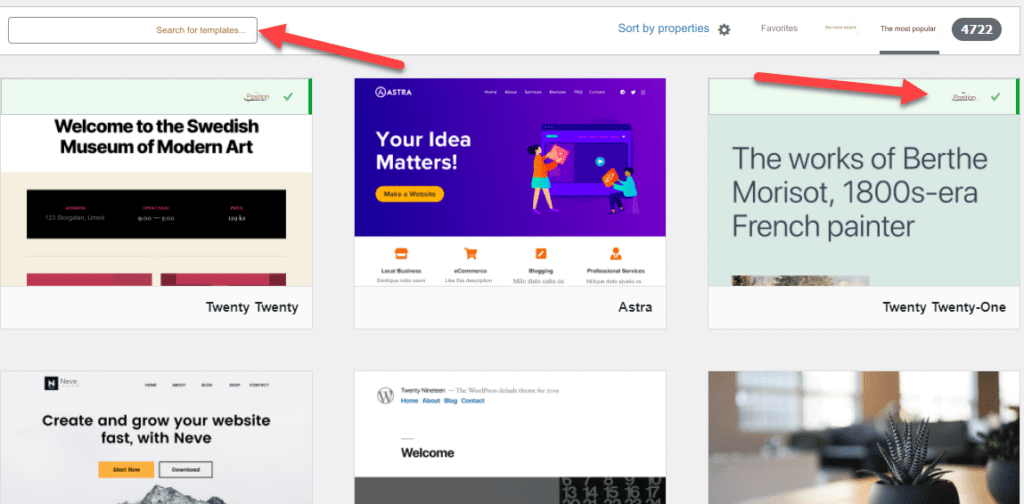
An interface for managing blog design templates will open in front of you, and the currently installed template will appear at the beginning of the list with the word ( position ) written on it.
A search box also appears in this interface that you can use to search for templates, whether by the name of the template if you know it, or by the type of design that you want to apply to your site. You can see the following article, which shows you the 50 best WordPress templates that you can start with.
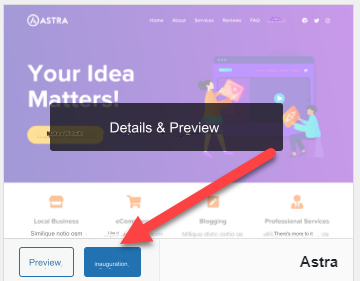
After choosing the appropriate template whose design you like, for example the famous Astra template , you can hover your mouse over it to click on the ( Install ) button to begin the process of installing the template on the site:
After successfully installing and activating the template on the blog, you can visit the blog to find that its appearance, as well as the appearance of the way articles are displayed, has completely changed from the default template. Whenever you change the template, the entire appearance will be changed, but in the future, when you change the template installed on the blog, we advise you to make a copy. Backup the entire blog to avoid any data loss or unexpected malfunction on the site.
After installing the template, you can start working on improving the main parts of the blog, for example by modifying the top part of the blog, the Header, as well as the last part at the bottom of the blog, or what is known as the Footer .
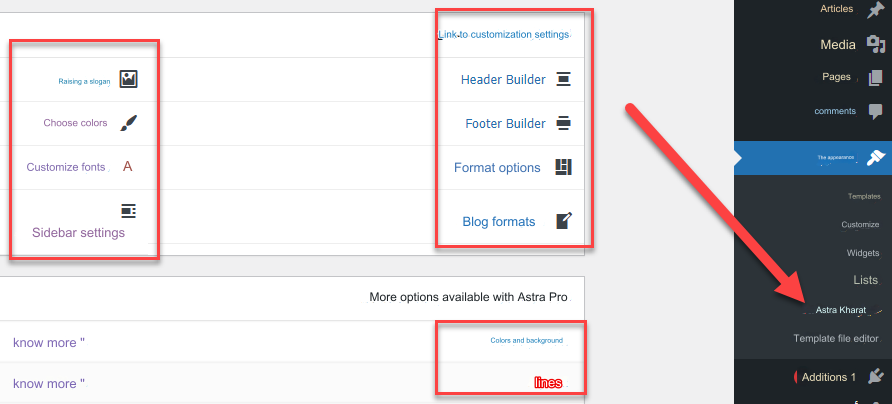
Most WordPress templates, immediately after installing them on the blog, allow you to modify the entire appearance and design through the template’s control panel. In the case of the Astra template, for example, you will find that it activates a new tab within the (Appearance) tab entitled (Astra Options), through which you will find Many options for controlling the design of the entire appearance of the blog by resetting the options available to you, which are more in the paid versions than in the free templates:
Conclusion
I also noticed that a WordPress blog can be created for beginners easily and in steps that anyone can do without much effort. Of course, the journey will not end with just designing and launching the blog. You can start making a profit from blogging through many simple methods that help you make a financial income while writing and publishing articles on the blog.
Profit from the blog depends mainly on the number of visits that come to view and browse the blog content, and these visits are directly proportional to your work on improving SEO to increase the chances of blog articles appearing in search results in front of people interested in the content, and thus you earn free visits that may turn into financial profits.