

If you are planning to create a successful website that contains many different types of content, you should know that compressing the size of images is considered one of the most important steps that affect the speed of your site, and therefore it is important to know ways to compress your website images (while maintaining image quality) even if you do not. Be a graphic design specialist, and this is what we will learn about in this article.
In today’s article, we will show you how to compress images before uploading them to your site using easy tools, or compress them automatically on your WordPress site through some plugins if you have already uploaded them to your site. All of the methods that we will explain will not affect the quality and clarity of the images, but they will make a difference in the size of the images published on the web.
Why do you need to compress images in WordPress?
Compressing the size of images in WordPress is an essential factor because it helps significantly increase the loading speed of your site, which affects the user experience as well as the ranking of your site in search results, even if you face problems affecting the performance of your site, such as:
- Increase the bounce rate for visitors to your site or online store if it is slow. This rate may reach a high rate if the site loading time exceeds 3 seconds through many experiments conducted by experts.
- Google and other search engines rely on speed as a basic criterion for ranking sites in search results, and give priority to sites with the fastest pages.
- Compressing the size of images is one of the costs of hosting in general, because reducing the size of images reduces storage space, reduces the data transfer rate (bandwidth), and also reduces the cost of backup.
The step of compressing the size of images on your site should not be a cumbersome step for you, but after choosing one of the following methods, you will find that it is a very simple step without the need for technical expertise.
Ways to compress images on your WordPress site
Perhaps the easiest way to compress images is to ask the designer to compress the size of the images using the graphic program he uses (mostly Photoshop), but when you are dealing with a large number of images, you will need an easy way to compress all the images with one click, and this is what we will talk about in the following methods:
Compress images using TinyPng
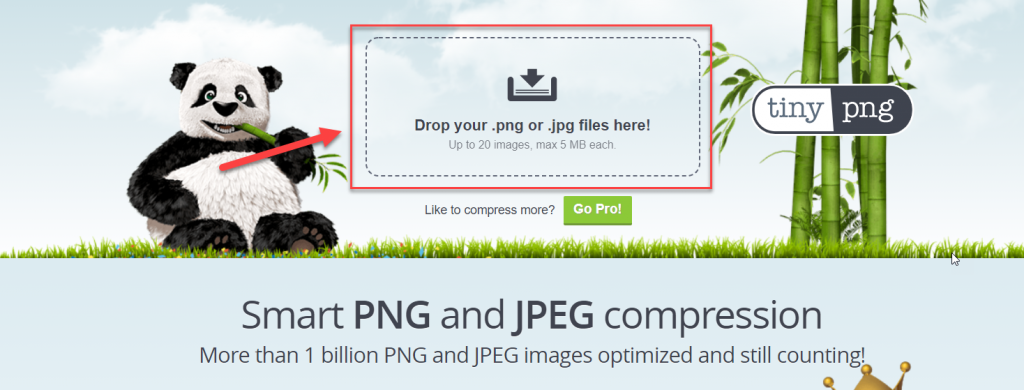
We will start with the first method, which is to compress images before uploading them to your website through an easy and free tool, the Tinypng tool , which compresses a large amount of images with one click without losing the quality of the images.
After going to the site , you will upload the pictures and place them in the conversion box, or you will click on the conversion box and it will open your device, so select the location of the pictures and place the pictures once.
After that, the size of the images will be compressed within seconds, and the compression ratio and area before and after compression will appear.
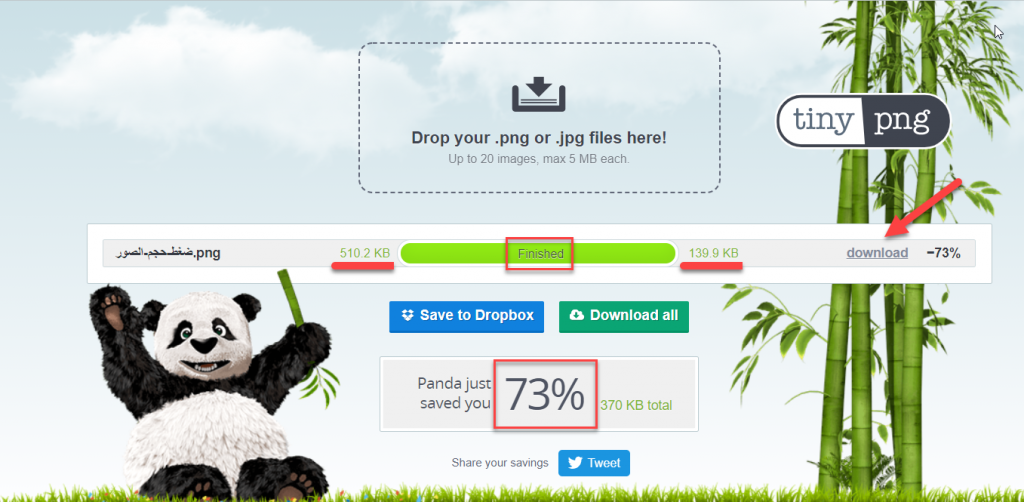
After that, download the new compressed image by clicking on the Download button in order to download the image to your device and the image will be ready to upload to your site at a smaller size.
This is an example of compressing an image, where the image area before compression was 479.9 KB, but after compression it became 128.6 KB, meaning 351.3 KB was saved, representing 73.2% of the original image area, without affecting the quality, as you can see the difference between the following two images.

The maximum number of images is 20 images at a time, and the maximum image size is 5 MB. As for the paid membership, there is no maximum limit for the image uploaded at one time, and the maximum image size is 75 MB, and the paid membership is priced at 25 US dollars / year, but The features available in the free membership may be enough for you.
This is the first method we talked about using the TinyPng tool, but what if you have a large collection of images already uploaded to your site, will you download all the images and upload them again manually? Of course not, it would be cumbersome, but you can use appropriate WordPress plugins to do this task.
Compress images using Smush
The Smush plugin is considered one of the best tools for automatically compressing the size of images in WordPress without affecting the quality of the images. It also enables you to automatically compress all images that are already present in WordPress, and it also compresses newly added images in WordPress automatically, as well as changing the size of all large images. Size and specify the compression ratio that matches the required image quality.
In order to install the plugin, we will go to the WordPress control panel in easy steps as follows:
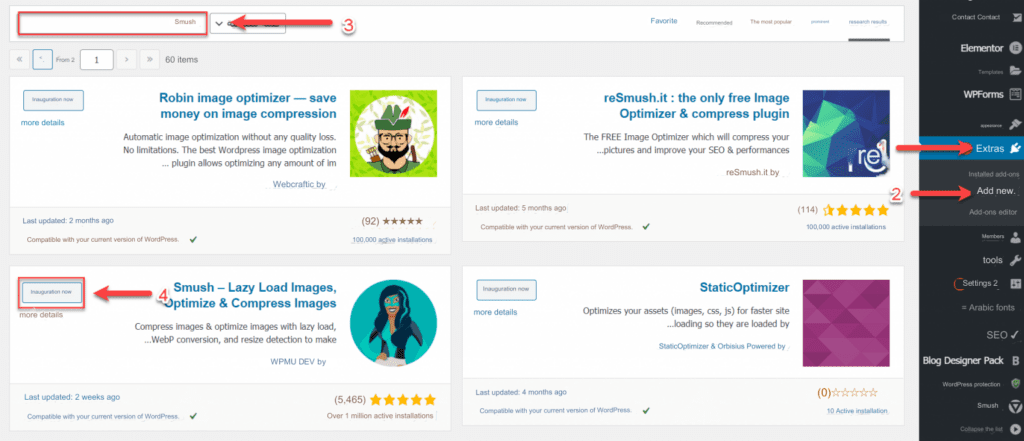
- Click on the (Add-ons) tab from the WordPress side menu
- Choose the (Add New) tab from the Add-ons submenu
- Search for the name of the Smush extension in the search box
- The add-on will appear to you as it was developed by WPMU DEV, so you will click on the (Install Now) button, then we will wait a few seconds until the add-on is installed, then we will click on the (Activate Now) button to activate it on your site.
Then we go to the plugin settings by choosing Smush from the side menu of WordPress, and we activate the All option located under the Image Sizes option to deal with all different image sizes, and we will also activate the Automatic Compression option to automatically compress the size of images in WordPress that are added in the future.
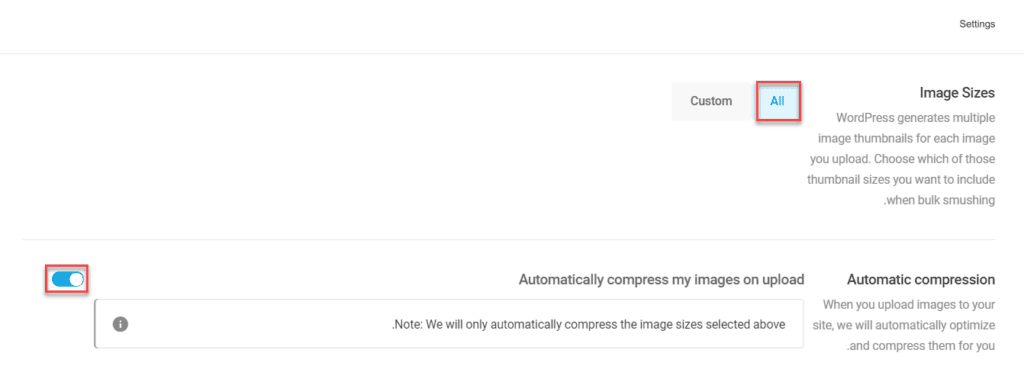
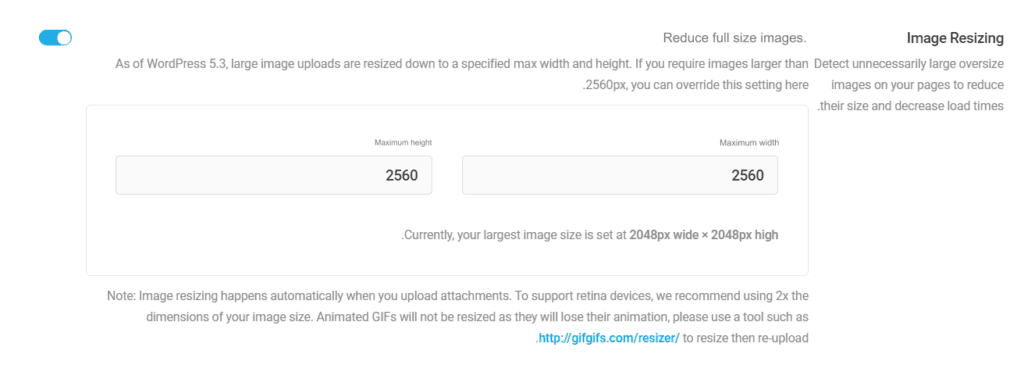
You will also find the Image Resizing option that you can activate in order to resize all large images with certain dimensions of maximum width and maximum height, so that the width and height of those images do not exceed this size that you specify.
Don’t forget to click the UPDATE SETTINGS button at the end of the page after setting all the add-on settings.
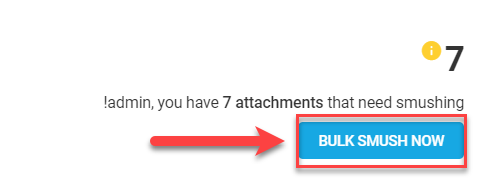
Then, after adjusting all the settings, you will click on Bulk Smush Now to compress all the images previously uploaded to your WordPress site.
In this way, the Smush plugin is fully installed and activated so that the size of images in WordPress will be automatically compressed in the future. Even if the plugin contains a paid version with higher features, you can be satisfied with the free version at first.
Read also: Ways to upload images and media to WordPress and edit them correctly
On the other hand, you can also rely on the EWWW plugin, which helps you compress images in the same way on your WordPress site.
Compress images using EWWW plugin
The EWWW Image Optimization plugin is also considered one of the most important tools that you can rely on completely to compress images on WordPress without the need for other plugins. The plugin enables you to automatically compress all previous images as well as all newly uploaded images. There is a paid version, but the The free one is completely sufficient for your use.
Now we install the EWWW Image Optimization plugin from within the control panel using the same steps used to install any WordPress plugin as follows:
- Click on the ( Plugins) tab from the WordPress side menu
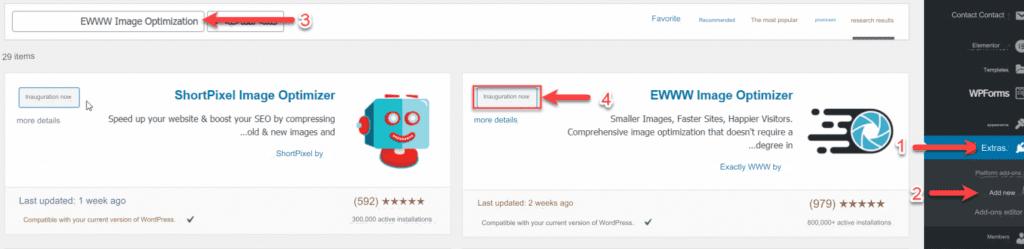
- Choose the (Add New) tab from the Add-ons submenu
- Type the extension name EWWW Image Optimization in the search box
- The add-on will appear to us and it has received more than 800k active installations. We will click the (Install Now) button , then wait a few seconds until the add-on is installed by clicking the (Activate Now) button.
After that, we go to the plugin settings from the side settings menu in WordPress, then choose EWWW Image Optimization.
You will find that most of the plugin’s settings are fine and work automatically, but you will need to adjust the image resizing portion of Resize Images
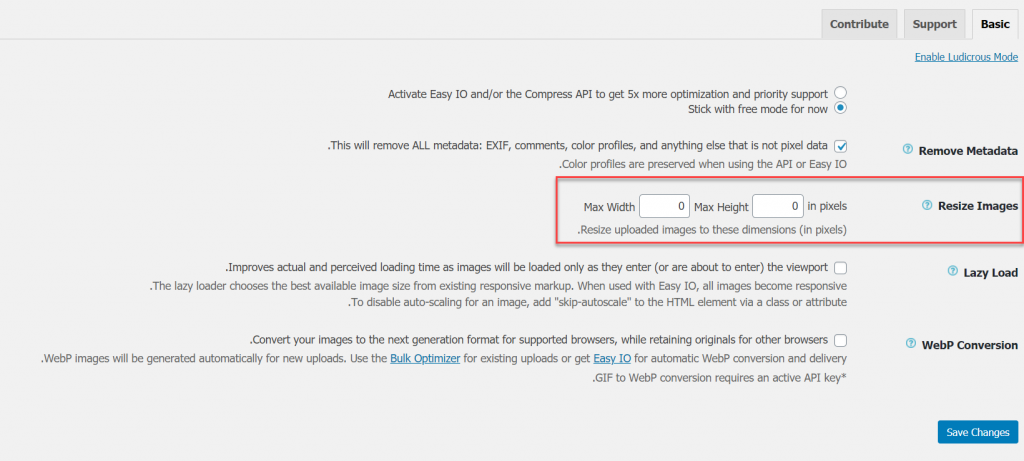
Then click the Save Changes button after making the required modifications.
Then, go to the Media tab in your site’s control panel from the side menu to choose Bulk Optimize , then click on Scan for unoptimized images to search for all uncompressed images on your site.

The tool will conduct a comprehensive search on your site, showing you the images that were discovered to be poorly formatted. The tool will compress the images by clicking on Optimize.

The process will take 5-10 minutes until all the images are compressed on your site, and this period may be longer, as it depends on the number of compressed images.
In this way, we have reached the conclusion of the article after we explained to you the importance of compressing the size of images in WordPress, and the best ways to compress images using easy tools. If you have any other question that we did not address in the explanation of preparing your site’s images, then put it in the comments and we will answer it, God willing